10g nano Build on pocket change

Bryces

Community Member
View Badges
Joined
Jan 10, 2017
Messages
26
Reaction score
14
Rating - 0%
0   0   0
Ok, so, new to the forum and r2r it isn't exactly laid out like my usual haunts and I'm still figuring out what goes where so if this is posted in the wrong section I apologize in advance and trust the mods will move it to where it belongs.

First the backstory:
As I'm sure many of you can relate I've wanted a reef since the moment I first laid eyes on one as a child. Every time the idea came up I was always told that "it would be way too expensive and complicated to try something like that" and agreed "yeah you're probably right" and let it go. Until a day in the not so distant past I decided I can do whatever I want and I want a reef so I set to work researching and found out really it's not that difficult. One thing lead to another and next thing I knew i had a comprehensive plan for a fairly advanced 75 gallon system but as luck would have it shortly after that I had to scrap my budget to buy a house. Never being one to give up; I HAD to have a tank so here's my reef build on pocket change.

The Money:
Since I have to save everything I can for the house I've started going the extra mile to visit the ATM and make all of my daily purchases in cash and saving the change to fund my project. Now I must admit I did have a little cash stashed away for the original build and I decided that since it was already supposed to be reef money i wasn't putting it toward the house.
 
OP
OP
Bryces

Bryces

Community Member
View Badges
Joined
Jan 10, 2017
Messages
26
Reaction score
14
Rating - 0%
0   0   0
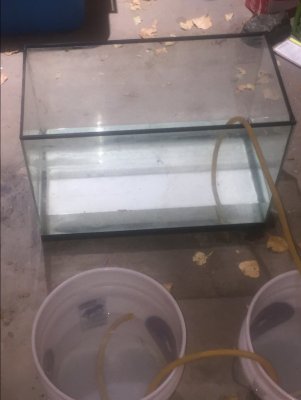
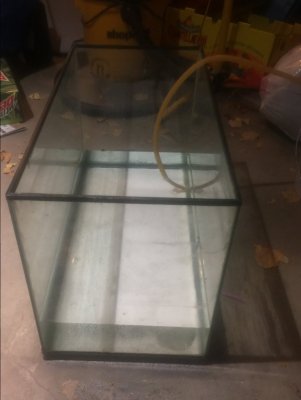
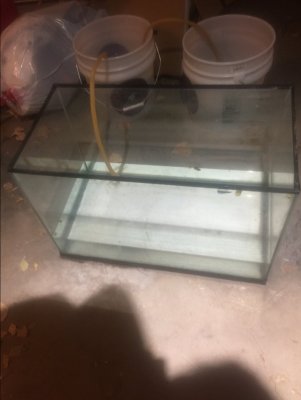
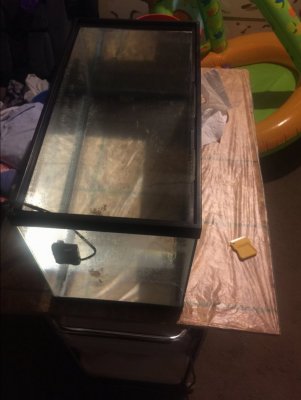
The tank: I didn't think about taking pictures of this when it was happening so I went back and took these. My grandma had an old 20 gallon tall that someone had given her back in the 70's. It had some kind of freshwater fish in it before i was born then it was placed in the rafters of her garage where it sat until my teen years when it housed my hedgehog. It then sat in my garage until now so I got out and put some water in it to leak test. No surprise it leaks......everywhere.
IMG_0849.JPG


IMG_0850.JPG


IMG_0851.JPG

IMG_0849.JPG
 
OP
OP
Bryces

Bryces

Community Member
View Badges
Joined
Jan 10, 2017
Messages
26
Reaction score
14
Rating - 0%
0   0   0
Plan B:
I didn't get pictures of this at the time either.
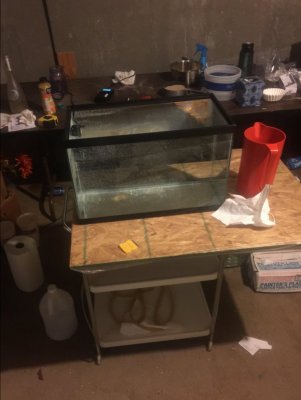
There was also an old 10 gallon in there so I said I'll throw some water in this one and if it doesn't leak we'll just do a 10 gallon for now, it'll be cheaper and when we out grow it I'll reseal the 20 and we can upgrade. So a little nostalgically I got out the old metal cart that held my hedgehog up for so many years, put a scrap of OSB left over from another project on top and leveled the tank. After 20 trips upstairs for water with a half gallon pitcher for water it was full and a little disappointingly not leaking anywhere. I went to bed and this morning it still hadnt leaked a drop so I guess we're good to go.

IMG_0852.JPG
 
OP
OP
Bryces

Bryces

Community Member
View Badges
Joined
Jan 10, 2017
Messages
26
Reaction score
14
Rating - 0%
0   0   0
A little clean up:
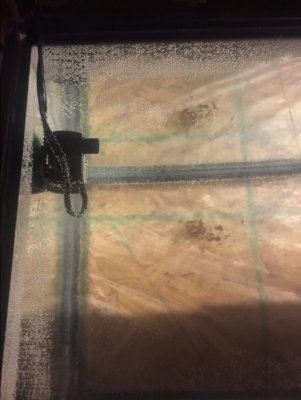
The tank was pretty nasty and had some kind of build up in a few places, I believe my sister had dewarf hamsters or something in it a number of years ago. I picked up a couple gallons of acetic acid (distilled white vinegar) on the way home from work and when I got home I cleaned the glass inside and out with a razor blade. After finishing with the razor i drained out a gallon of water and replaced it with acetic acid. I added a little pump from my distilling column for a little water movement and when turned all the way up it really doesn't do too bad. I'll leave it going over night and we'll see what happens tomorrow after work.

IMG_0854.JPG

IMG_0856.JPG
 

Luna

Active Member
View Badges
Joined
May 8, 2015
Messages
367
Reaction score
125
Rating - 0%
0   0   0
How much $ are you starting with cause you could get a 40g breeder for$40 (petco dollar days) & it would be a much better tank to start with. IMO[emoji4]
 

DLHDesign

Ex-Noob
View Badges
Joined
Jun 7, 2016
Messages
3,259
Reaction score
5,448
Location
Lathrop, CA
Rating - 0%
0   0   0
Welcome to R2R! Glad you posted; the details of where it all goes will get sorted out, no worries. :)

Where are you located? There may be local reef clubs with spare tanks and/or equipment that can help you get up-and-running on a budget. I know that if you're anywhere close to me, I've got a pile of spare gear I could donate...

Keep up the updates in any case; this place is a wonderful resource for any reefer - new or old!
 

DLHDesign

Ex-Noob
View Badges
Joined
Jun 7, 2016
Messages
3,259
Reaction score
5,448
Location
Lathrop, CA
Rating - 0%
0   0   0
My QT tank is the same 10gal one you have, so I figured I'd share the equipment I use for it. My QT tanks were built on a budget, but with an eye towards buying pieces that will last long enough to justify the cost.

Hang-on-back (HOB) Filter - Supports filter floss ("foam" - rough filtering), carbon (cleans water of chemicals), and bio media (supports beneficial bacteria growth). Also aerates the water as it falls into the tank (good for oxygen absorption, etc.). You'll want to get some spare carbon and filter floss (related products) so that you can swap those out when they need cleaning/run out.
Powerhead - This one has enough power to move water about the 10gal tank without blowing everything about too much. Took me awhile to find one that fit a 10gal, honestly... Though I'm sure there are others, I've liked this model.
Digital Thermometer - Get the two-pack so that you have a backup; I've had a few die on my over the past year (I'm not too careful when I wash them, though - my bad). You may want to also get a non-digital backup, just in case (redundancy is key to reef keeping).
Heater - You can go with a preset heater as a backup (good idea), but for your main heater I would get something that you can adjust. A 50W should be enough for either a 10gal or 20gal.
Lights - This is where you will spend your money, most likely. It really depends upon what you want to have in your tank that will determine what lights you need. Rather than just throw ideas out there, it's likely best if you describe what you hope to have in your tank first. If it's just fish, then you can get away with some simple, inexpensive lighting. If you want corals, then you'll want to spend a bit more to get a light that can cover the spectrum that they need to survive and grow.
Test Kit - You'll want this on-hand. The first step in understanding your reef tank is knowing it's chemistry, and this kit will get you going with that. There are many other options out there, but this is a good value kit to start with. I would also suggest a Seachem Ammonia Alert badge for in your tank; that will clue you into the most dangerous of chemicals for your fishes.
Seachem Prime - There are numerous medications and chemicals you could (likely should) keep on hand, but for me Prime is the first on that list. This is what I use in my small tanks to knock down any ammonia spikes when I'm not able to do a water change (and often, even after I have done so).

Beyond that, you shouldn't need much hardware IF you have a local fish store (LFS) nearby that can supply you with water. It's critical that you do not just use tap water - you won't like the results. What you want is RO/DI (reverse-osmosis and de-ionized) water. You can buy this at most LFS that have aquarium supplies. You can also often buy pre-mixed salt water, though you'll pay more for that. My suggestion is to get a few 5gal buckets and some salt and mix your own. You'll need a hydrometer (or better yet; refractometer), but that way you'll be able to store some top-off water (RO/DI) as well as mix your own salt water for water changes as needed.

Once you've got the tank holding water, I'd suggest talking with your LFS about getting some of their tank water (not plain salt water) along with some live rock and live sand from them. If you can get that hooked up, then you should be able to avoid most (if not all) of the initial tank cycle that most tanks go through before they are ready for marine life!

Sorry - don't mean to blast you with info. Feel free to ignore it all and go your own way; that's often half the fun. :)
 
Last edited:
OP
OP
Bryces

Bryces

Community Member
View Badges
Joined
Jan 10, 2017
Messages
26
Reaction score
14
Rating - 0%
0   0   0
Welcome to R2R! Glad you posted; the details of where it all goes will get sorted out, no worries. :)

Where are you located? There may be local reef clubs with spare tanks and/or equipment that can help you get up-and-running on a budget. I know that if you're anywhere close to me, I've got a pile of spare gear I could donate...

Keep up the updates in any case; this place is a wonderful resource for any reefer - new or old!

Thank you for the advice/offer but unfortunately I doubt there are any near me, I'm in extreme western Kansas. Pretty much as far from anyone or anything as you can be.
 
OP
OP
Bryces

Bryces

Community Member
View Badges
Joined
Jan 10, 2017
Messages
26
Reaction score
14
Rating - 0%
0   0   0
My QT tank is the same 10gal one you have, so I figured I'd share the equipment I use for it. My QT tanks were built on a budget, but with an eye towards buying pieces that will last long enough to justify the cost.

Hang-on-back (HOB) Filter - Supports filter floss ("foam" - rough filtering), carbon (cleans water of chemicals), and bio media (supports beneficial bacteria growth). Also aerates the water as it falls into the tank (good for oxygen absorption, etc.). You'll want to get some spare carbon and filter floss (related products) so that you can swap those out when they need cleaning/run out.
Powerhead - This one has enough power to move water about the 10gal tank without blowing everything about too much. Took me awhile to find one that fit a 10gal, honestly... Though I'm sure there are others, I've liked this model.
Digital Thermometer - Get the two-pack so that you have a backup; I've had a few die on my over the past year (I'm not too careful when I wash them, though - my bad). You may want to also get a non-digital backup, just in case (redundancy is key to reef keeping).
Heater - You can go with a preset heater as a backup (good idea), but for your main heater I would get something that you can adjust. A 50W should be enough for either a 10gal or 20gal.
Lights - This is where you will spend your money, most likely. It really depends upon what you want to have in your tank that will determine what lights you need. Rather than just throw ideas out there, it's likely best if you describe what you hope to have in your tank first. If it's just fish, then you can get away with some simple, inexpensive lighting. If you want corals, then you'll want to spend a bit more to get a light that can cover the spectrum that they need to survive and grow.
Test Kit - You'll want this on-hand. The first step in understanding your reef tank is knowing it's chemistry, and this kit will get you going with that. There are many other options out there, but this is a good value kit to start with. I would also suggest a Seachem Ammonia Alert badge for in your tank; that will clue you into the most dangerous of chemicals for your fishes.
Seachem Prime - There are numerous medications and chemicals you could (likely should) keep on hand, but for me Prime is the first on that list. This is what I use in my small tanks to knock down any ammonia spikes when I'm not able to do a water change (and often, even after I have done so).

Beyond that, you shouldn't need much hardware IF you have a local fish store (LFS) nearby that can supply you with water. It's critical that you do not just use tap water - you won't like the results. What you want is RO/DI (reverse-osmosis and de-ionized) water. You can buy this at most LFS that have aquarium supplies. You can also often buy pre-mixed salt water, though you'll pay more for that. My suggestion is to get a few 5gal buckets and some salt and mix your own. You'll need a hydrometer (or better yet; refractometer), but that way you'll be able to store some top-off water (RO/DI) as well as mix your own salt water for water changes as needed.

Once you've got the tank holding water, I'd suggest talking with your LFS about getting some of their tank water (not plain salt water) along with some live rock and live sand from them. If you can get that hooked up, then you should be able to avoid most (if not all) of the initial tank cycle that most tanks go through before they are ready for marine life!

Sorry - don't mean to blast you with info. Feel free to ignore it all and go your own way; that's often half the fun. :)

Thanks for the words of wisdom. I haven't gotten that far in my build log yet but I do have a 4 stage RO/DI system ready and waiting, it's pretty bare bones but should suffice for now. When I get some more advanced stock I'll add a couple pressure gauges and tds Meters along with a second stage for sed, carb, and di but this will do for now.

Looks like we're pretty much on the same page as far as gear goes, hopefully tomorrow I'll be taking delivery of HOB filter, 50 watt heater, 200 gal instant ocean salt mix, refractometer with calibration solution, fine aragonite sand dry, 15lb dry rock, API saltwater master test kit, and possibly a few other things but I can't remember off the top of my head if I ordered them or decided wait.

As far as lighting goes I'll probably be throwing a custom led fixture together when I get some time. For now probably just something like 4 cree 12,000k stars and 4, 445nm blue stars on dimmable drives but as I get more light demanding corals I'll probably up it to 12 and 12 with an rgb array and digital controller so I can get solar and lunar cycles with weather simulation.
 
OP
OP
Bryces

Bryces

Community Member
View Badges
Joined
Jan 10, 2017
Messages
26
Reaction score
14
Rating - 0%
0   0   0
I'm back!! With updates!! Much has happened in the time that I've been AWOL. I had planned to keep this kinda play by play up to date but life happened and I got behind. First off I'm single now so the tank and you guys will be getting a lot more attention.

Tank Mail:
Last Thursday and Friday I received a few goodies in the mail.

Aquaclear 20 HOB filter

ViaAqua 50w quartz glass adjustable heater

API saltwater master test kit

Instant Ocean sea salt mix 50 gallon

Agriculture Solutions automatic temperature compensating salinity refractometer

10 pounds dry CaribSea aragonite sand

15 pounds BRS reefsaver dry rock

And 1 bottle Aqua Craft refractometer reference solution


IMG_0860.JPG
 
OP
OP
Bryces

Bryces

Community Member
View Badges
Joined
Jan 10, 2017
Messages
26
Reaction score
14
Rating - 0%
0   0   0
UPDATE 2
Fill and Testing:

Draining the Tank:
I attached a length of rubber lab tubing to the small submersible pump I've been using for circulation and pumped the vinegar/tap water solution out of the tank into a 3 gallon bucket and dumped it outside.

RO/DI Water:
I thoroughly rinsed out the 1 gallon vinegar jug and used the included sink faucet diverter valve to hook up my BRS 4 stage 75GPD RO/DI unit in the kitchen sink and let it run for an hour to break in. I then began slowly filling the 1 gallon jug.

Rinsing:
I rinsed out the tank with a few gallons of DI water and returned to the sink for more.

Filling:
I began filling the tank 1 gallon at a time with my trusty jug.....(many hours later)

This Isnt going to work:
The RO/DI has been in the sink all day tying up not only the faucet but the entire kitchen sink and not to mention the three 10 foot lengths of polyethylene tubing splayed everywhere like Medusa on a bad hair day. I have the necessary fittings to plumb it into the house supply line in the HVAC/water heater room but as I'm sure you can all relate I was way too excited to take the time for that. At this point it was very late and I shut the unit down for the night and went to bed.
 

DLHDesign

Ex-Noob
View Badges
Joined
Jun 7, 2016
Messages
3,259
Reaction score
5,448
Location
Lathrop, CA
Rating - 0%
0   0   0
I thoroughly rinsed out the 1 gallon vinegar jug
Just a heads-up; vinegar can be absorbed by plastic, silicone, and other porous surfaces. In my experience, it generally takes a day or two (three is usually safe) for the vinegar to fully evaporate from a surface; could take longer if it had more time to be absorbed... Vinegar in your system could prevent (and/or kill) beneficial bacteria, so you want to make sure that you give the tank plenty of time to dry and air out before filling it, IMO.

I also rinse my tanks in tap water, usually. I'll dry them off with towels after to absorb all the "undesirable" water. Might help save you from making even more RO/DI water...

Starting off is certainly the hardest time to be patient, but keep in mind the "golden rule of reefing": Nothing good happens fast. :)

Keep going - the tank will be up and running and filled with fish in no time!
 
OP
OP
Bryces

Bryces

Community Member
View Badges
Joined
Jan 10, 2017
Messages
26
Reaction score
14
Rating - 0%
0   0   0
Just a heads-up; vinegar can be absorbed by plastic, silicone, and other porous surfaces. In my experience, it generally takes a day or two (three is usually safe) for the vinegar to fully evaporate from a surface; could take longer if it had more time to be absorbed... Vinegar in your system could prevent (and/or kill) beneficial bacteria, so you want to make sure that you give the tank plenty of time to dry and air out before filling it, IMO.

I also rinse my tanks in tap water, usually. I'll dry them off with towels after to absorb all the "undesirable" water. Might help save you from making even more RO/DI water...

Starting off is certainly the hardest time to be patient, but keep in mind the "golden rule of reefing": Nothing good happens fast. :)

Keep going - the tank will be up and running and filled with fish in no time!

I'll have to check into this. I wasn't concerned with the trace amounts of residual vinegar killing off any bacteria as it's my understanding it's a fairly common practice to use vinegar as a Source of carbon for dosing as a way to promote excess bacterial colonization as a means of nutrient export. Essentially, short term carbon loading to force a bacterial bloom the bacteria consume excess nutrients in the tank then the skimmer removes the excess bacteria which contain the excess nutrients and bobs your uncle.... or, such is my understanding of the subject.
 
OP
OP
Bryces

Bryces

Community Member
View Badges
Joined
Jan 10, 2017
Messages
26
Reaction score
14
Rating - 0%
0   0   0
UPDATE 3
The Great Flood

Disaster Struck:
When I shut the system down for the night I set the unit up on the counter, turned off the faucet, opened the diverter valve, and let everything drain. When it was finished I decided I didn't want to leave the 30 foot mess of PE tubing in the sink so I neatly rolled them up and tucked the ends of the rejection and Product lines into the top of the unit leaving the source connected to the faucet for convenience when I start again tomorrow. Before walking away I opened the diverter valve so if the faucet should drip in the Night it wouldn't go into the system and made sure the ends of the other two lines were pointing upward and were the highest point in the system thus discouraging any dripping or seeping. Now, for those of you detail oriented that we're paying attention you've probably already caught my fatal mistake and are having a good chuckle. For the scooby doos of the group that would like to solve a good mystery read back through carefully and see if you can find Waldo amongst the details and for the rest of you let's press on and it'll all make sense shortly. I went to bed feeling good about my progress so far and got a good nights sleep. The next morning I awoke to find.....a lake had apparently moved into my kitchen in the night. The counters were covered from end to end in standing water and the carpet was fully saturated. I stood in awe for a while trying to discern how this had happened and how I was going evict this lake that was now squatting in my kitchen. After mentally reviewing my steps from last night and inspecting the system I discovered .... wait for it...... I had opened the diverter valve twice!! Thanks a lot Murphy.

Finally filled:
After cleaning up the water I reconnected the unit and resumed filtering. A few more trips up and down the stairs trusty jug in hand the tank is finally full.
 
OP
OP
Bryces

Bryces

Community Member
View Badges
Joined
Jan 10, 2017
Messages
26
Reaction score
14
Rating - 0%
0   0   0
Update 4
I forgot i put the rock inside the tank before I filled it.

Equipment test:
With the tank full of water its time to test the equipment. I assembled the aquaclear and hung it on. After filling it with water I plugged it in and it began priming. This was pretty dramatic and took a lot longer than I expected but when it eventually expelled all the air and established good flow it ran great.

The Dust Cloud:
I didn't rinse the rock before I put it in so there's a lot of rock particulate floating around and the waters very cloudy I can only see about halfway through the tank, so I put the media in the filter basket and let it run for a few hours. For media I'm running the open cell foam sponge and biomedia bag that it came with. I didn't put the carbon in because I don't want it interfearing with my cycle.

It's Not filtering:
No change in the water after about six hours... hmm I have 10x turnover rate from my filter, theoretically my entire tanks been turned over 60 times by now I should have seen some kind of change. I've got it the pores on the sponge are fairly large and the biopelets aren't designed for mechanical filtration. The solution? Filter floss. Luckily filterfloss is just 100% polyester wool and I just so happen to have a large bag of polyfill laying around which is 100% polyester wool. So I added a handful to the top of the media basket and and in a couple hours the water was Chrystal clear. I stirred up what had settled on the rocks and bottom of the tank with a turkey Baster and changed the floss. After repeating this process a few more times all the rock dust was gone and the water was clear.
 
OP
OP
Bryces

Bryces

Community Member
View Badges
Joined
Jan 10, 2017
Messages
26
Reaction score
14
Rating - 0%
0   0   0
UPDATE 5

Adding the salt.
After the rock was settled in and the water was clear I set the heater to 80 and began adding salt and checking the salinity with a refractometer. My refractometer shows the specific gravity equivalent alongside salinity and as I like the scale better eventhough I'm measuring with a refractometer I'll be referencing the specific gravity. SG currently holding steady at 1.025.

A note on the heater:
The settings on the heater are off dramatically, about 10 degrees. After a lot of adjusting and testing I've finally got it about where I want it. It's set around 90 and my thermometers reading 83.6

Get a proper thermometer:
I really need to get a more appropriate thermometer. At the moment I am using a cheap digital thermometer probe from my lab.

IMG_0877.JPG


And my testing procedure is kind of a hassle. I have to remove the probe from its sheath, turn it on. Stick it in the adjustment hole on the aquaclears lid to hold it because it's fairly slow, wait for a reading, take it out clean it off, and put it back in its sheath.

IMG_0878.JPG
 

saltnewb

Well-Known Member
View Badges
Joined
Jun 19, 2014
Messages
543
Reaction score
264
Rating - 0%
0   0   0
Love budget builds! Not all of us have the resources to get all the cool stuff we see. Looking forward to what you build here!
 
OP
OP
Bryces

Bryces

Community Member
View Badges
Joined
Jan 10, 2017
Messages
26
Reaction score
14
Rating - 0%
0   0   0
Love budget builds! Not all of us have the resources to get all the cool stuff we see. Looking forward to what you build here!

Thanks I'm excited to see where this goes too. I have an idea for a nice little stand I think I can put together for under $20 I'll sketch it out and post when I get caught up. I want to get the stand built and tank on it before it finishes cycling so I don't have to try to deal with moving it with livestock in it.
 

saltnewb

Well-Known Member
View Badges
Joined
Jun 19, 2014
Messages
543
Reaction score
264
Rating - 0%
0   0   0
My tank is a budget build as well. I built the stand, the tank was going to be trashed by my kids preschool, so that was free and all the sand live rock and filtration was $30 that came with a 60g hex tank/stand/canopy. I had a power head setup and light fixture I picked up from about 1 yr ago. I'm curious about the LED setup your doing and can't wait to see it being built.
 
OP
OP
Bryces

Bryces

Community Member
View Badges
Joined
Jan 10, 2017
Messages
26
Reaction score
14
Rating - 0%
0   0   0
UPDATE 6
We're about to get this log caught up.

Adding the sand:
The sand came in and I dumped it in the tank once again without rinsing but this time things didn't turn out as well. The sand was significantly dustier than the rocks and by the end of the 10 pound bag I knew this was going to be an issue.

Clearing up the sludge:
The water had turned to a thick calcium carbonate sludge. I put some floss in the filter and within an hour it had overwhelmed it was running mud back into the tank. I removed a the biopellets and sponge from the media tray and left them on the sand in the bottom of the aquarium. I packed it full of floss and changed it every hour for a day and a half. For the next 3 days I stirred it up with the turkey baster and changed the filter every few hours.

Beginning the cycle:
At some point during the sand storm fiasco I started phantom feeding with some tadpole pellets I found.

The storm has passed.

IMG_0874.JPG


As you can see the storm is over and everything is back to normal.

Flow:
So if there's one thing I learned from the sandstorm it's that I don't have near enough flow. Solution? Ordered Hydor koralia 425 nano
 

Algae invading algae: Have you had unwanted algae in your good macroalgae?

  • I regularly have unwanted algae in my macroalgae.

    Votes: 45 35.4%
  • I occasionally have unwanted algae in my macroalgae.

    Votes: 28 22.0%
  • I rarely have unwanted algae in my macroalgae.

    Votes: 9 7.1%
  • I never have unwanted algae in my macroalgae.

    Votes: 10 7.9%
  • I don’t have macroalgae.

    Votes: 31 24.4%
  • Other.

    Votes: 4 3.1%
Back
Top