Phillygeeks' 225 Reef

phillygeeks

Active Member
View Badges
Joined
Nov 6, 2016
Messages
380
Reaction score
199
Location
Spring Lake, MI
Rating - 0%
0   0   0
I am hoping it's getting close to me putting up a lot of photos of some glass but I figured I would also share some photos of progress prior to the tank.

I have a 225g Reef Savvy 72x30x24 piece of glass on order. Our goal is for an SPS dominant reef.

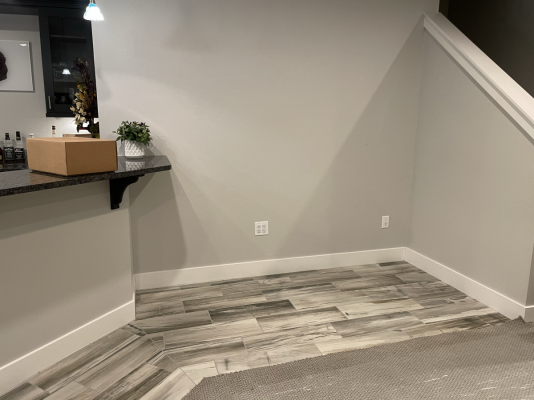
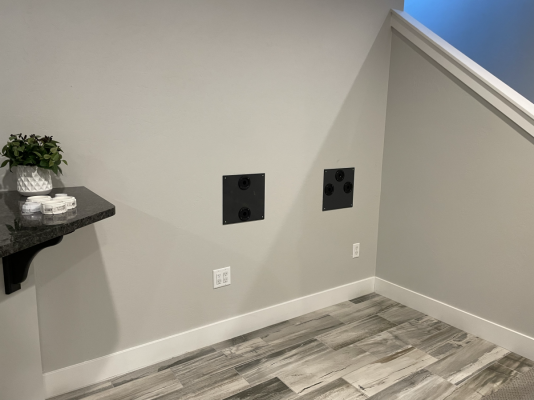
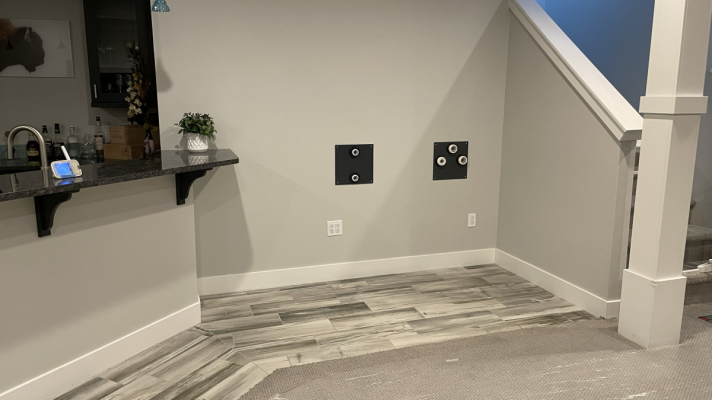
So far I have wired a fish room with a 50 amp subpanel and have 2x20amp circuits for the set up.

Lighting will be the 60" Giesemamm Stellar running ATI blue+ and 4 Radion xr 30w gen 4 pro's as seen below.
I hope to have an attractive mount or minimalist canopy built to hide any wires and prevent the lighting from being an eyesore.

20200227_192212.jpg


I have a good amount of live rock sitting in a couple vats that I will place in my sump once the tank gets up and running.
I bought a bunch of Marco rock that will be in the DT that is dry. The aquascape I am liking so far is below.

20200223_125817.jpg
20200223_125830.jpg


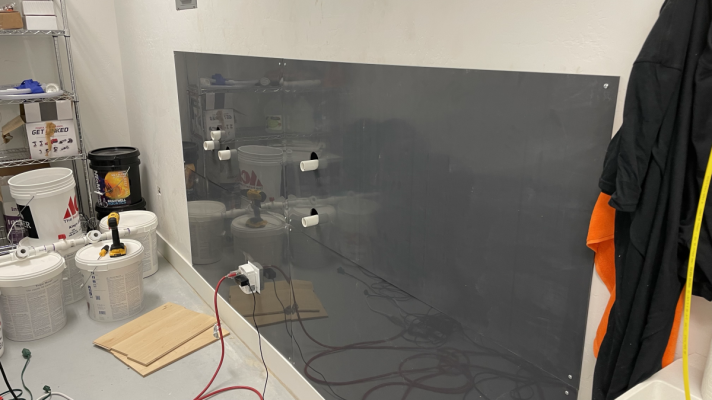
My biggest frustration so far has been a few leaks at the PVC joints on the mixing station. I have replaced 2 sections for leaks already and I just found another 2. I'm not sure what the deal is. I never had any leaks at the joints of my previous PVC work.

Looking forward to sharing more as it progresses!!
 
OP
OP
phillygeeks

phillygeeks

Active Member
View Badges
Joined
Nov 6, 2016
Messages
380
Reaction score
199
Location
Spring Lake, MI
Rating - 0%
0   0   0
Scape looks great, Reef Savvy make beautiful tanks

Thank you! I am sure I will tweak the scape a bit but overall I think I like what I have. Suggestions are always welcome.

I am very much looking forward to getting the tank in hand and seeing the Reef Savvy craftsmanship first hand.
 

Ultra Aquatics

Well-Known Member
View Badges
Joined
Apr 13, 2012
Messages
796
Reaction score
853
Location
New York
Rating - 100%
1   0   0
Thank you! I am sure I will tweak the scape a bit but overall I think I like what I have. Suggestions are always welcome.

I am very much looking forward to getting the tank in hand and seeing the Reef Savvy craftsmanship first hand.
Looking forward to this. As someone that had a Reef Savvy 225 I am sure you will be more than happy with Felix’s work. I wish I could have had the time to wait for one on my latest 280g.
 
OP
OP
phillygeeks

phillygeeks

Active Member
View Badges
Joined
Nov 6, 2016
Messages
380
Reaction score
199
Location
Spring Lake, MI
Rating - 0%
0   0   0
So things are on the move finally. Tank is being built. Custom stand and sump are also in the works.

I am struggling a bit with ideas on hanging my lights. My goal is for a very clean install. I have paid for a very nice stand and tank and the last thing I want is some eye sore of a light fixture with a bunch of wires.

If you see from my post on Mar 28 in this thread I have the Giesmann Stellar 59 with 4 radion gne 4 pro's. This beast of a setup weighs just under 40 pounds (18kg).

The space I am working with is below. The blue tape outlines where I am extending the etched concrete floor to and where ultimately the tank will be placed. Imagine a nice custom modern wood finish stand and a nice 72x30x24 tank sitting on it. Then I have to manage to hang that heavy light fixture and hide the wires.
IMG_1358.jpg


I found this image in this post by @rcpalmer1 in the thread https://www.reef2reef.com/threads/mounting-options-for-aquatic-life-61-t5-hybrid.551184/

20190201_120604.jpg


I was thinking I could maybe have a metal floating mount fabricated that was the same length of my 59" light fixture and then bolt it to the studs. I imagine I would have 2 screws each in 3 studs with something this length. From the metal plate mounted to the wall I would have hollow rectangular metal arms extending that would then attach to the light fixture. I imaging a length of 24" from the wall wound be where the weight of the lights would be supported (I am wondering then if I would want to use some thin wire and toggle bolts from the ceiling to help support the light. Otherwise I think I would need a bit of a wider foot plate along the wall to disperse the forces). I would then have the cords pass through the rectangular arms and have a hollow point in the wall plate where the cords would pass into the wall and then I could fish them down to the power outlets behind the stand.

This sounds a bit cumbersome and I am finding myself struggling with planing the light mounting more than anything else.
 

ajjw0828

Active Member
View Badges
Joined
Dec 12, 2019
Messages
485
Reaction score
449
Rating - 0%
0   0   0
So things are on the move finally. Tank is being built. Custom stand and sump are also in the works.

I am struggling a bit with ideas on hanging my lights. My goal is for a very clean install. I have paid for a very nice stand and tank and the last thing I want is some eye sore of a light fixture with a bunch of wires.

If you see from my post on Mar 28 in this thread I have the Giesmann Stellar 59 with 4 radion gne 4 pro's. This beast of a setup weighs just under 40 pounds (18kg).

The space I am working with is below. The blue tape outlines where I am extending the etched concrete floor to and where ultimately the tank will be placed. Imagine a nice custom modern wood finish stand and a nice 72x30x24 tank sitting on it. Then I have to manage to hang that heavy light fixture and hide the wires.
IMG_1358.jpg


I found this image in this post by @rcpalmer1 in the thread https://www.reef2reef.com/threads/mounting-options-for-aquatic-life-61-t5-hybrid.551184/

20190201_120604.jpg


I was thinking I could maybe have a metal floating mount fabricated that was the same length of my 59" light fixture and then bolt it to the studs. I imagine I would have 2 screws each in 3 studs with something this length. From the metal plate mounted to the wall I would have hollow rectangular metal arms extending that would then attach to the light fixture. I imaging a length of 24" from the wall wound be where the weight of the lights would be supported (I am wondering then if I would want to use some thin wire and toggle bolts from the ceiling to help support the light. Otherwise I think I would need a bit of a wider foot plate along the wall to disperse the forces). I would then have the cords pass through the rectangular arms and have a hollow point in the wall plate where the cords would pass into the wall and then I could fish them down to the power outlets behind the stand.

This sounds a bit cumbersome and I am finding myself struggling with planing the light mounting more than anything else.
Interested to hear how you ended up mounting your lights?
 
OP
OP
phillygeeks

phillygeeks

Active Member
View Badges
Joined
Nov 6, 2016
Messages
380
Reaction score
199
Location
Spring Lake, MI
Rating - 0%
0   0   0
Interested to hear how you ended up mounting your lights?
I haven’t set them up yet. I emailed Giesmann who mentioned they believe their mounting kit would hold from the ceiling. I’m a little skeptical of 2 wires with toggle bolts and just a few threads of screw into the lighting bracket holding that weight (18 kg).

I ordered a custom stand and so I really need to see the finish on that in person prior to deciding on a mounting solution for my lights. That’s not a big deal as I plan to have the tank maturing for a bit before I have the tank fully lit and going. Out of all the plans I have I am still a bit frustrated with myself on a lack of a solid light mounting plan.
 
OP
OP
phillygeeks

phillygeeks

Active Member
View Badges
Joined
Nov 6, 2016
Messages
380
Reaction score
199
Location
Spring Lake, MI
Rating - 0%
0   0   0
So here we are a year later and finally things should get moving. Changing plans and an infant and a toddler make for limited time. I hope to have some pics on the install soon.

We decided to have tile floor installed and this should be going in sometime in October if it stays on schedule

In terms of the lighting I decided to abandon the hybrid Stellar mount and just go with the four Radion gen 4 pros I have. I’ll place them on the RMS rail mount from the ceiling. I like the idea of the ATI Stratons but not spending more money when I haven’t even used the radions yet. I decided on this because I don’t want the massive bulk of the stellar hybrid and all the wires and I figure it will be a couple years before things fill out enough to the point I need to worry about shading. At that time I won’t mind spending money on some better lights

I will definitely be posting more pics soon as the flooring and rest of the install goes in
 
OP
OP
phillygeeks

phillygeeks

Active Member
View Badges
Joined
Nov 6, 2016
Messages
380
Reaction score
199
Location
Spring Lake, MI
Rating - 0%
0   0   0
We had our floors installed in the area where the tank will go. I am planning on installing wood flooring outside of the tile to replace the carpet but that shouldn't stop the install. I also started on the plumbing with running some pvc from the tank install sight to the fish room. I installed gray pvc sheeting to clean up the plumbing through the walls. Still more work to do on installing unions and grommets on the fish room side. Stand is downstairs and ready to move into position and tank is in the garage. I have the sump in my storage unit ready to move. Here we go!!
 

Attachments

  • tempImage6S14AT.png
    tempImage6S14AT.png
    2 MB · Views: 50
  • tempImagezk8k2g.png
    tempImagezk8k2g.png
    1.1 MB · Views: 48
  • tempImageClopwt.png
    tempImageClopwt.png
    994.6 KB · Views: 46
  • tempImagePQK7nj.png
    tempImagePQK7nj.png
    855.2 KB · Views: 46
  • tempImageXHCUls.png
    tempImageXHCUls.png
    836.4 KB · Views: 58
OP
OP
phillygeeks

phillygeeks

Active Member
View Badges
Joined
Nov 6, 2016
Messages
380
Reaction score
199
Location
Spring Lake, MI
Rating - 0%
0   0   0
I think at first I am going to keep all the pumps on one side and see if I can get away with that as things mature. I know it should be fine initially. Should certainly provide higher and lower flow areas. In the pic I have 2 MP40's low on the staircase side of the tank and I have another MP60 on order which will go high and also be on the same side. The benefit is the side of the aquarium facing the bar won't have any pumps or wires in the view. I do plan to have SPS dominant but wouldn't mind some other corals. The tank dimensions are 72x30x24

IMG_2435.jpeg
 
OP
OP
phillygeeks

phillygeeks

Active Member
View Badges
Joined
Nov 6, 2016
Messages
380
Reaction score
199
Location
Spring Lake, MI
Rating - 0%
0   0   0
The fish room is a MESS! I have the sump in there just to play with how big it is and where to install storage,etc. This room needs a lot of work. Hopefully I can get the dry rock mortared and the plumbing done in the next week and start getting this thing wet
84243EA0-F90F-4F16-B610-C5868661650B.jpeg
 
OP
OP
phillygeeks

phillygeeks

Active Member
View Badges
Joined
Nov 6, 2016
Messages
380
Reaction score
199
Location
Spring Lake, MI
Rating - 0%
0   0   0
Things are progressing...but slowly. I can't seem to get over my limited time or motivation hump with this plumbing. Dry rock is in it's final position. Now I just need to finish the plumbing before getting it wet!
IMG_2612.jpeg
IMG_2613.jpeg
IMG_2615.jpeg
IMG_2584.jpeg
 

ripcord

Community Member
View Badges
Joined
Jan 12, 2022
Messages
41
Reaction score
40
Location
Atlanta
Rating - 0%
0   0   0
Thinking about getting a new sump, Mrc is at the top of my list, did you get the uv installed on it or bio chamber. What are the dimensions? Anything else you could share about it including pics, not to many people seem to have one on this forum. Thanks
 

Being sticky and staying connected: Have you used any reef-safe glue?

  • I have used reef safe glue.

    Votes: 62 86.1%
  • I haven’t used reef safe glue, but plan to in the future.

    Votes: 4 5.6%
  • I have no interest in using reef safe glue.

    Votes: 3 4.2%
  • Other.

    Votes: 3 4.2%
Back
Top