Dennis2213

Community Member
View Badges
Joined
Jun 25, 2021
Messages
54
Reaction score
28
Location
Wellington
Rating - 0%
0   0   0
Hello everyone,

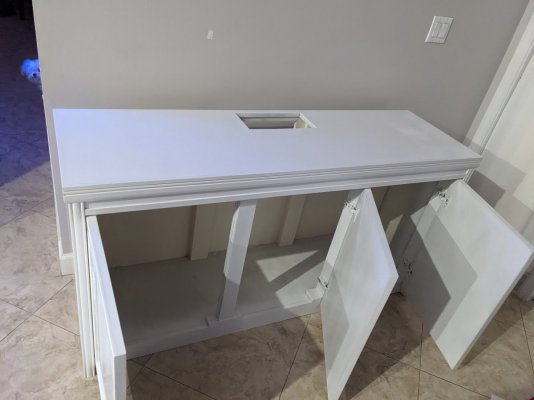
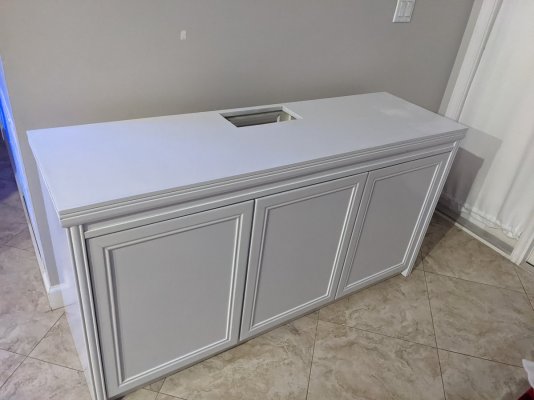
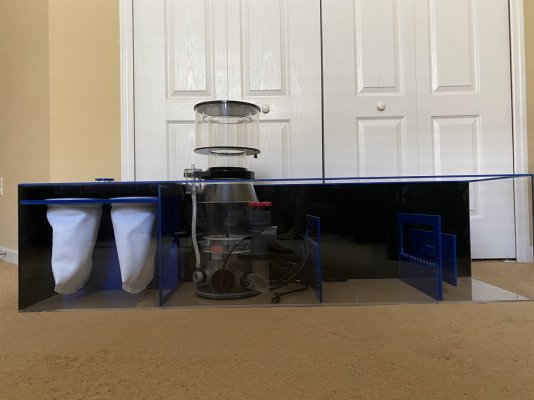
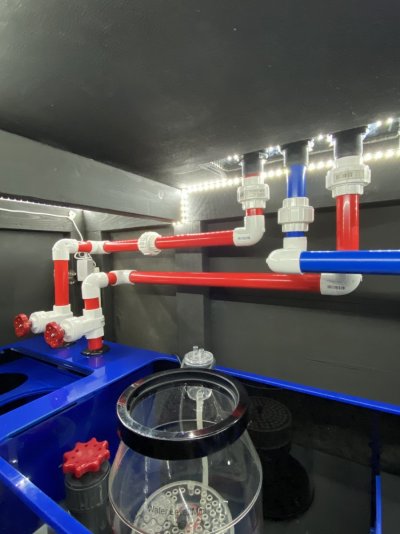
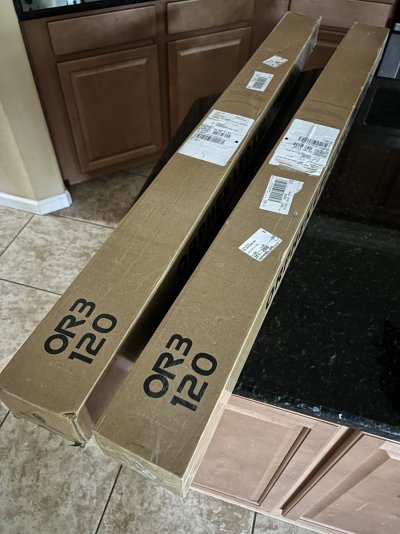
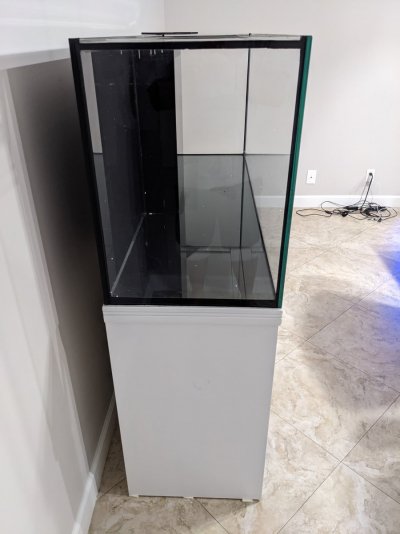
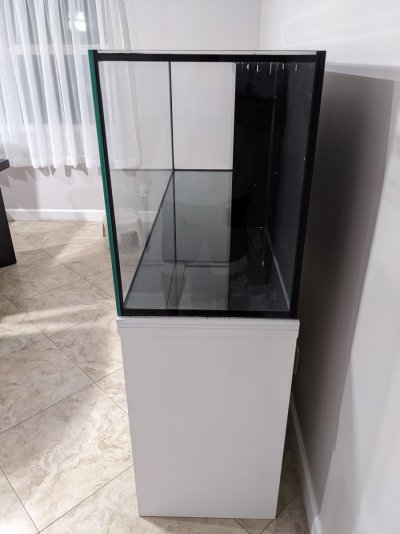
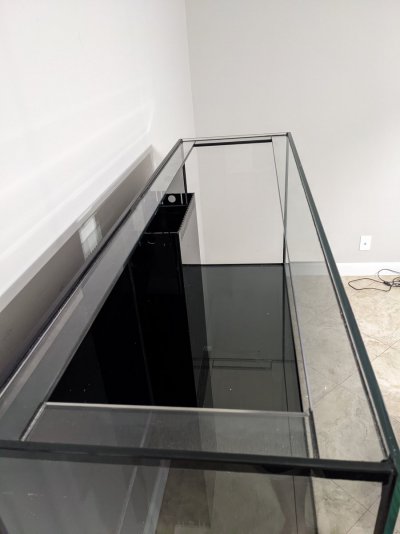
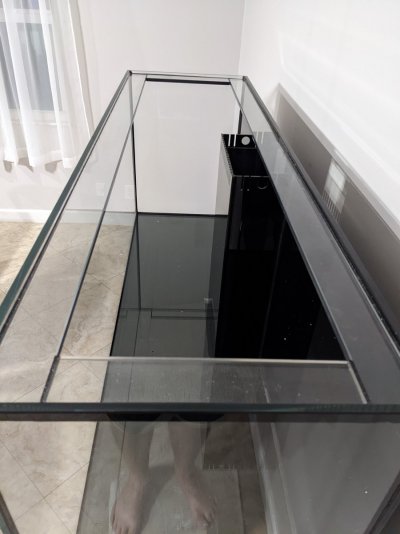
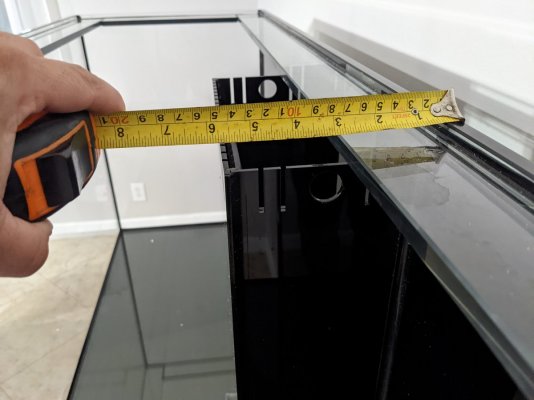
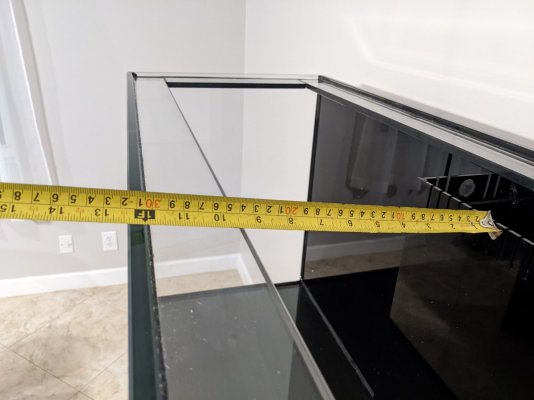
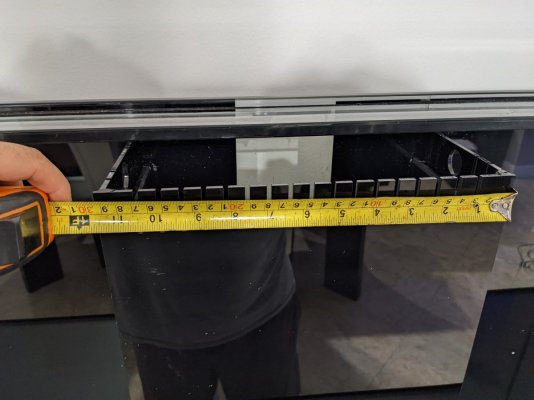
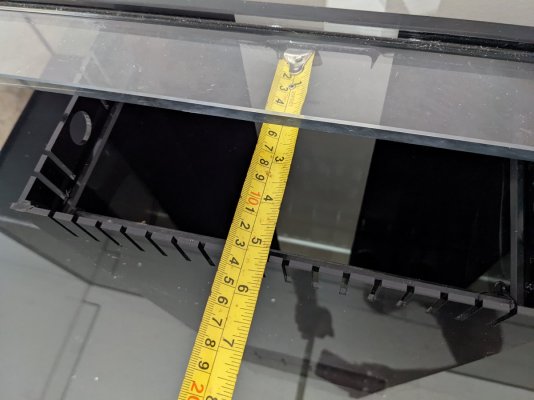
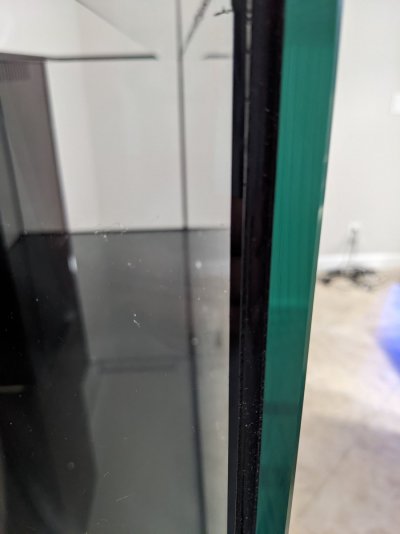
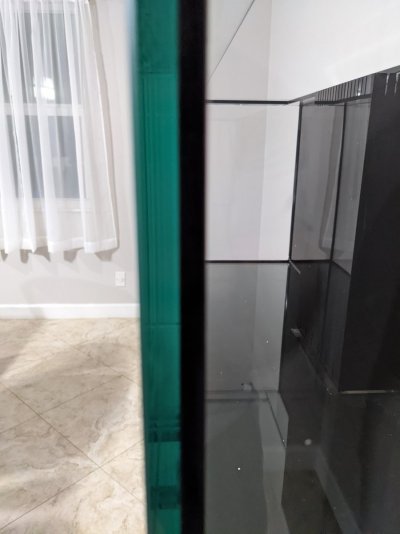
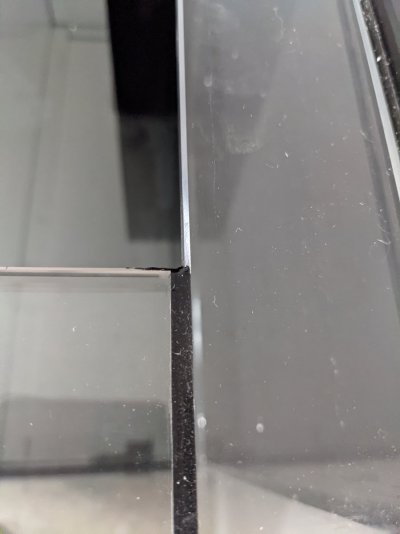
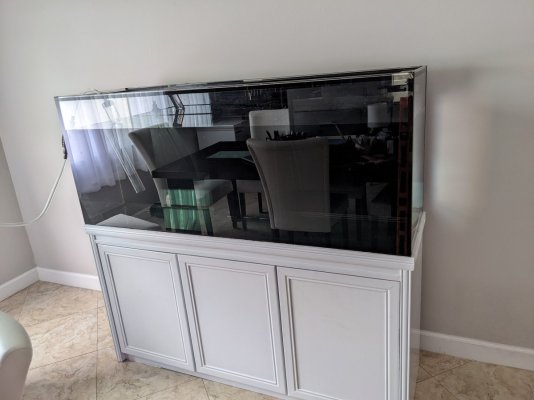
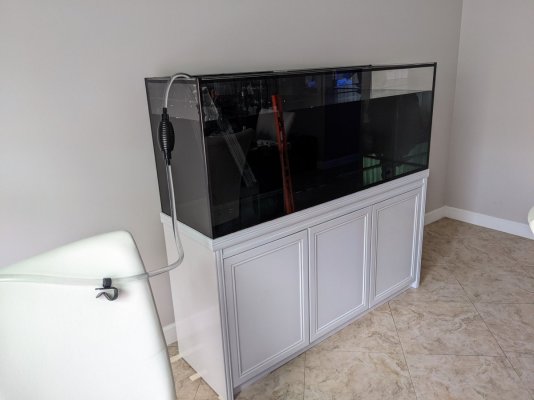
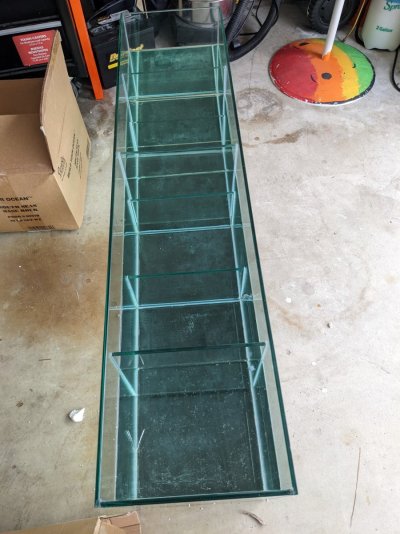
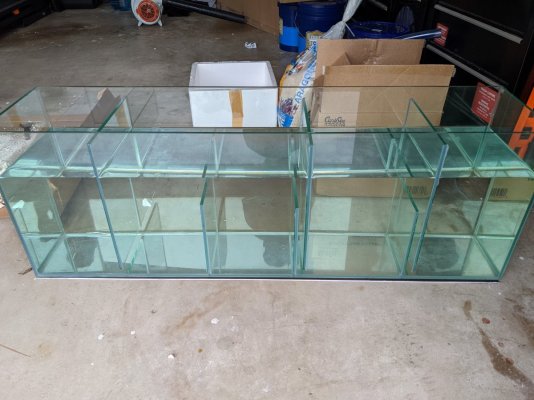
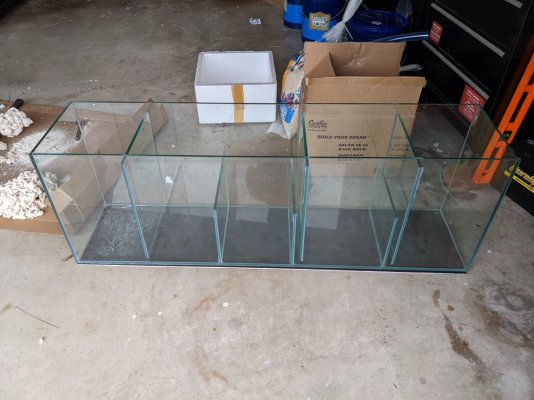
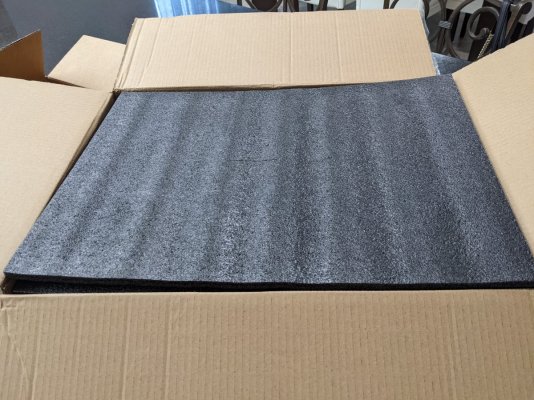
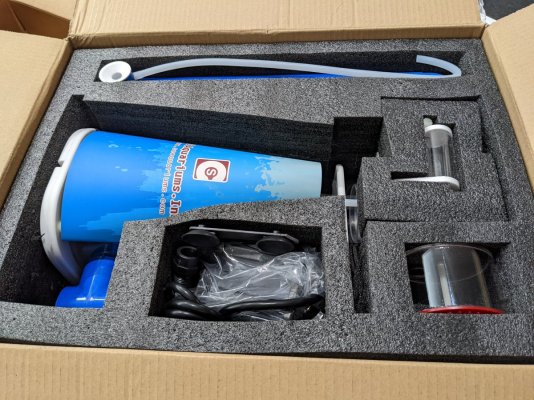
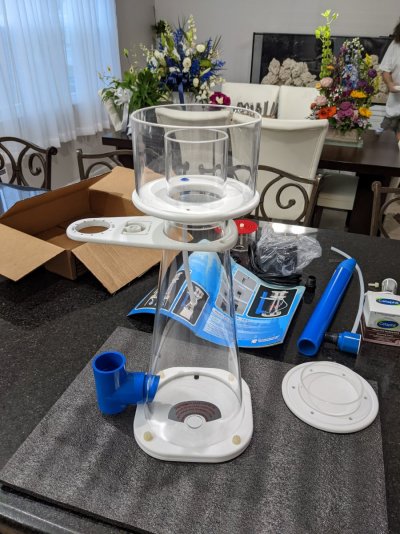
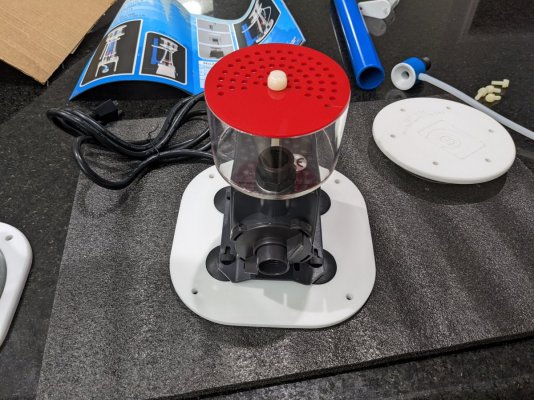
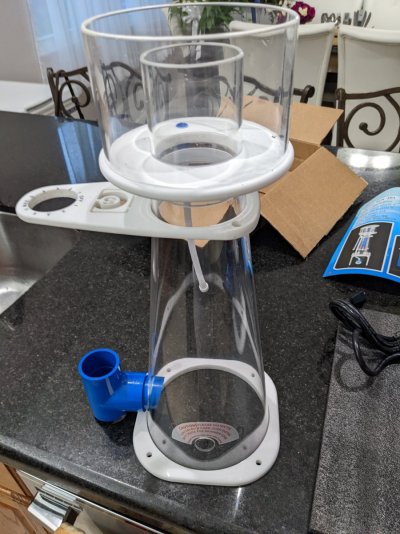
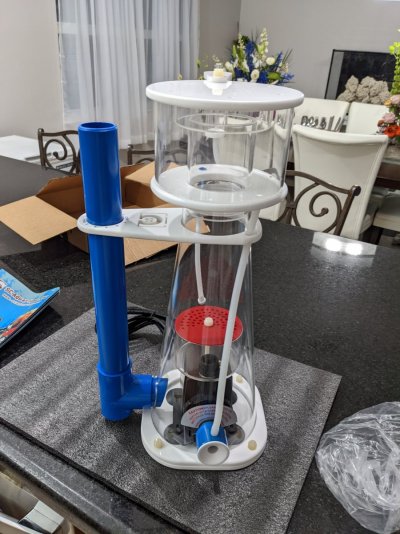
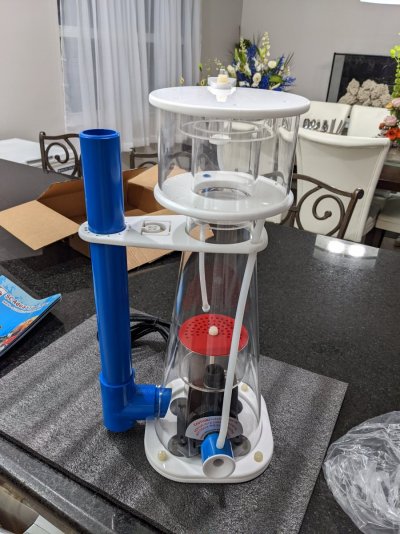
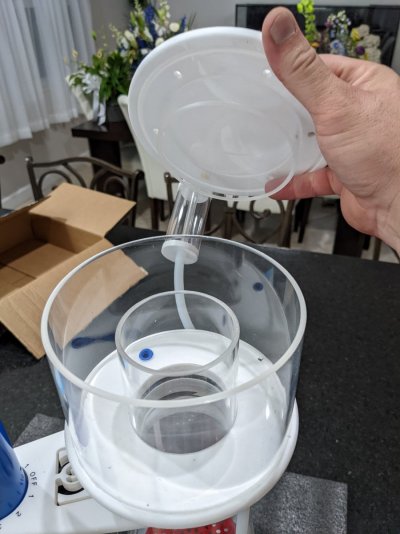
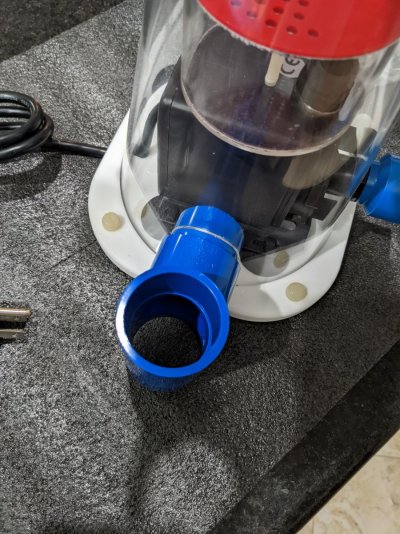
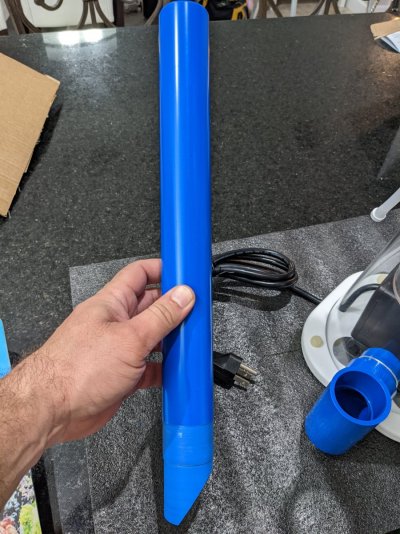
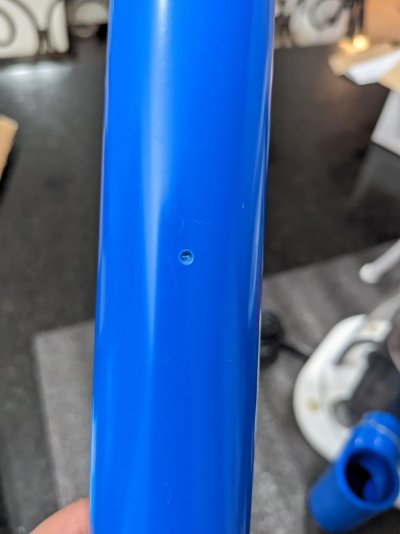
I'm super excited today, received delivery of my 112 gallon SCA PNP system. Surprised, on the size of the shipment, and how well it was packaged. I'm starting this thread for those like myself that researched the SCA systems and didn't find enough information to make an educated decision.. I'm going to post the good, the bad, and the ugly. My triumph's and mishaps. Honest reviews every step of the way.
PXL_20220103_190322173.jpg
PXL_20220103_190257613.jpg
 
OP
OP
D

Dennis2213

Community Member
View Badges
Joined
Jun 25, 2021
Messages
54
Reaction score
28
Location
Wellington
Rating - 0%
0   0   0
Bought the same system. I love it, especially for the price.
Do you have any pictures you can share? Specially the plumbing, and set up. What do you think?, What do you like? What do you hate? What are things you would change?
 

Goaway

10K Club member
View Badges
Joined
Oct 17, 2020
Messages
16,689
Reaction score
57,971
Location
Illinios
Rating - 100%
1   0   0
No pictures of plumbing. The washers i placed umder the tank... My mistake. This was my first build that was drilled.

@flyfisher2. Also has an sca settup. That was an exciting thread.

I don't like the sump. Can't adjust baffles. Difficult to remove the skimmer if i need too.
Was a little confusing where i should place return pump. No real room inside cabin to add an ato. That would make for a precise sized container. I guess, you could seal off.the first chamber to use as an ato. Not sure the easiest way to so that.

I am not a fan of center overflow. Next time I'll go with a bean animal style.
 
OP
OP
D

Dennis2213

Community Member
View Badges
Joined
Jun 25, 2021
Messages
54
Reaction score
28
Location
Wellington
Rating - 0%
0   0   0
FE9378E9-4F99-4B2B-87A4-D04285085A97.jpeg

I built my own stand.
Im very pleased with the tank at this point.
Just now beginning to stock it
Good luck!
That's a great looking set up, are you using the kessil lights? What's your plumbing look like? Did you use the O.G sump?
 
OP
OP
D

Dennis2213

Community Member
View Badges
Joined
Jun 25, 2021
Messages
54
Reaction score
28
Location
Wellington
Rating - 0%
0   0   0
Removed the cabinet out of the box, inspected thoroughly. The cabinet is very solid, very well built, it's solid wood, not compressed, or Ikea style. It's pretty heavy and very sturdy. The paint job outside was ok, but horrible in the inside. Looks like they just half way painted it. The inside is half painted and mostly primed. If you don't t open the doors you will never notice. Happy with the exterior look, but very disappointed with interior. Also their are no push to open, or any slow closing hinges. No biggie, I can buy some off Amazon. Still not happy with interior of the stand. I will post pictures. Also I will be painting it with water proof high gloss white paint to match the exterior. Not a deal breaker but shouldn't have to do this. Overall give the cabinet a 9 out of 10 in build quality, buy give a 4 out of ten in paint quality of the stand.
 

Attachments

  • PXL_20220105_015703869.jpg
    PXL_20220105_015703869.jpg
    102.4 KB · Views: 256
  • PXL_20220105_015622391.jpg
    PXL_20220105_015622391.jpg
    120.9 KB · Views: 252

Fam5dad

Community Member
View Badges
Joined
Feb 13, 2021
Messages
31
Reaction score
17
Location
Batavia
Rating - 0%
0   0   0
Removed the cabinet out of the box, inspected thoroughly. The cabinet is very solid, very well built, it's solid wood, not compressed, or Ikea style. It's pretty heavy and very sturdy. The paint job outside was ok, but horrible in the inside. Looks like they just half way painted it. The inside is half painted and mostly primed. If you don't t open the doors you will never notice. Happy with the exterior look, but very disappointed with interior. Also their are no push to open, or any slow closing hinges. No biggie, I can buy some off Amazon. Still not happy with interior of the stand. I will post pictures. Also I will be painting it with water proof high gloss white paint to match the exterior. Not a deal breaker but shouldn't have to do this. Overall give the cabinet a 9 out of 10 in build quality, buy give a 4 out of ten in paint quality of the stand.
I'm really impressed by the pictures of this stand. For the price I'll be ok painting the inside. Some people complain about the stand but this looks very nice. Looking forward to more of your updates.
 

flyfisher2

Valuable Member
View Badges
Joined
Jan 30, 2012
Messages
1,764
Reaction score
2,830
Location
Central Florida
Rating - 0%
0   0   0
That's a great looking set up, are you using the kessil lights? What's your plumbing look like? Did you use the O.G sump?
Yes I’m using the two Kessil Ap9X’s for now.
I have two light strips which I haven’t yet installed as I just put in the frags a couple days ago
The tanks been up and running since July but I’m really taking my time with this one.
The plumbing is very basic.

As it stands the parameters seem stable and I went with a large sump built by a local vendor.
See attached
 

Attachments

  • E23BE5C1-2B5D-4C1A-B5EA-B766DC2A1373.jpeg
    E23BE5C1-2B5D-4C1A-B5EA-B766DC2A1373.jpeg
    137.7 KB · Views: 241
  • 9C429C75-6FB8-4EE4-8854-2280DD4BAE15.jpeg
    9C429C75-6FB8-4EE4-8854-2280DD4BAE15.jpeg
    134.8 KB · Views: 215
  • 174087AC-5A67-444A-A36F-391D8CA1B811.jpeg
    174087AC-5A67-444A-A36F-391D8CA1B811.jpeg
    186.6 KB · Views: 227
OP
OP
D

Dennis2213

Community Member
View Badges
Joined
Jun 25, 2021
Messages
54
Reaction score
28
Location
Wellington
Rating - 0%
0   0   0
I'm really impressed by the pictures of this stand. For the price I'll be ok painting the inside. Some people complain about the stand but this looks very nice. Looking forward to more of your update
 
OP
OP
D

Dennis2213

Community Member
View Badges
Joined
Jun 25, 2021
Messages
54
Reaction score
28
Location
Wellington
Rating - 0%
0   0   0
Good evening,
So today I decided to place the tank on the stand, I made sure that the stand was level, and placed the leveling foam that came equipped with the tank. Be very careful it almost looks like styrofoam protection during shipping, but it's not it's actually the leveling mat that goes between the tank and the stand. Everything seems to be okay so far. I took a couple of measurements that nobody explains to you before purchasing this tank, how much room do you have with the euro brace? How much space do you lose with the overflow tower? I also attached a couple of pictures of the seams, I am pretty impressed that the silicone work is done by hand. They were very neat and I didn't find any imperfections. I do feel the Euro brace does affect the type of aqua scape you can build in the tank. But on the flip side it forces you to build an aquascape that fits perfectly in the center with enough room to clean behind and in front into the side of the tank.
PXL_20220111_002513682.jpg
 

Attachments

  • PXL_20220111_002523525.jpg
    PXL_20220111_002523525.jpg
    110.1 KB · Views: 230
  • PXL_20220111_002535808.jpg
    PXL_20220111_002535808.jpg
    111.7 KB · Views: 211
  • PXL_20220111_002554924.jpg
    PXL_20220111_002554924.jpg
    92.6 KB · Views: 210
  • PXL_20220111_002609364.jpg
    PXL_20220111_002609364.jpg
    106.9 KB · Views: 220
  • PXL_20220111_002641587.jpg
    PXL_20220111_002641587.jpg
    103.8 KB · Views: 199
  • PXL_20220111_002657707.jpg
    PXL_20220111_002657707.jpg
    109.5 KB · Views: 209
  • PXL_20220111_002728784.jpg
    PXL_20220111_002728784.jpg
    104.3 KB · Views: 192
  • PXL_20220111_002743202.jpg
    PXL_20220111_002743202.jpg
    130.7 KB · Views: 192
  • PXL_20220111_002800056.jpg
    PXL_20220111_002800056.jpg
    126.9 KB · Views: 189
  • PXL_20220111_002901798.jpg
    PXL_20220111_002901798.jpg
    70.3 KB · Views: 184
  • PXL_20220111_002941432.jpg
    PXL_20220111_002941432.jpg
    94.3 KB · Views: 200
  • PXL_20220111_003012196.jpg
    PXL_20220111_003012196.jpg
    82.4 KB · Views: 183
OP
OP
D

Dennis2213

Community Member
View Badges
Joined
Jun 25, 2021
Messages
54
Reaction score
28
Location
Wellington
Rating - 0%
0   0   0
Hello everyone so today I decided I was going to level the stand and leak test the tank this thing is beautiful. The craftsmanship on this tank is great. I will not be leak testing the sump, that's going to be the next post. This test will be files to 1/2 inch from overflow, 48 hours. So far no leaks from overflow, and no leaks from display.
PXL_20220108_194026274.jpg
 

Attachments

  • PXL_20220108_194103176.jpg
    PXL_20220108_194103176.jpg
    87.1 KB · Views: 185
  • PXL_20220109_160224317.jpg
    PXL_20220109_160224317.jpg
    117.9 KB · Views: 198
  • PXL_20220109_160253767.jpg
    PXL_20220109_160253767.jpg
    109.6 KB · Views: 215

Fam5dad

Community Member
View Badges
Joined
Feb 13, 2021
Messages
31
Reaction score
17
Location
Batavia
Rating - 0%
0   0   0
Dennis- You are really selling me on this tank! Are you going to cover the sump and skimmer in detail?
 
OP
OP
D

Dennis2213

Community Member
View Badges
Joined
Jun 25, 2021
Messages
54
Reaction score
28
Location
Wellington
Rating - 0%
0   0   0
Good evening everyone, sorry for not posting for a few days. Today I checked out and leak tested the sump. I had a total water volume of 50 gallons, and five Chambers leak tested for 24 hours with no issues. The only issue I see with the Sun is the final chamber should have been made an ATO. But it may not be big enough. Either way has a lot of room for customization and filtration. Also if anyone can tell me which side of the sump is the chamber the return pump goes into. I'm not sure if there's any right or wrong way of installing this sump but if there is please let me know. If you notice the baffles it looks like there may be a couple of bubble traps before certain sections of the Sump.
 

Attachments

  • PXL_20220123_190350669.jpg
    PXL_20220123_190350669.jpg
    209.6 KB · Views: 213
  • PXL_20220123_190339585.jpg
    PXL_20220123_190339585.jpg
    185.9 KB · Views: 202
  • PXL_20220123_190338607.jpg
    PXL_20220123_190338607.jpg
    186.3 KB · Views: 192
  • PXL_20220123_174458477.jpg
    PXL_20220123_174458477.jpg
    186.6 KB · Views: 191

flyfisher2

Valuable Member
View Badges
Joined
Jan 30, 2012
Messages
1,764
Reaction score
2,830
Location
Central Florida
Rating - 0%
0   0   0
Good evening everyone, sorry for not posting for a few days. Today I checked out and leak tested the sump. I had a total water volume of 50 gallons, and five Chambers leak tested for 24 hours with no issues. The only issue I see with the Sun is the final chamber should have been made an ATO. But it may not be big enough. Either way has a lot of room for customization and filtration. Also if anyone can tell me which side of the sump is the chamber the return pump goes into. I'm not sure if there's any right or wrong way of installing this sump but if there is please let me know. If you notice the baffles it looks like there may be a couple of bubble traps before certain sections of the Sump.
It's based on your plumbing. Most sumps have socks and pre filters on left so you end up with return on your far right. Custom jobs are open to your design.
 
OP
OP
D

Dennis2213

Community Member
View Badges
Joined
Jun 25, 2021
Messages
54
Reaction score
28
Location
Wellington
Rating - 0%
0   0   0
So today I added the sand rock's, and hard plumbing. I also added saltwater to start the cycle. I am using micro bacter quick cycle with micro bacter quick start XLM. I chose this because I'm using dry sand, and dry rock. They have a proven track record to have a great blend of nitrifying bacteria. Also you can cycle just about any tank with this product in less than 10 days. I also like the return pump it's not a variable pump but it is extremely strong, and surprisingly quiet. I can honestly say I don't hear any vibrations in the Sump.

PXL_20220128_025638286.jpg PXL_20220128_025720870.jpg PXL_20220128_025731196.jpg PXL_20220128_025740500.jpg PXL_20220128_025750046.jpg PXL_20220126_231103278.jpg PXL_20220126_230959960.jpg PXL_20220126_231103278.jpg
 
Last edited:
OP
OP
D

Dennis2213

Community Member
View Badges
Joined
Jun 25, 2021
Messages
54
Reaction score
28
Location
Wellington
Rating - 0%
0   0   0
I have started to assemble the skimmer, even though the tank is cycling i figured it would be a good idea to have it assembled. I read previous reviews of people saying they hated it because they couldn't clean it very well. I don't see the issue. You can fully break it down, and even though it's not a big box name it's very well built. I will continue this when it's in the sump and broken in.
 

Attachments

  • PXL_20220126_223641395.jpg
    PXL_20220126_223641395.jpg
    292.1 KB · Views: 121
  • PXL_20220126_223647742.jpg
    PXL_20220126_223647742.jpg
    322.4 KB · Views: 131
  • PXL_20220126_224021024.jpg
    PXL_20220126_224021024.jpg
    261.4 KB · Views: 121
  • PXL_20220126_224529009.jpg
    PXL_20220126_224529009.jpg
    286.9 KB · Views: 126
  • PXL_20220126_224536399.jpg
    PXL_20220126_224536399.jpg
    209.2 KB · Views: 128
  • PXL_20220126_230918358.jpg
    PXL_20220126_230918358.jpg
    221 KB · Views: 117
  • PXL_20220126_230919678.jpg
    PXL_20220126_230919678.jpg
    237.5 KB · Views: 116
  • PXL_20220126_230919678.jpg
    PXL_20220126_230919678.jpg
    237.5 KB · Views: 110
  • PXL_20220126_230926814.jpg
    PXL_20220126_230926814.jpg
    138.6 KB · Views: 125
  • PXL_20220126_231827573.jpg
    PXL_20220126_231827573.jpg
    280.9 KB · Views: 111
  • PXL_20220126_231832444.jpg
    PXL_20220126_231832444.jpg
    257.4 KB · Views: 102
  • PXL_20220126_231838752.jpg
    PXL_20220126_231838752.jpg
    81.2 KB · Views: 120

Reefing threads: Do you wear gear from reef brands?

  • I wear reef gear everywhere.

    Votes: 16 16.7%
  • I wear reef gear primarily at fish events and my LFS.

    Votes: 5 5.2%
  • I wear reef gear primarily for water changes and tank maintenance.

    Votes: 0 0.0%
  • I wear reef gear primarily to relax where I live.

    Votes: 17 17.7%
  • I don’t wear gear from reef brands.

    Votes: 50 52.1%
  • Other.

    Votes: 8 8.3%
Back
Top