Yes. That’s correct. It is on just at 0% so you wouldn’t see it. And if you use the On/Off button on the light it doesn’t do it. You probably only saw it once when you first plugged it inCan’t say I’ve ever seen that but I’ve never seen my light come on in the morning. Although I’m curious if that’s cause my light is always “on” per se with night times just listed at 0%
Navigation
Install the app
How to install the app on iOS
Follow along with the video below to see how to install our site as a web app on your home screen.
Note: This feature may not be available in some browsers.
More options
You are using an out of date browser. It may not display this or other websites correctly.
You should upgrade or use an alternative browser.
You should upgrade or use an alternative browser.
Smat farms led from Amazon
- Thread starter EJReefer
- Start date
- Tagged users None
Gotcha. Yea I remember when first plugged in. Hmm that’s a good question.Yes. That’s correct. It is on just at 0% so you wouldn’t see it. And if you use the On/Off button on the light it doesn’t do it. You probably only saw it once when you first plugged it in
I made a video review, setup, etc for the version 2's if anyone is interested. I'm sure you all have yours set up for now.
I'm planning on using 4 of these on my 200 gallon new build! So I'll be documenting my journey here as well as in the future build thread I need to start.
I made a video review, setup, etc for the version 2's if anyone is interested. I'm sure you all have yours set up for now.
I'm planning on using 4 of these on my 200 gallon new build! So I'll be documenting my journey here as well as in the future build thread I need to start.
I have a question for you, I did watch your set up video, but what I didn't see is you attaching to the aquarium. Have you done that yet? Was the bracket secure? Do you have a rimless tank?
My questions I ask because for me on my rimmed tank the brackets holes to tighten onto the tank were on the wrong side for a rimmed tank. I actually had my husband drill and tap holes on the other side of the bracket. I took pictures and detailed my journey a couple pages back all you can see what I'm taking about.
I remember seeing your post! I have not actually. My tank is eurobraced and there's actually no way to attach these to my tank. I'm going to have to build something at this point.I have a question for you, I did watch your set up video, but what I didn't see is you attaching to the aquarium. Have you done that yet? Was the bracket secure? Do you have a rimless tank?
My questions I ask because for me on my rimmed tank the brackets holes to tighten onto the tank were on the wrong side for a rimmed tank. I actually had my husband drill and tap holes on the other side of the bracket. I took pictures and detailed my journey a couple pages back all you can see what I'm taking about.
Depending on your tank you can spin the bottom piece (rectangular piece that attaches to the tank) and put the screws inside or outside the tank.
I didn't want to say it in the video, but this new arm seems quite a bit like a Kessil knock off. So I'm not sure if other people have had your same issue with their kessil arms. If you Google kessil arm and go to BRS it's almost the exact same arm. You might be able to find some answers down that path.
I just purchased 3 of these lights to mount in my canopy. I want to drill through the top of the canopy and drop 3" or 3.5" machine screws through to screw into the existing threaded mounting holes in the light. The canopy is an inch thick and it looks like the light would use approximately 3/4" when fully inserted. This would leave me at least 1" or 1.5" clearance which I'd be comfortable with for airflow/cooling etc. My question is does anybody know what the diameter of these screws are? I assume they're metric. I live in a small town and my local hardware store had nothing close to what I'm looking for. Thanks.
FYI this is what I (promptly) heard back from the manufacturer:I just purchased 3 of these lights to mount in my canopy. I want to drill through the top of the canopy and drop 3" or 3.5" machine screws through to screw into the existing threaded mounting holes in the light. The canopy is an inch thick and it looks like the light would use approximately 3/4" when fully inserted. This would leave me at least 1" or 1.5" clearance which I'd be comfortable with for airflow/cooling etc. My question is does anybody know what the diameter of these screws are? I assume they're metric. I live in a small town and my local hardware store had nothing close to what I'm looking for. Thanks.
"You mean the screw to between the G5 BODY and fixed rod. The screw is M3*14. it is 3mm.
You need use longer screw to replace existing screw.It is standard.
You can find in you local shop. If you can not find them, please tell me the length of the screw you need.
We can ship screws from China factory with free."
Mcmaster Carr has some that may work if you can't find them locally.
the longest I could find were 2.75" long.
try part #91292A316
FYI, there are (2) possible thread pitches in M3 threads.
The part I noted above is an M3-0.5 thread. the other possibility would be a M3-.35 thread, which would be a finer thread.
the longest I could find were 2.75" long.
try part #91292A316
FYI, there are (2) possible thread pitches in M3 threads.
The part I noted above is an M3-0.5 thread. the other possibility would be a M3-.35 thread, which would be a finer thread.
Thanks. That was the closest I found looking online as well. 70mm. I was hoping for about 90mm but may have to settle. The 70mm would still give me about a 1 inch clearance.Mcmaster Carr has some that may work if you can't find them locally.
the longest I could find were 2.75" long.
try part #91292A316
FYI, there are (2) possible thread pitches in M3 threads.
The part I noted above is an M3-0.5 thread. the other possibility would be a M3-.35 thread, which would be a finer thread.
Another option might be to use a piece of M3 threaded rod instead of a screw.... cut it to whatever length you need, then use some type of nut/washer (wing nut maybe for easy adjustment?) at the top of your canopy. Basically using long threaded rod/stock to make your own screw whatever length you need.Thanks. That was the closest I found looking online as well. 70mm. I was hoping for about 90mm but may have to settle. The 70mm would still give me about a 1 inch clearance.
thread it into the light, stick it up through the hole in your canopy and secure it with a washer/nut at the top.
M3 threaded stock
That's a good idea. I was thinking of doing a canopy over my tank to remove light spill over so this sounds like my route!!Another option might be to use a piece of M3 threaded rod instead of a screw.... cut it to whatever length you need, then use some type of nut/washer (wing nut maybe for easy adjustment?) at the top of your canopy. Basically using long threaded rod/stock to make your own screw whatever length you need.
thread it into the light, stick it up through the hole in your canopy and secure it with a washer/nut at the top.
M3 threaded stock
I'm also looking to build some sort of mounting system for these. My tank is euro braced and the arms are unfortunately useless for me. I'd be interested in seeing if anyone has anything custom.
I know these lights are supposed to be compatible with the universal mounting solutions for kessil/hydra/etc, but those racks cost an absurd amount of money from what I've seen.
I know these lights are supposed to be compatible with the universal mounting solutions for kessil/hydra/etc, but those racks cost an absurd amount of money from what I've seen.
Reach out to my friend @neon_reefer he makes all kinds of mounts for different rail types.I'm also looking to build some sort of mounting system for these. My tank is euro braced and the arms are unfortunately useless for me. I'd be interested in seeing if anyone has anything custom.
I know these lights are supposed to be compatible with the universal mounting solutions for kessil/hydra/etc, but those racks cost an absurd amount of money from what I've seen.
8020 T-slot rail.
Can make anything you want/need.
post #360 in this thread has pics of a 8020 canopy I made.
I had HVAC ducts directly over my tank, so I needed something wall mounted rather than ceiling mounted.
I attached some 8020 rails to my wall vertically and then attached the 8020 canopy to those so that I can adjust the whole thing up/down easily.
Do you have any pics of this? I need a wall mount option as well8020 T-slot rail.
Can make anything you want/need.
post #360 in this thread has pics of a 8020 canopy I made.
I had HVAC ducts directly over my tank, so I needed something wall mounted rather than ceiling mounted.
I attached some 8020 rails to my wall vertically and then attached the 8020 canopy to those so that I can adjust the whole thing up/down easily.
The new mount is round tubing, and on initial inspection is super sturdy feeling, but the more you tighten the more it leans in toward the water. At least with a rimmed tank, maybe its different when you have a rimless tank? But the weight of arm + light makes it fall completely forward.
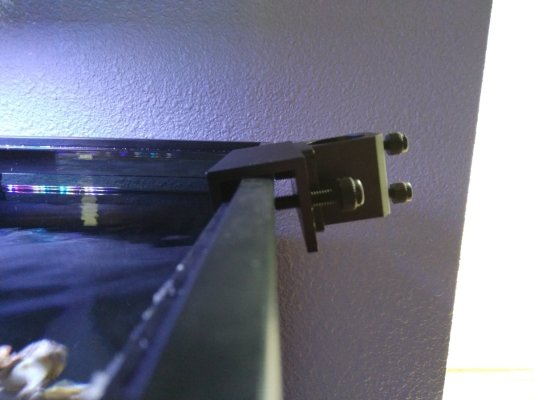
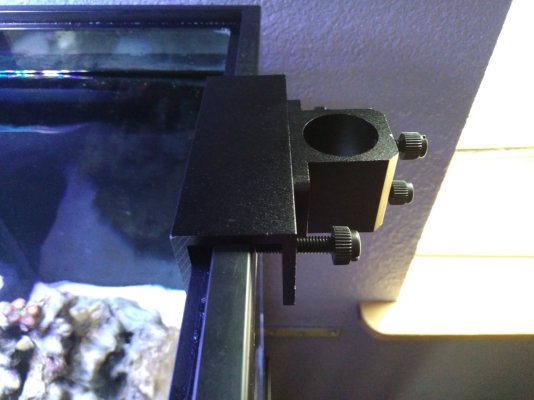
So i referenced the "directions", and it shows installation screws on the inside, but that would leave the excess tubing going into the water...
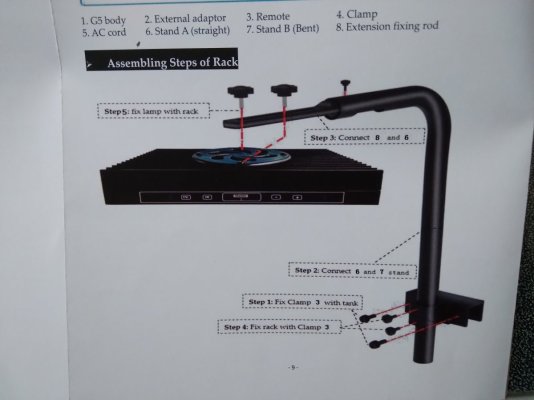
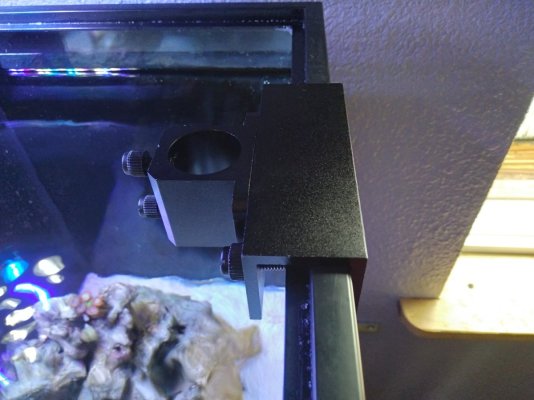
But with the screws against the glass, it feels sturdy. So I had the husband redrill and tap two holes on the opposite side where it was blank.
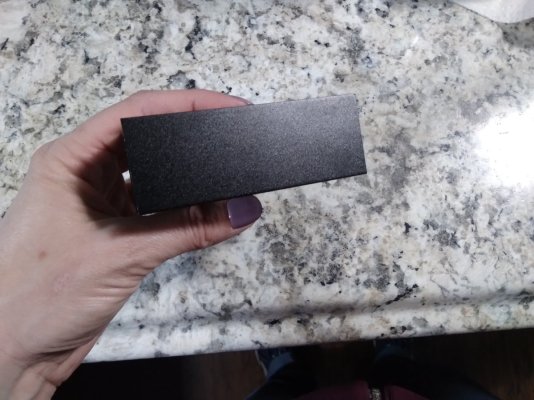
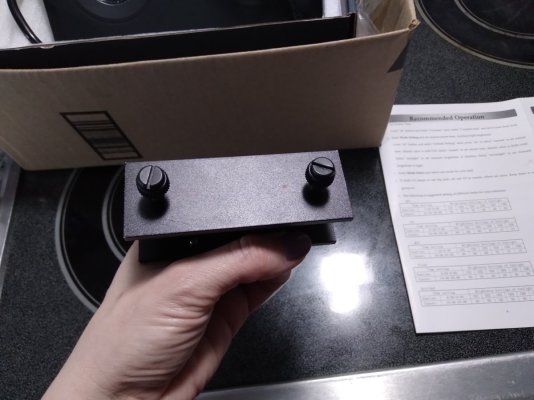
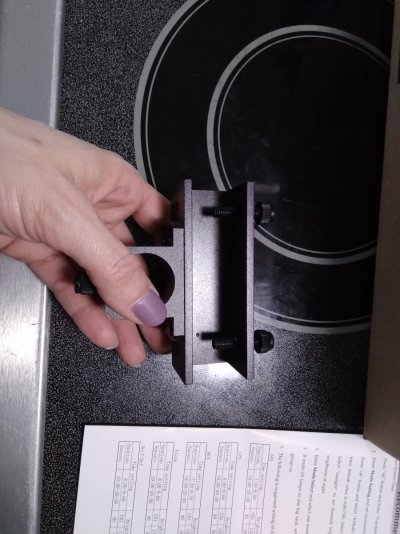
So now its mounted up and looks good, feels sturdy. Took hubs less than 5 minutes.
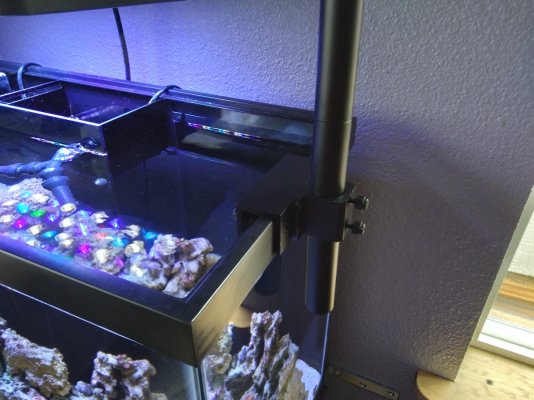
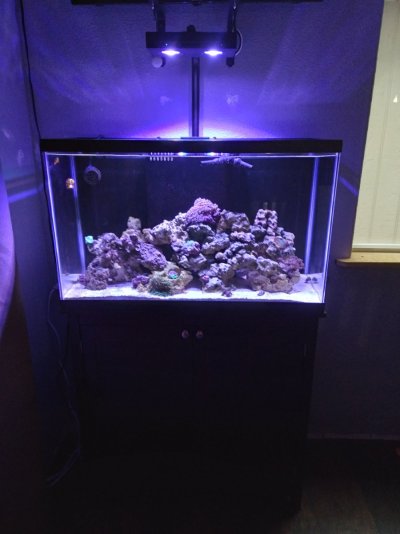
Where the new holes threaded ?
These are great lights with a few caveats to be aware of:
1) if you cut power and plug back in, the light will self test, cycling through all colors at 100% intensity.
2) any blue channel is too bright for moonlights, and moonlights are either always off or on while the other LEDs are off. Ie... You can't have moonlight for a few hours followed by total darkness, if you have them set to come on - they come on as soon as the main lights are off and stay on until the main lights come back on.
3) once any color channel is set to 20% intensity of higher, the fan will ramp up 100% and stay on.( With that said it isn't very loud and can't be heard over ambient room noise from about 10' away)
4) when using the ramp down function, highest set channels ramp down first, until all active channels are at 1% before turning off, thus changing the spectrum while ramping down. So your tank will be white, not blue towards the end of the lighting schedule.
5) even though the lights have a nice spectrum and grow corals well, for whatever reason they lack the ability to make corals truly pop (fluoresce). ( Even with blue only channels active). Corals still look nice and grow well but they lack the glow you may be accustomed to seeing.
6) this one I can't confirm as I only have single units, but have heard if you have 2 or more synced, they will tend to drift from the programmed schedule.
7) not really a con, but just an FYI. No app, everything has to be programmed on a small 1.5" screen with the soft membrane buttons built on the unit, or with the remote. The remote only works from about 18" away however.
Personally, I don't miss having an app and find the programming easy to do and quite functional.
8) channel E is a low kelvin white and pulls the color to a yellow tinge, even set at 1% it seems to overpower the others and kill the spectrum. It's also this channel that appears to cause a disco effect where you can see color banding on your live rock and sand .
I don't find this as an issue as I just leave this channel set to zero, and use channel A which is a 14K white and looks quite nice.
Pro tip, use at least a few percentage of the last channel which is green which really helps pull the spectrum from warm to cool.
IMO, none of these are deal breakers and the light is very nice, looks good mounted on the tank and has a visually attractive spectrum.... Just wanted to list my observations for those who are still on the fence.
I think that's a fair assessment of the lights and I can convey that information back to the company. Maybe they can address some of the complaints/comments in the future. I'll let you know what I hear back.
I'll be hitting your friend up for him what mounts he has as well as looking into 8020, which was my original plan.
I'll be hitting your friend up for him what mounts he has as well as looking into 8020, which was my original plan.
Here is the link to the post in my build thread where I showed what I did.Where the new holes threaded ?
Post in thread 'Maggie's Mixed Reef Build V2' https://www.reef2reef.com/threads/maggies-mixed-reef-build-v2.907616/post-10231513
Thanks for the response. I was able to find another workaround. I glued two small pieces of plexiglass together, then I hold them in the inside of the tank while i tighten up the bracket screws. This did the trick. Anyone can do the same and it doesn't need to be plexiglass, just anything in the inside of the tank so that the bracket sits on a flat surface. This will prevent it from tilting towards the inside of the tank.Here is the link to the post in my build thread where I showed what I did.
Post in thread 'Maggie's Mixed Reef Build V2' https://www.reef2reef.com/threads/maggies-mixed-reef-build-v2.907616/post-10231513
Similar threads
- Price: 70$
- Shipping Available
- Replies
- 5
- Views
- 433
- Replies
- 4
- Views
- 724
- Replies
- 24
- Views
- 318


