Switching Controllers from Apex to GHL

Ditto

Valuable Member
View Badges
Joined
Apr 25, 2017
Messages
2,229
Reaction score
2,972
Location
Albany, NY
Rating - 0%
0   0   0
The title of the thread says it all. I am not going to bash Neptune systems, all I am going to say mine crashed again, and the word fluke in the technical response left me going I cannot take any more chances. This was my second hard crash of the system, where both time the system came up in an inconsistent state and caused issues.

What I currently Have:
Apex 2016
FMM (Fluid Monitor)
WAV Controller (Went back to my Vortech)
Additional PM1 and PM2 Module used to Monitor Reactors
LSM Module (Lunar simulation)
Leak Detector
Multiple EB832/EB8
ASM Module
Multiple Displays

What I have Ordered:
ProFilux 4 Ultimate Set
PLM-PH-Redox and PH probes * 2
2 Level Sensors (ATO)
3 Power Bar 5.1
Expansion Box
Proflux Touch (Downstairs Sump Display)
Vortech Controller
Mitras Simu-Stick
Mitras Simu-Driver
Temperature-Sensor
5000 l/h Flow-sensor
9000 l/h flow sensor * 2
Assortment of PAB Cables to connect everything
PL-LY cables to Connect

Not ordered yet:

Leak Detectors
New ¼ Relays (I use these as safety I may see if I can re-wire the apex ones or try)
And what the solution will be for PAR readings as I have a ASM module (idea’s welcomed as I may also swap out my CebruSun T5 with Mitras LED)

My plan is to post the actual switching out of the components, and how I converted the programming from my Apex to GHL. Join the discussion, have some fun asking questions or answering some of mine, and I will attempt to show as much as possible!!
 
OP
OP
Ditto

Ditto

Valuable Member
View Badges
Joined
Apr 25, 2017
Messages
2,229
Reaction score
2,972
Location
Albany, NY
Rating - 0%
0   0   0
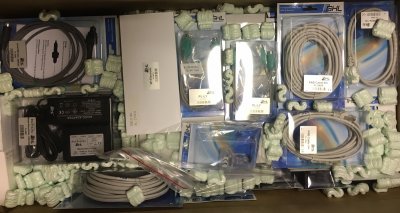
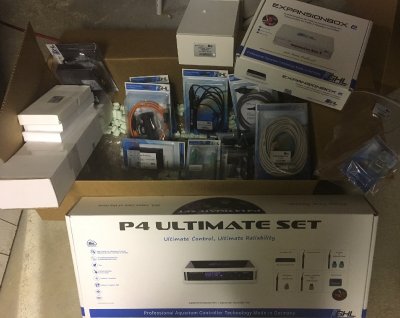
Came home today and the first shipment of GHL has arrived!!

IMG_1067.JPG
IMG_1068.JPG

Now the real fun begins!!

I want to thank Vinny for answering my week long worth of questions.

Observations:
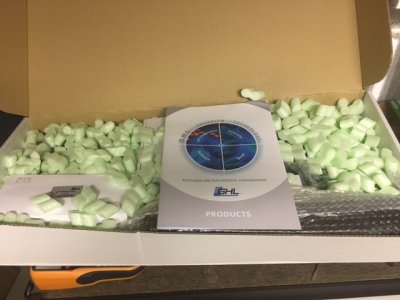
Well Packaged overall no complaints on how it was boxed (No damage on Box, maybe it had something to do with all the red/yellow stickers on the box)
IMG_1070.JPG
 
OP
OP
Ditto

Ditto

Valuable Member
View Badges
Joined
Apr 25, 2017
Messages
2,229
Reaction score
2,972
Location
Albany, NY
Rating - 0%
0   0   0
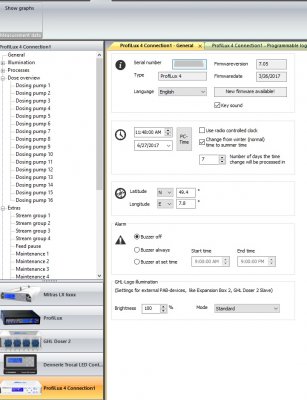
Since this is going to be a switch over from Apex to GHL, here is a screen shot of my Apex Fusion for comparison. As we place each device online I will show some of the readings between the two also.

baseline neptune.jpg


OP
OP
Ditto

Ditto

Valuable Member
View Badges
Joined
Apr 25, 2017
Messages
2,229
Reaction score
2,972
Location
Albany, NY
Rating - 0%
0   0   0
Good Morning Everyone:

Thank everyone for the comments and Follows.

Always good to know where to find everything

Now we need some GHL Manuals:

ProFilux 4 Manual

https://www.aquariumcomputer.com/downloads/profilux-4-manual/

ProFilux Programming Guide
https://www.aquariumcomputer.com/downloads/profilux-4-programming-guide-v7-02/

Vortech-Controller Guide
https://www.aquariumcomputer.com/downloads/vortech-controller-manual/

Programmable Logic Instructions

https://www.aquariumcomputer.com/downloads/programmable-logic-instructions/

Seasonal Lighting Simulation
https://www.aquariumcomputer.com/downloads/seasonal-lighting-simulation/

ProFilux Touch Manual
https://www.aquariumcomputer.com/downloads/profilux-touch-manual/

Going to Need some software also

GHL Control Center V1.0.9.0
https://www.aquariumcomputer.com/downloads/ghl-control-center-v1-0-9-0/


Software Download, Typical Zip file just double click on the zip file and then choose the application within, I had no issues on the install (I am on a Windows 10 PC)
Folder.jpg
 
OP
OP
Ditto

Ditto

Valuable Member
View Badges
Joined
Apr 25, 2017
Messages
2,229
Reaction score
2,972
Location
Albany, NY
Rating - 0%
0   0   0
My Plan is to configure this via the USB cable, but I will also look to see if it can be done through the interface for people that do not have a computer with a USB connection.

So the Ultimate Set Pictures
IMG_1071.JPG
Impression very well boxed no issues to report

IMG_1072.JPG

Calibration Fluid (Different then what comes in a Apex Unit they are typical small pouches, one time use)

IMG_1073.JPG


All the probes came in boxes, but this one which is the Temperature Probe.
 
OP
OP
Ditto

Ditto

Valuable Member
View Badges
Joined
Apr 25, 2017
Messages
2,229
Reaction score
2,972
Location
Albany, NY
Rating - 0%
0   0   0
Unit is Powered up, flashing Red (No probes Connected)

Since the unit is constructed in Germany, English is not the default on the display.

IMG_1076.JPG


Press the Check Mark on the unit to bring up the Menu using the arrow keys scroll down until you Highlight Extra That the easy one it was in English on the Menu

Once in the Extra menu using the arrow keys scroll down until you highlight Language oh wait Sprache hehe and again press the Check Mark

IMG_1077.JPG


Using the arrow keys scroll down until you highlight Language you wish to have your unit use, and press the check mark

IMG_1078.JPG


Sorry German is Rusty hehe, but I think this is Are you Sure hehe. Using the arrows click the one to the left to highlight ja and then press the check mark (Mine asked for me to do it twice)
IMG_1079.JPG


Whooohoo it now in English
 

HolisticBear

Valuable Member
View Badges
Joined
Jan 17, 2017
Messages
1,853
Reaction score
6,672
Location
NYC
Rating - 0%
0   0   0
Calibrating probes tripped me up for a bit. I didn't find any reference in the manual to the process and I couldn't find anything in GCC. I then figured out you do it via the unit display and all was fine. I was surprised I couldn't trigger the process thru GCC.

I believe you can connect to it as an access point, log into it via your website browser, configure your WiFi, and then it will be online. I used USB for initial setup & firmware upgrade
 
OP
OP
Ditto

Ditto

Valuable Member
View Badges
Joined
Apr 25, 2017
Messages
2,229
Reaction score
2,972
Location
Albany, NY
Rating - 0%
0   0   0
I was able to connect via USB, one mistake the link above I used was for the wrong version of software!!

Correct Version below:
https://www.aquariumcomputer.com/downloads/ghl-control-center-v1-0-9-8/

Once Installed the Correct Software version configured it for COM 3 I was up and running!!

Logged_in.jpg

Was Able to Update the firmware in a few easy steps. No issues actually went very smoothly

Connected to the Cloud Services

myGHL configured.jpg


And Configured the unit for a static IP through the Control Center and tested a direct connection to it (Logged in and presented with a default dashboard)
Default_Page.jpg
 
OP
OP
Ditto

Ditto

Valuable Member
View Badges
Joined
Apr 25, 2017
Messages
2,229
Reaction score
2,972
Location
Albany, NY
Rating - 0%
0   0   0
Good Evening,

I went down and renamed all the probes on the base unit. I have to say was quite easy, no fuss.

Negative:
Probe/Sensor List does not show the Description when you enter when in GHL Command center and expand the Probe/sensor controls, only seen when you click on it. (Not a biggie issue, but be nice to see not pH-vaule 1 but what the description is or allow us to name them also like Sump PH)

Positive:

Operational Hours of the Probe is a big plus (I tracked this in Aquarium Application and now the controller does it also)

renaming probes.jpg


I then went ahead and added new hardware within the P4 Unit.

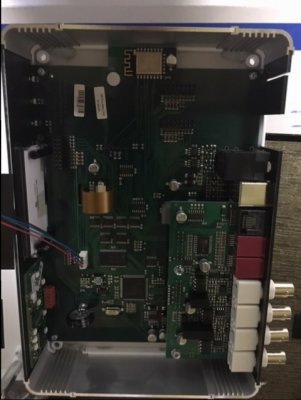
4 Screws from the Bottom of the unit and the top pops off (Very nice construction inside)

Positive:
No More chaining Modules together!!

IMG_1081.JPG

Card I am adding PLM-PH-Redox (I needed an additional ORP, and PH for the Reactors)
IMG_1082.JPG


Slides right into the slot with ease
IMG_1083.JPG


Pop the cover back on, and power up the unit. (Upon powering up detected the cards and showed on the display New Channel 4 and New Channel 5 Hardware Detected)

And now two more Probe/sensor controls are on the list

Added_Card.jpg


For users not familiar with Neptune Fusion
You Access probes for example through inputs from Fusion, or from the webpage of unit.
Neptune_inputs.jpg


Clicking on a probe provides basic and advance configuration (Probes in Neptune are Renamed to be displayed in inputs and panels, they do not have a description) (Screen shot below is my Sump Salinity Probe)
Neptune_input_details.jpg

input_advanced.jpg


Accessing the modules area of allows you to see all modules connected to the Apex. Since I needed to have multiple PH probes, I needed to purchase multiple modules so I could connect my PH probes to them and connect the modules via via Aquabus cables. You can not add modules within an Apex unit.

Neptune_Modules.jpg
 
OP
OP
Ditto

Ditto

Valuable Member
View Badges
Joined
Apr 25, 2017
Messages
2,229
Reaction score
2,972
Location
Albany, NY
Rating - 0%
0   0   0
Good Afternoon,

Temperature Probe now in the Sump

PH Probe Calibration: (Steps I took to do it)

From the P4
- Press Any key on the P4, and use the arrow down button and highlight Sensor Setting and press the check mark
- Using the Arrow Key on the P4 highlight the Probe you wish to Calibrate and press the check mark mine was pH-value 1
- Using the arrow keys scroll down the list and highlight Calibration and press the check mark
- The display updates on the P4 and is now asking you for to set the calibration Tolerance make sure it is <1> mine was one to begin with and press the check mark
- The display updates on the P4 and is now asking you for the first Tolerance level, I set mine to 07.00 using and press the check mark (To adjust the value use the arrow keys to move left and right and up and down to change the value)
- The display updates on the P4 and is now asking you for the second Tolerance level, I set mine to 09.00 and press the check mark (To adjust the value use the arrow keys to move left and right and up and down to change the value)
- The display updates on the P4 and is now asking you for the asking you to put the probe now in the 7.00 solution and press the check mark
- Beep Sound
- This display updates on the P4 and is now asking you for the asking you to put the probe now in the 9.00 solution and press the check mark
- Beep Sound
- This display updates on the P4 and is now asking you Save now press the left arrow key to highlight Yes (Box will show around it) and press the check mark

Whooohoo Calibration Completed and now in the Sump.

Positive:
Even thou it had to be done from the P4, it was quite simple, easy to read, and cancel out of if you make a mistake
I like the Nominal Value(Going to need to research what I want to set it to) and Nocturnal change (PH goes down at Night and now can adjust for it and not alarm)

PH_set.jpg


dashboard_Ph.jpg


A few differences in reading from the Apex and the GHL.
Sump_T (Sump Temperature) is showing a difference and Sump_p (Sump PH) also.

base_neptune1.jpg
 
Last edited:
OP
OP
Ditto

Ditto

Valuable Member
View Badges
Joined
Apr 25, 2017
Messages
2,229
Reaction score
2,972
Location
Albany, NY
Rating - 0%
0   0   0
Salinity and ORP now online:

Redox Probe Calibration: (Steps I took to do it)

From the P4
- Press Any key on the P4, and use the arrow down button and highlight Sensor Setting and press the check mark
- Using the Arrow Key on the P4 highlight the Probe you wish to Calibrate and press the check mark mine was Redox 1
- Using the arrow keys scroll down the list and highlight Calibration and press the check mark
- The display updates on the P4 and is now asking you for to set the calibration Tolerance make sure it is <1> mine was one to begin with and press the check mark
- The display updates on the P4 and is now asking you for the first Tolerance level, I set mine to 220.00 using and press the check mark (it defaulted to this)(To adjust the value use the arrow keys to move left and right and up and down to change the value)
- Insert Null Plug
- Beep Sound
- This display updates on the P4 and is now asking you for the asking you to put the probe now in the 220.00 solution and press the check mark
- Beep Sound
- This display updates on the P4 and is now asking you Save now press the left arrow key to highlight Yes (Box will show around it) and press the check mark

Calibration Completed and now in the Sump.

ORP_Adjusted.jpg


Salnity Probe Calibration: (Steps I took to do it)

From the P4
- Press Any key on the P4, and use the arrow down button and highlight Sensor Setting and press the check mark
- Using the Arrow Key on the P4 highlight the Probe you wish to Calibrate and press the check mark mine was Conduct(S) 1
- Using the arrow keys scroll down the list and highlight Calibration and press the check mark
- The display updates on the P4 and is now asking you for to set the calibration Tolerance make sure it is <1> mine was one to begin with and press the check mark
- The display updates on the P4 and is now asking you for the first Tolerance level, I set mine to 50.00 using and press the checkbox (it defaulted to this)(To adjust the value use the arrow keys to move left and right and up and down to change the value)
- The display updates on the P4 and is now asking what Temperature probe should be used for variation I selected Temperature 1 (Right next to it in the Sump) and press the check mark
- The display updates on the P4 and is now asking you for Specify the temperature of the calibration liquid in Celsius and press the check mark (To adjust the value use the arrow keys to move left and right and up and down to change the value)
- The display updates on the P4 and is now asking you for Hold the sensor in the Air, press the check mark to start it
- Beep Sound
- The display updates on the P4 and is now asking you to immerse the probe into the calibration liquid. When you place it into the solution press the check mark
- Beep Sound
- This display updates on the P4 and is now asking you Save now press the left arrow key to highlight Yes (Box will show around it) and press the check mark

Last one inserted into the Sump
salinity_1.jpg

Quick Observations, seems Salinity Probe is reading low, ORP also (But I now the ORP has to break in)
 

Algae invading algae: Have you had unwanted algae in your good macroalgae?

  • I regularly have unwanted algae in my macroalgae.

    Votes: 45 35.4%
  • I occasionally have unwanted algae in my macroalgae.

    Votes: 28 22.0%
  • I rarely have unwanted algae in my macroalgae.

    Votes: 9 7.1%
  • I never have unwanted algae in my macroalgae.

    Votes: 10 7.9%
  • I don’t have macroalgae.

    Votes: 31 24.4%
  • Other.

    Votes: 4 3.1%
Back
Top