Another Reef Beginning!

Mike_J

Valuable Member
View Badges
Joined
Nov 16, 2014
Messages
2,386
Reaction score
3,947
Location
Bloomfield, CT
Rating - 0%
0   0   0
So I thought I would document the process of building my new reef tank and share it here. As a newer member of the group (only a year) and having only attended 2 meetings, I thought this would be a great way to get to know some of you and welcome some feedback and input at each step along the way. I'd like to become more active within the group in the next year, so here's to a new beginning!

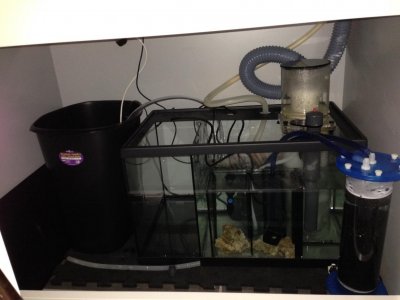
It's been a year and a half for me of learning about the hobby and maintaining a 29 gallon biocube. These forums have certainly been a tremendous source of information. So naturally the next step was to upgrade to a bigger and better tank. After months of researching and getting quotes on different tank builds, I went with the all-in-one Elos 120XL tank, 126 gallons, and I couldn't be happier. The tank has been cycling for 2 weeks now. I went with dry Fiji rock from BRS (a clean start with no hitch-hikers!) and chose Fiji Pink Arag-Alive sand to help jump start the cycling. Patience while the tank fully cycles will allow me to add the remaining necessary components, such as lighting. I have decided to stick with LEDs and go with the Kessil A360WE pendants (x2). Here are a few pictures so far with more to come soon!

FullSizeRender.jpg
FullSizeRender (1).jpg
FullSizeRender - Copy.jpg
FullSizeRender (1) - Copy.jpg
FullSizeRender (3) - Copy.jpg


FullSizeRender (3) - Copy.jpg


FullSizeRender (1) - Copy.jpg


FullSizeRender.jpg


FullSizeRender (1).jpg


FullSizeRender - Copy.jpg
 

DarkTang

Valuable Member
View Badges
Joined
Oct 21, 2014
Messages
1,040
Reaction score
718
Rating - 0%
0   0   0
Why didn't you put the overflow on the wall's side?
 

143MPCo

ASSIST PROTECT DEFEND
View Badges
Joined
May 14, 2012
Messages
6,696
Reaction score
8,294
Rating - 0%
0   0   0
Bloomfield? really... How close are you to School St?
 

143MPCo

ASSIST PROTECT DEFEND
View Badges
Joined
May 14, 2012
Messages
6,696
Reaction score
8,294
Rating - 0%
0   0   0
BTW, very nice setup!
 
OP
OP
Mike_J

Mike_J

Valuable Member
View Badges
Joined
Nov 16, 2014
Messages
2,386
Reaction score
3,947
Location
Bloomfield, CT
Rating - 0%
0   0   0
Why didn't you put the overflow on the wall's side?

This isn't a custom build, but rather a standard Elos all-in-one setup. This is how they build most of their tanks. I found this set-up from an online retailer at a deep discounted price, so I couldn't pass it up. I actually don't mind the overflow not being on the wall side.
 

143MPCo

ASSIST PROTECT DEFEND
View Badges
Joined
May 14, 2012
Messages
6,696
Reaction score
8,294
Rating - 0%
0   0   0
Not sure where School St. is, but I'm right down the road from Wintonbury Mall on Mills.

I'm like 10min away from the mall.
 
OP
OP
Mike_J

Mike_J

Valuable Member
View Badges
Joined
Nov 16, 2014
Messages
2,386
Reaction score
3,947
Location
Bloomfield, CT
Rating - 0%
0   0   0
Looking sweet man! Is that a maxspect gyre I see on the tank?

Thanks, and yes, it's a Maxspect Gyre. It's been running for 2 weeks in the tank and I have to say, it's an impressive piece of equipment. Pricey but well worth it. Highly recommend it.

FullSizeRender (2).jpg
FullSizeRender (3).jpg
FullSizeRender (4).jpg
 

SteelerMike

Well-Known Member
View Badges
Joined
Apr 6, 2012
Messages
548
Reaction score
229
Location
Massachusetts
Rating - 0%
0   0   0
nice. Those things look pretty cool. I'll be interested to see the rest of your build and how it works out for you.
 
OP
OP
Mike_J

Mike_J

Valuable Member
View Badges
Joined
Nov 16, 2014
Messages
2,386
Reaction score
3,947
Location
Bloomfield, CT
Rating - 0%
0   0   0
Awesome can we see what's under?


sump.jpg


This is the current setup within the cabinet that includes the sump and skimmer 2000 that come with the tank. It's a very nice design but I only wish the sump was bigger to increase the overall water volume and allow for some flexibility to accommodate a bigger refugium, more space for live rock, macro algae, etc. However, it does what it needs to. On the far left of the sump is a fresh water reservoir for auto top off that is approximately 10 gallons. I decided to use this area of the sump as a quarantine area instead, at least initially, and perhaps I will later turn it into a bigger refugium. I included a 10 gallon plastic trash receptacle on the far left as a replacement reservoir for fresh water top off and it seems to be a bit better use of the space. I still may change it up a bit, for maximum efficient use of the cabinet space.
 

Attachments

  • sump.jpg
    sump.jpg
    85.9 KB · Views: 411

PCygni

Active Member
View Badges
Joined
Sep 5, 2013
Messages
176
Reaction score
0
Location
Cabo Wabo
Rating - 0%
0   0   0
I'd go for the bigger 'fuge' right now -- cause 'tomorrow might not never come."

[Who said that?]

Looks good, man.

Keep us posted.
 
OP
OP
Mike_J

Mike_J

Valuable Member
View Badges
Joined
Nov 16, 2014
Messages
2,386
Reaction score
3,947
Location
Bloomfield, CT
Rating - 0%
0   0   0
Lighting for the new tank arrived today. I went with 2 Kessil A360WEs and I'm stoked. Can't wait to install them above the tank!

FullSizeRender (5) - Copy.jpg
FullSizeRender - Copy (2).jpg


FullSizeRender (5) - Copy.jpg


FullSizeRender - Copy (2).jpg
 
OP
OP
Mike_J

Mike_J

Valuable Member
View Badges
Joined
Nov 16, 2014
Messages
2,386
Reaction score
3,947
Location
Bloomfield, CT
Rating - 0%
0   0   0
Next project: Cord management, organization and concealment.:sad:

cables.jpg
 
Back
Top