DIY Filter Socks

  • Thread starter Thread starter 8pixel
  • Start date Start date
  • Tagged users Tagged users None
I make all my filter socks but mine are little different. Im using a SeaClear all in one tank and the filter is more a panel then sock, the sock slides over a piece of egg crate to form a wall. I use the same material but also course blue pre-filter material so it works like a 2 stage. I can make probably 50 for the cost of 1 Seaclear replacment.

20191108_081339.jpg
 
Is everyone still using the fabric at Joanne Fabric with the item number 086-8448 from the OP? I just picked some up tonight and the number is the same but the labeling is different (ie not eco-fi brand).
 
Appreciate the info, definitely worth doing. I have a few running tanks so it is frustrating when it's replacement time. Those things add up at retail.
 
A few people have asked me how I make my filter socks so I figure I'd post a thread in case this can be helpful to others. All you need is a sewing machine, very basic sewing skills and about 30-45 minutes every 2 months. I buy my polyester felt from JoAnn Fabric for about $2.50/yard (usually $5 but they have online coupons every month or so for 50% off). One yard of material will give me 15 12" socks which comes out to around .16 cents a piece. Old ones just get tossed and no need for washing and drying, etc. Changing them out twice a week these will last you almost 2 months.


The key to making these easy to use and change is the ring which you only need to make once. When it comes time to change socks, you just pull out the ring and thread it in to the new sock through the upper slot and you are done….30 seconds tops.


Below are the steps with photos.


How great
It's very creative, congratulations.
I'm sure I'll use this idea, thank you.
Your ideas are like YouTube R&Z plumbing.
 
I’m not sure I can get that in Australia, all I can find is acrylic felt, is it the same stuff?

Thank you Dan!
I've been searching for this for ages. In the USA they call this stuff Polyester. Over here they call it Acrylic. Spotlight has a tendency to not provide accurate specifications. For example, micron isn't specified. When I asked a Spotlight sales representative about micron size, she didn't even know what I was taking about and neither did her supervisor, so they said that they'd check with their supplier/manufacturer in China and get back to me - that never happened.

I suppose that I'll pretty much know how small the perforations are by how fast it clogs up. I currently alternate between 100μ and 200μ. The 100μ socks need changing every 3 to 4 days. The 200μ can go a week. Of course those figures are based on what I feed and how often.

It's not going to break my bank account to give this stuff a shot. I'm pretty good at sewing so that's a plus.
Cheers
Bill
 
Last edited:
This thread is amazing. I have a Waterbox AIO which uses 2.75" socks. These are very hard to find and very expensive. From Waterbox, one sock costs $9.99!!! I have found cheaper ones for $5 but they did not fit exactly right.

My wife just sewed me 48 of these. I found packs of 24 sheets of EcoFi felt for $9 on Amazon. The sheets are 9"x12" which is almost exactly the size I need.
 
I've been doing this DIY sock about over 5 years now, and has over the years refined the sock so the cutting/sewing is absolutely down to a minimum, and the ring attachment is extremely easy and straightforward. I still use a brand new sock each time I change the sock and just toss out the used one.

This is for 4" sock (100mm for metric folks)
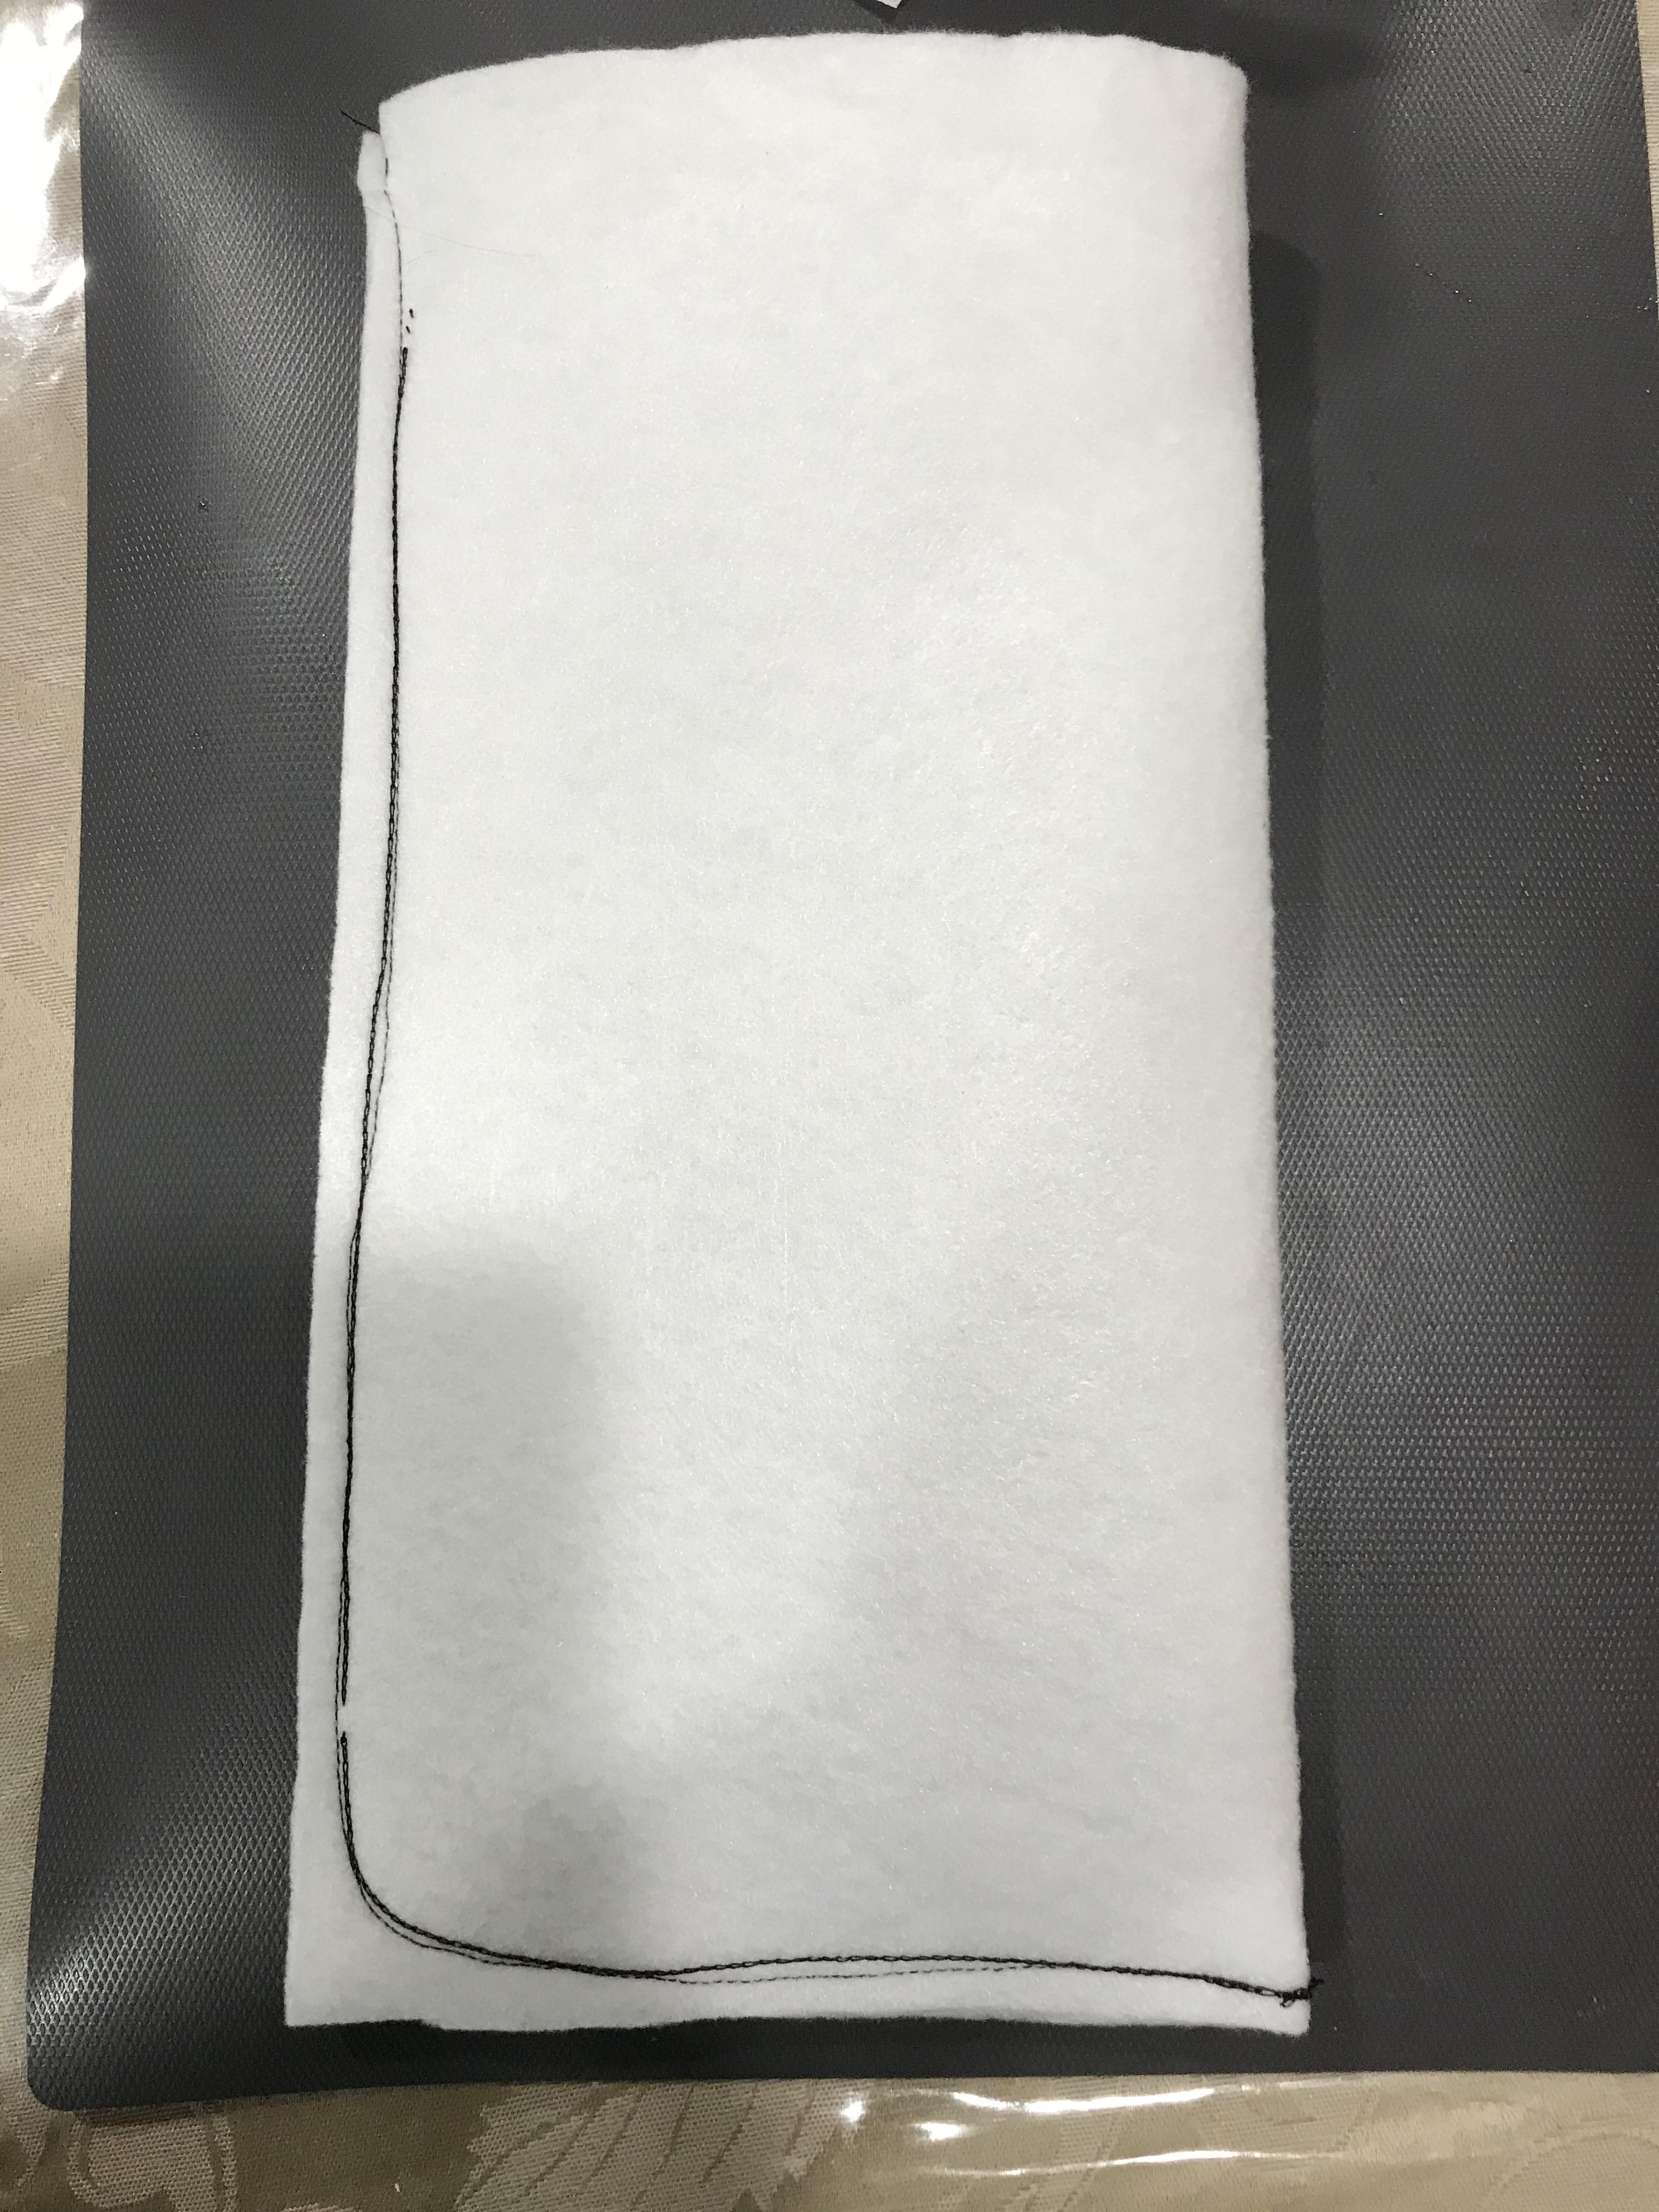
each yard of fabric is 72"x36". I cut them to 12"x12" square pieces. I don't even have to measure, just fold the 36" side into 3 equal parts and cut, then cut the 72" side to 6 equal parts. One yard yields 18 socks and enough to last me 3 months.

Then I sew by simply folding in half, and just saw the long side then the bottom then back to make a bag. That's it. (I am still using the handheld portable Singer sewing machine from when I posted years ago)
mhHj60l.jpg

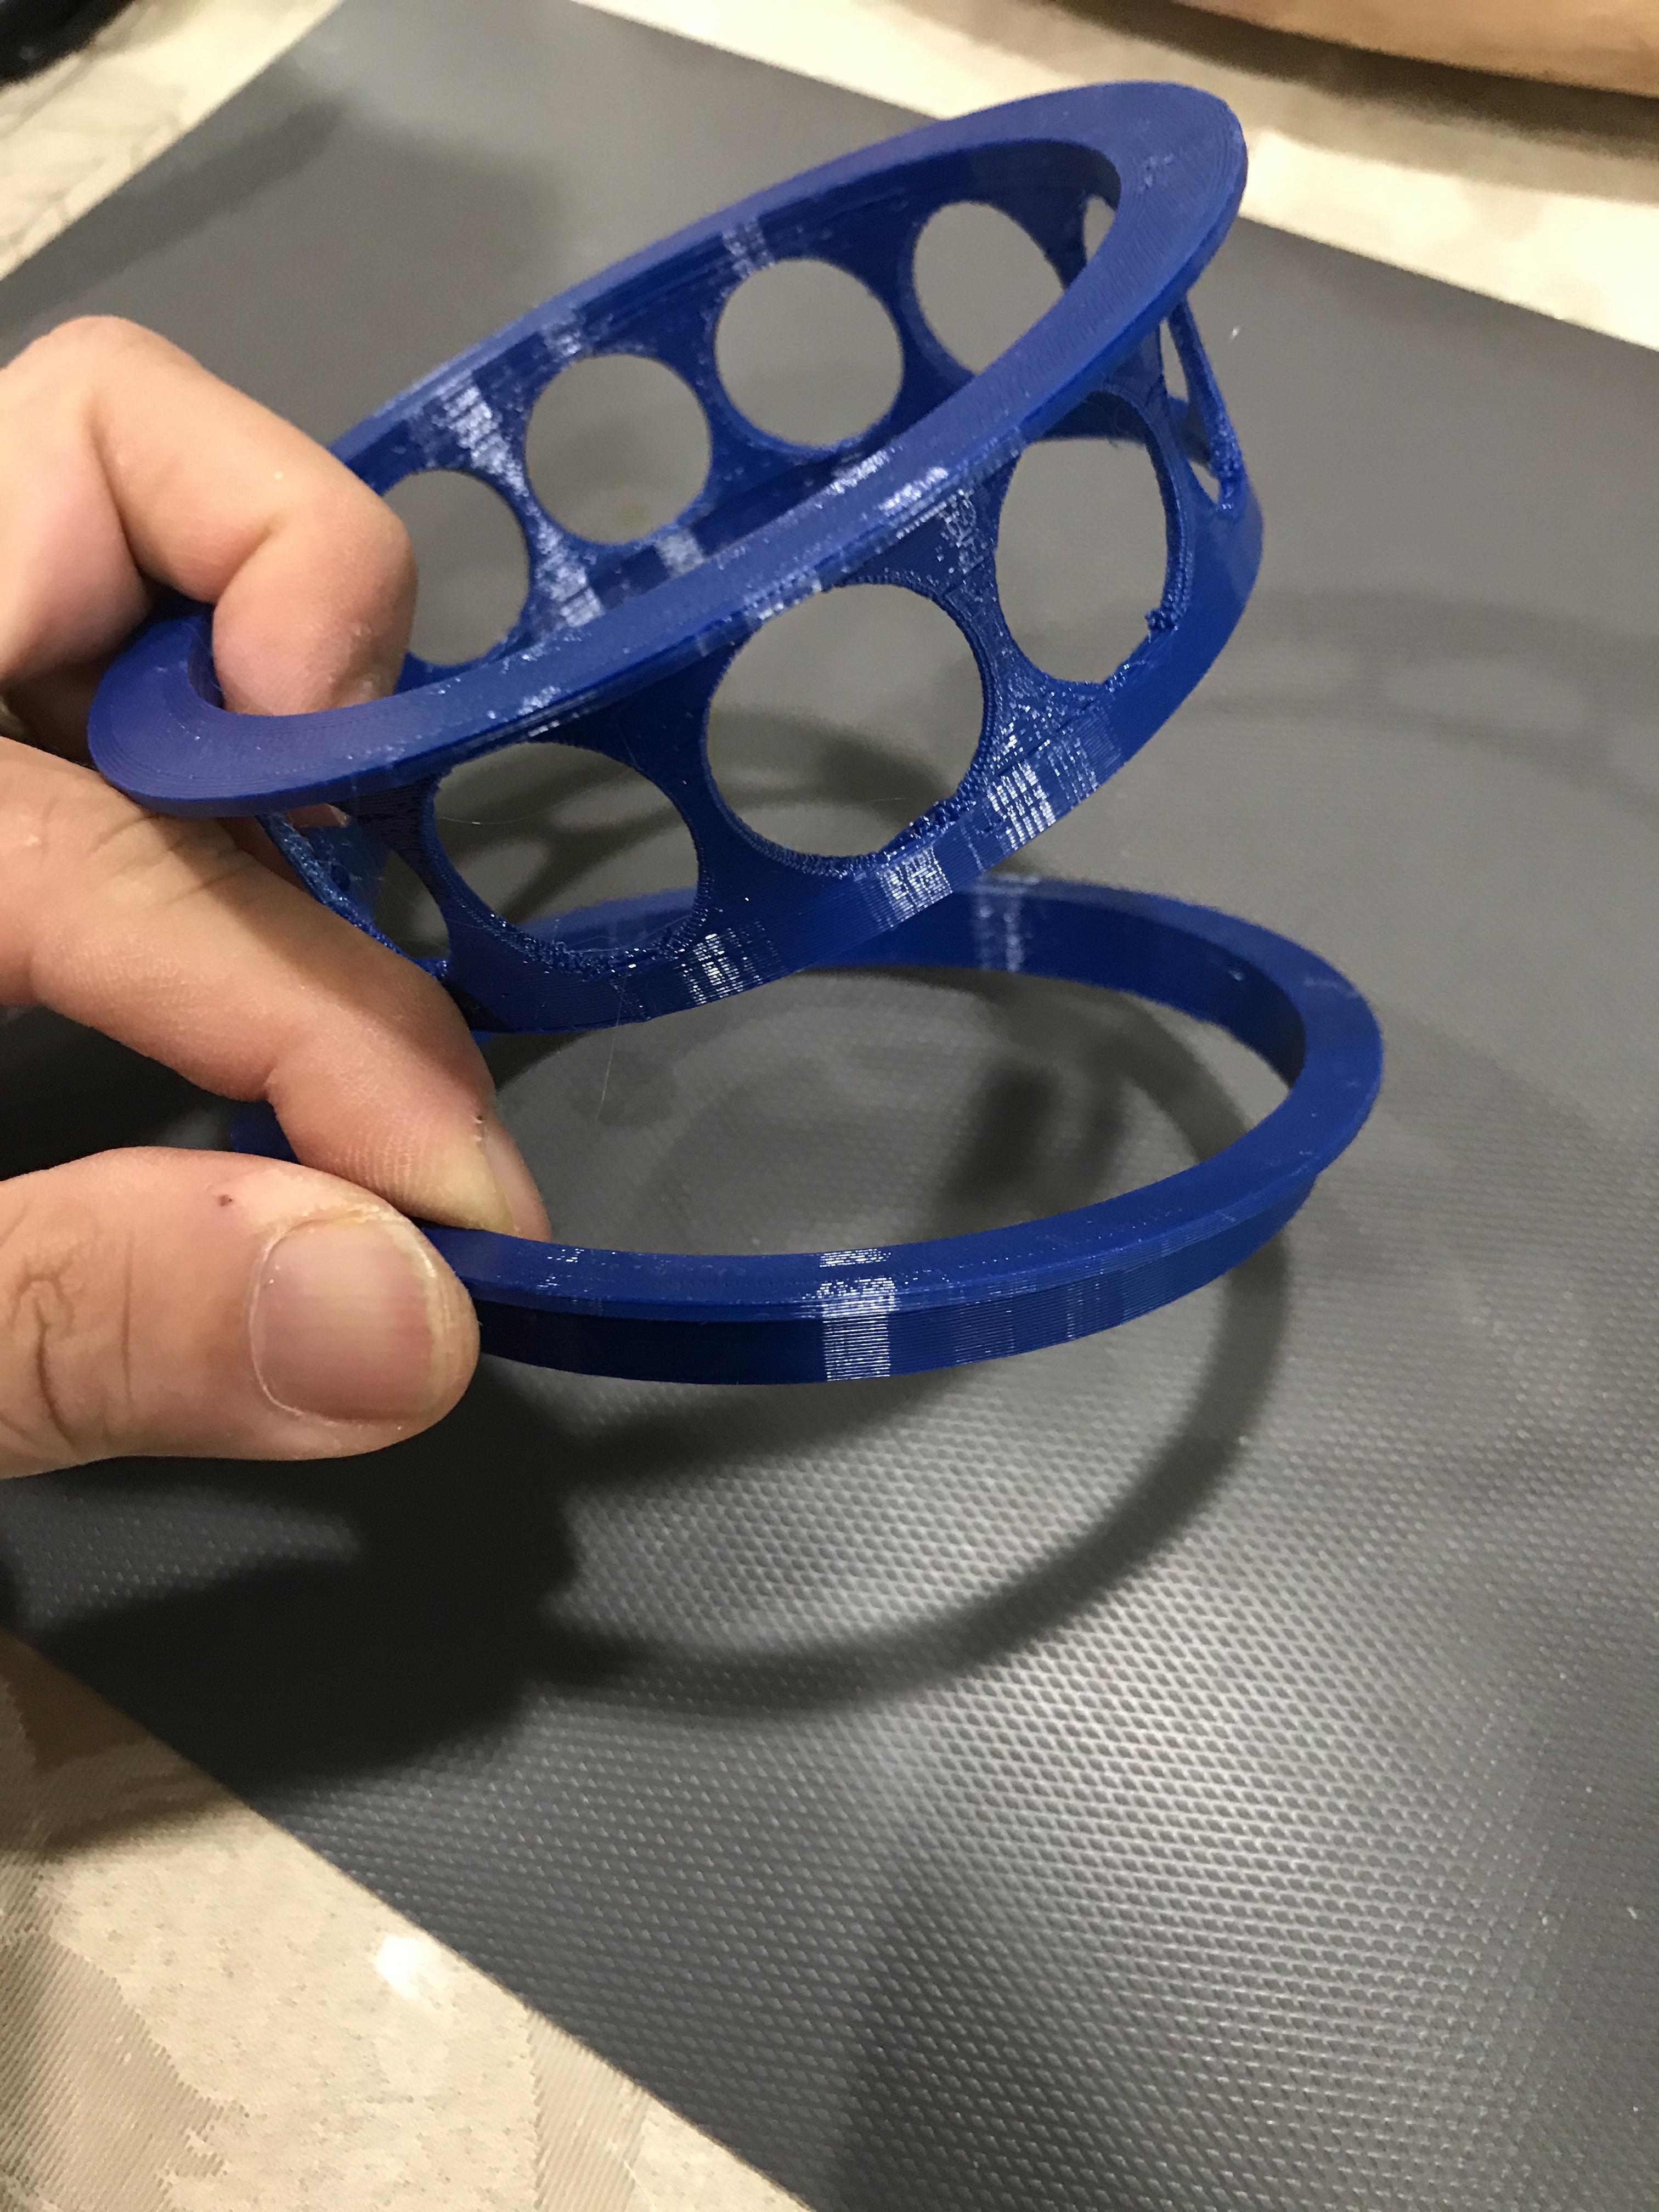
For the ring attachment, I use a 3D printed ring that I designed. Its extremely simple anyone can easily draw up the 3D file. The holes are not there for decoration. Its to minimize the filament used and reduce print time. Also when water level on sock starts to reach the top, water can still flow out the material through the holes. A put a lot of thought into this simple design.
C6whbRd.jpg

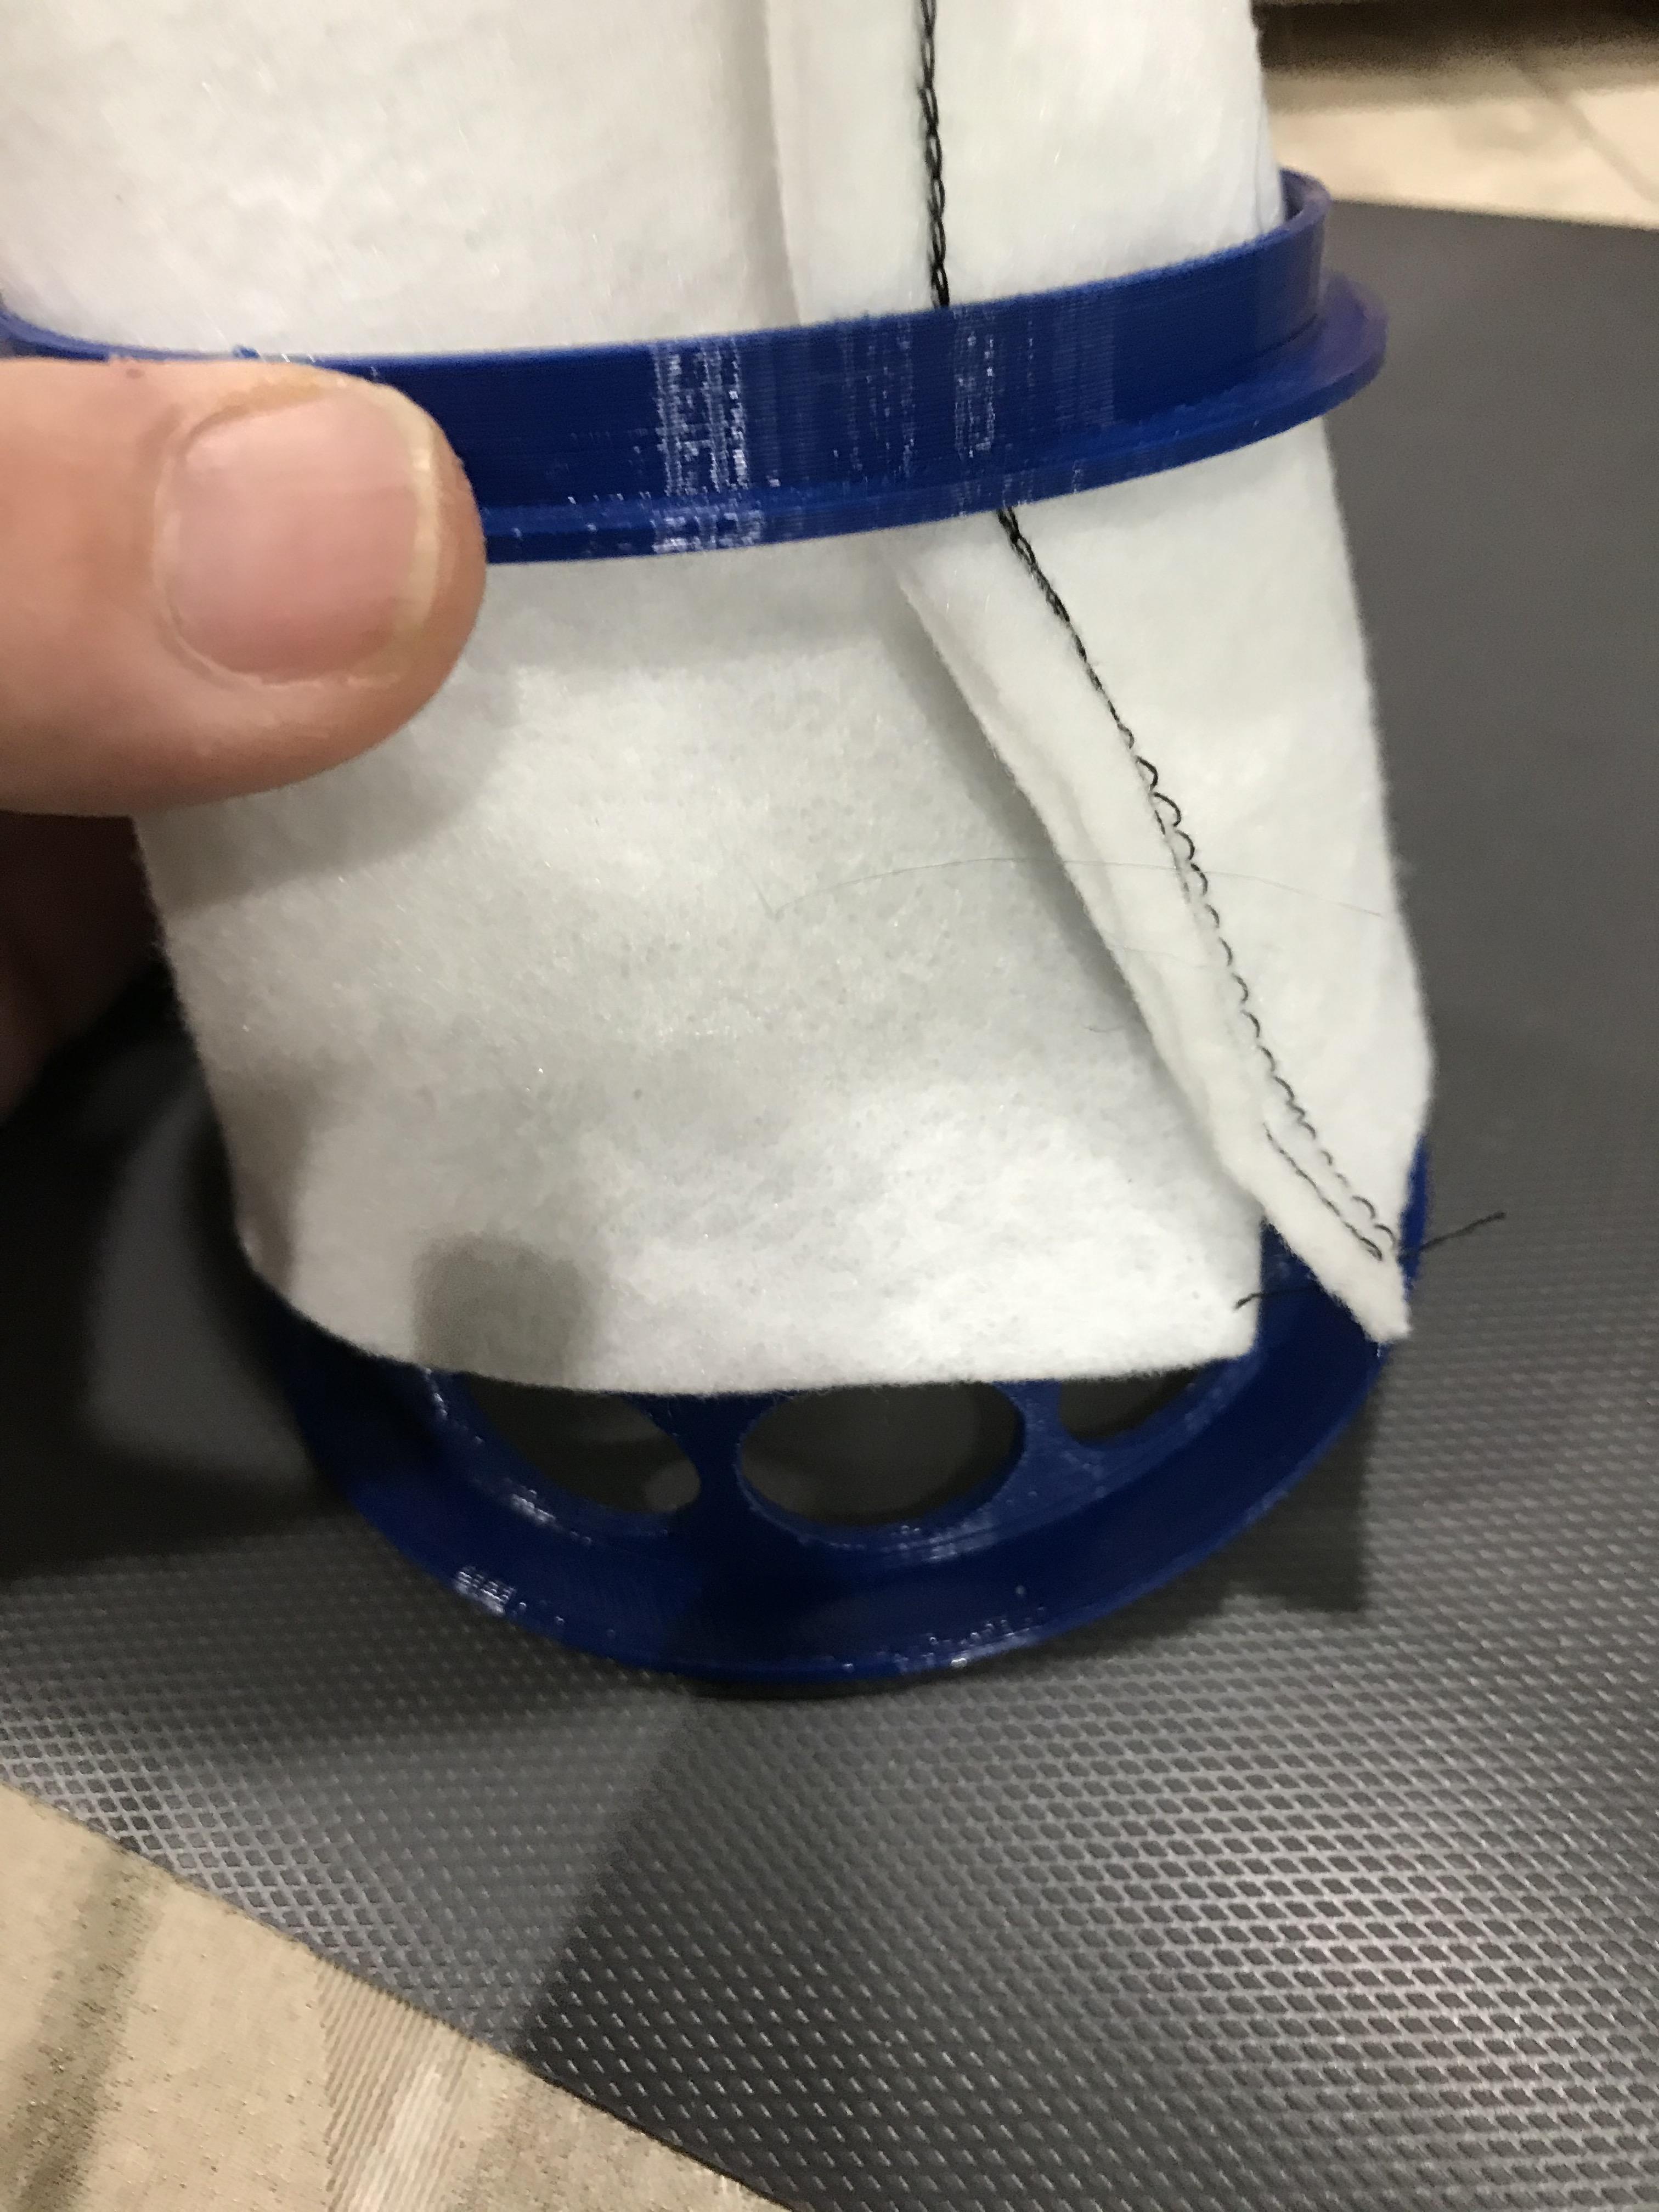
Its basically two rings, and the sock goes between the two rings. Larger ring goes outside the sock, smaller ring goes inside the sock, then press down.
g2LsQkC.jpg

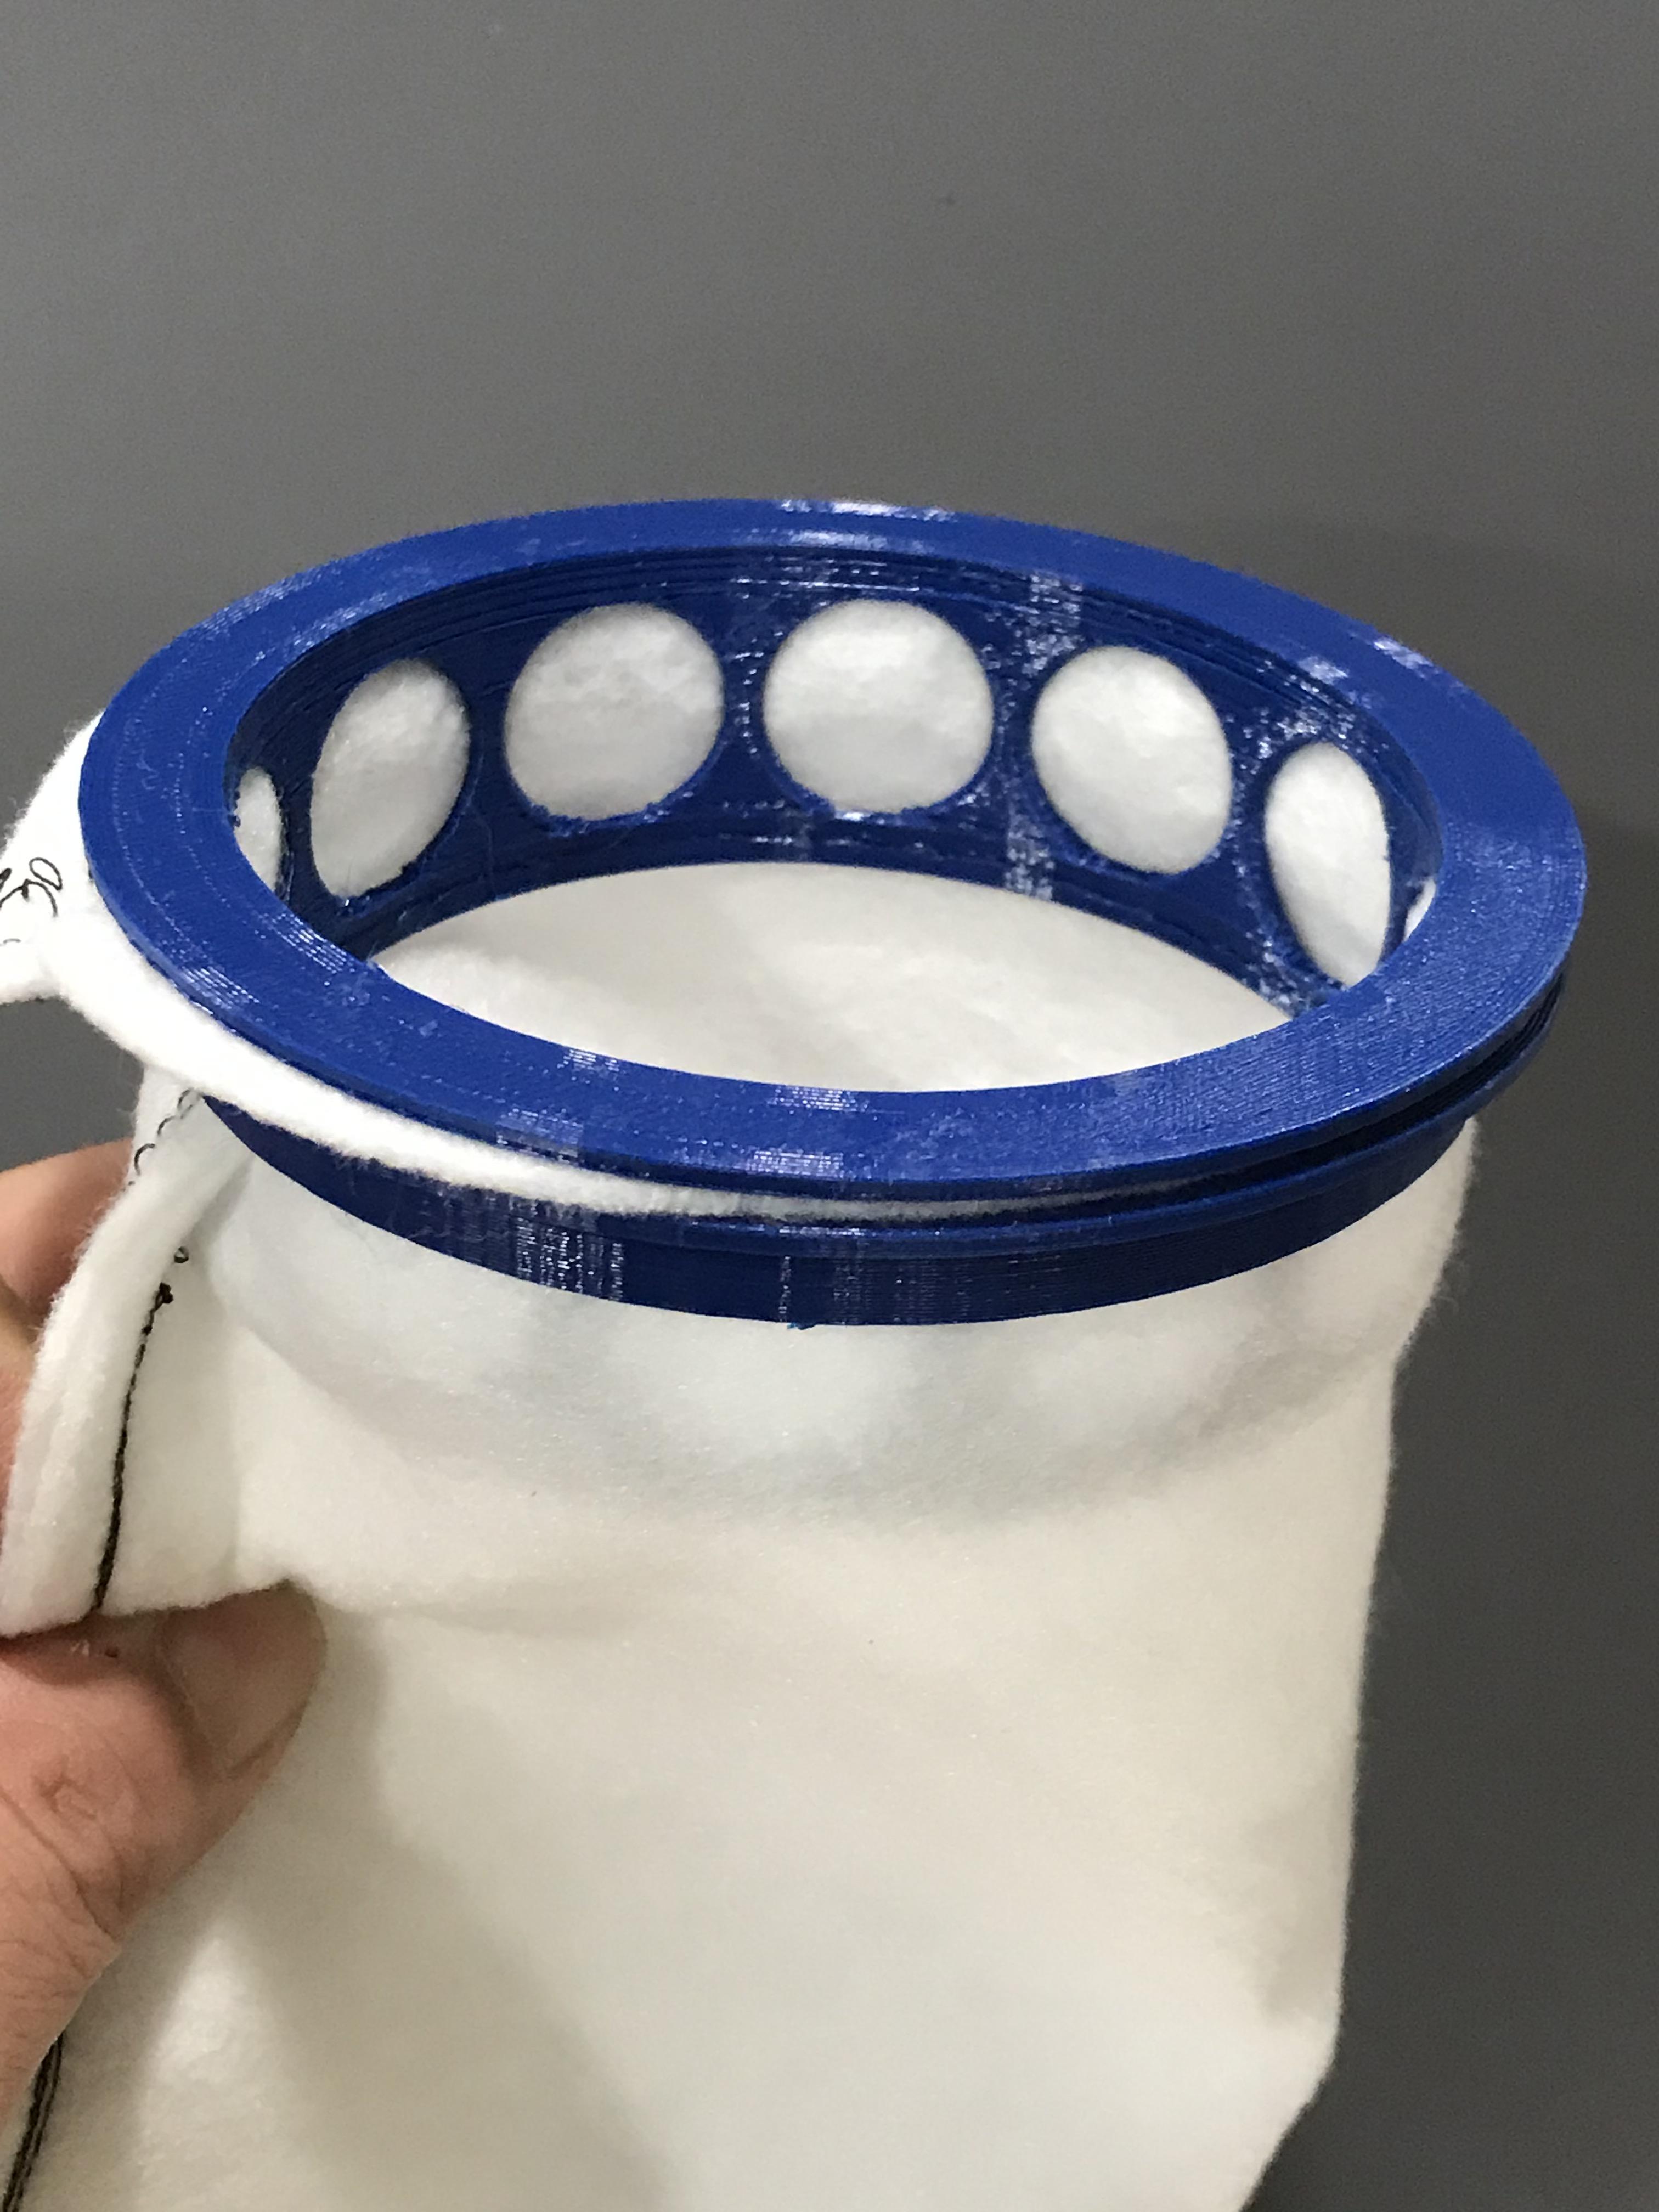
voila! DIY sock!
9ymGFMb.jpg


Print using PETG, as PLA softens in saltwater.
Hope this helps.

 
I've been doing this DIY sock about over 5 years now, and has over the years refined the sock so the cutting/sewing is absolutely down to a minimum, and the ring attachment is extremely easy and straightforward. I still use a brand new sock each time I change the sock and just toss out the used one.

This is for 4" sock (100mm for metric folks)
each yard of fabric is 72"x36". I cut them to 12"x12" square pieces. I don't even have to measure, just fold the 36" side into 3 equal parts and cut, then cut the 72" side to 6 equal parts. One yard yields 18 socks and enough to last me 3 months.

Then I sew by simply folding in half, and just saw the long side then the bottom then back to make a bag. That's it. (I am still using the handheld portable Singer sewing machine from when I posted years ago)
mhHj60l.jpg

For the ring attachment, I use a 3D printed ring that I designed. Its extremely simple anyone can easily draw up the 3D file. The holes are not there for decoration. Its to minimize the filament used and reduce print time. Also when water level on sock starts to reach the top, water can still flow out the material through the holes. A put a lot of thought into this simple design.
C6whbRd.jpg

Its basically two rings, and the sock goes between the two rings. Larger ring goes outside the sock, smaller ring goes inside the sock, then press down.
g2LsQkC.jpg

voila! DIY sock!
9ymGFMb.jpg


Print using PETG, as PLA softens in saltwater.
Hope this helps.

If you have the ring uploaded somewhere I can add it to the 3d print archive thread! We have a very active community of 3d printer enthusiasts here.
 
what a great idea. i never thought about doing this. i will give it a try thanks
 
For those of us without a sewing machine, is there a suitable glue that can be used to make these?
 
For those of us without a sewing machine, is there a suitable glue that can be used to make these?
I think there is a post in this thread that some1 used a small hand held sewing machine that uses 2 AA batteries. I was on EBAY the other month and i got a small sewing machine (because I couldn't find mine) $50+ i think
Screenshot_2020-10-26-03-39-05~2.png

This is similar to the one that I have
Screenshot_2020-10-26-03-15-29~2.png
 

ARE YOU READY TO CONFESS TO CRAZIEST, DUMBEST, FUNNIEST THING YOU’VE EVER DONE IN REEFING?

  • Yeah, I'll confess! (Share your story in the comments!)

    Votes: 17 56.7%
  • Nah, I'll keep mine a secret...(Don't be like that, share with the class!)

    Votes: 13 43.3%

New Posts

Back
Top
Home
Post thread…
Market
What's new