Keith's IM Nuvo EXT 100

coronarex

Active Member
View Badges
Joined
Sep 1, 2017
Messages
479
Reaction score
254
Location
Eastern Shore of Maryland
Rating - 0%
0   0   0
Hello all !!! Welcome to my first build thread! I am very excited to be writing this and sharing this epic journey with you all. I truly love the hobby and am always eager to learn more! I have been a saltwater hobbyist for almost 2 years now. I would have to say that I definitely went too fast into this hobby. When you go fast in this hobby, its just cost you money and time. Despite all of the struggles I have had in the hobby, I continue to learn and find success.

My plans with the EXT 100 are simple, get into SPS. I want a SPS dominated tank! I've had success in my 30 gallon growing SPS but I feel my success will be enhanced in a larger, more stable system. All of the struggles I experienced (stability) in the 30 gallon, I'm hoping are non-existent in the EXT 100.

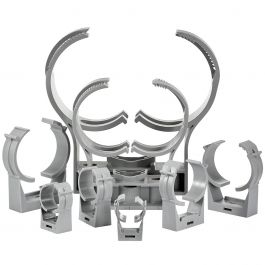
The tank does have a glass external overflow and will require plumbing, something that I know very little about. I have spent hours and hours learning about plumbing a reef tank and I feel prepared, kinda lol. I went with the new 30" Fiji cube per Adam from BRS. New to the #sumplife . Excited for all the benefits that having a sump provides. I also picked up a Varios 8. I am aware that its a overkill but after calculating head pressure, adding a manifold, and taking in to account the possibility of adding UV or a chiller in the future, I went big!!!

Let me know what you guys think! I could use your help!

What other equipment should I get?
Should I go barebottom??
How should I plumb the tank?? I like how BRS plumbed their 160 but thinks its a little too complicating. I was thinking of copying their style, just go with a minimalist approach. Thoughts??
And I know, lots of unions lol ;)

I'll be posting more. Also, give me a follow on IG @ keiths_reef

IMG_5084-1.jpg
IMG_5094-3.jpg
IMG_5095-3.jpg
IMG_5107.jpg
IMG_5110-1.jpg
IMG_5119.jpg
IMG_5124-1.jpg
IMG_5130-1.jpg
IMG_5131-1.jpg
IMG_5132-1.jpg
 
OP
OP
coronarex

coronarex

Active Member
View Badges
Joined
Sep 1, 2017
Messages
479
Reaction score
254
Location
Eastern Shore of Maryland
Rating - 0%
0   0   0
Started plumbing the tank tonight. Here are some pics of my progress. I am going to take it slow bc I have no idea what the heck I'm doing lol. It looks good though. Going complete the overflow than start on the return.
IMG_5170.jpg

IMG_5187.jpg
IMG_5188.jpg


Should I add another union here???? And should i glue the pipe to the sumps bulkhead?
IMG_5191.jpg
 
OP
OP
coronarex

coronarex

Active Member
View Badges
Joined
Sep 1, 2017
Messages
479
Reaction score
254
Location
Eastern Shore of Maryland
Rating - 0%
0   0   0
This is my plumbing as of right now. Nothing is glued as I’m still contemplating making changes. Things I’m thinkin about changing are as follows: raising the orientation of the return drains a few inches(3-4”), as well as the return, plumb the return 1” all the way to the “T” where it will be reduced to 3/4”, add a few 45s, and other things. These were suggesting a from many experienced hobbyist.

I'm really curious to see a video on Ryan from Brs’ plumbing. I’m sure it will be informative. Anyway, let me know what you guys think. I’m going to place an order for some additional plumbing supplies soon. Thanks Keith
ACE1204E-3DDD-46C0-BCCA-2B83F486E11F.jpeg
17B87E23-ECE6-4AD9-99B9-5218B3CE87BA.jpeg
 
OP
OP
coronarex

coronarex

Active Member
View Badges
Joined
Sep 1, 2017
Messages
479
Reaction score
254
Location
Eastern Shore of Maryland
Rating - 0%
0   0   0
Adding a VARIOS 2 to run independent of the return. Many hobbyist have said this is better, esp when adding a manifold. I will be using it to run the carbon and gfo reactors. Is it okay to have it in the return section or should I add it to the skimmer section? I was going to go dual return pumps but I think one is more simple. I want the plumbing to be clean. And I want to be able to place the lid on each section of the sump. If I have to drill a small hole I will but I’d like to avoid that.
0DFB96F4-2751-4C64-A564-155E3FBC87D6.jpeg
E271EB87-ECED-460A-AD13-CE34E02E0E08.jpeg
I’ll program the apex to notify me of any reduction in power from the single return. Plumbing should be completed in a few weeks
 

Ltlevil1

Active Member
View Badges
Joined
Jun 28, 2012
Messages
103
Reaction score
12
Location
Souteast Louisiana
Rating - 0%
0   0   0
You could run the Varios2 from the return section. Instead of drilling a hole in the sump you could notch or cope the sump cover at one of the corners to allow for pipe or hose to pass through. You could run silicone hose/tubing through the notched area up to piping at the top of the sump. You could run the piping across the top of the sump over to the reactors and then back down. The return lines could be run the same way. I have an INT50 with a Fiji15 sump and if you run the piping against the top (think attached to the cross brace) it is not visible from looking straight on. You can also use the cross-brace to attach whatever hanger mechanism you wish to use. While you are plumbing these, you might also consider adding an extra Tee and valve off of the Varios2 manifold. This can be used for a couple of things, later you may wish to add a UV sterilizer, calc reactor or just for general maintenance you can use it to pump water out. I see you have ball valves on your return lines, but you may want to consider a check valve. If you don't have one, the water will syphon back into the sump from the level that the return nozzles are located in the display, not just the overflow piping. There are pros and cons to the above suggestions, but in the end you have to decide what serves your plan the best and proceed accordingly. One other thing I did was install a leveling mat under the sump. This was more because I had an extra one, but I wouldn't put it back without the mat. It does two things, first is the obvious leveling, but it also makes a good splash protector/water barrier. If you haven't already, might want to check out Beananimal's page in regards to the overflow, in particular the height of the full siphon and primary returns below the water level. Another item you might want to consider is a cover for the sides of the overflow. Maybe have the accessible side removable so you can see if needed. This is just for aesthetics, so it's a matter of personal preference. Overall looks really nice, keep it up!
 

Mike Kearns

Active Member
View Badges
Joined
Apr 4, 2019
Messages
252
Reaction score
370
Rating - 0%
0   0   0
Great build thread so far. I subbed because I have been researching a new tank and this was one of the candidates. Happy to say I pulled the trigger and ordered it. Keep up the good work and know that you inspired at least one person with your thread.
 
OP
OP
coronarex

coronarex

Active Member
View Badges
Joined
Sep 1, 2017
Messages
479
Reaction score
254
Location
Eastern Shore of Maryland
Rating - 0%
0   0   0
You could run the Varios2 from the return section. Instead of drilling a hole in the sump you could notch or cope the sump cover at one of the corners to allow for pipe or hose to pass through. You could run silicone hose/tubing through the notched area up to piping at the top of the sump. You could run the piping across the top of the sump over to the reactors and then back down. The return lines could be run the same way. I have an INT50 with a Fiji15 sump and if you run the piping against the top (think attached to the cross brace) it is not visible from looking straight on. You can also use the cross-brace to attach whatever hanger mechanism you wish to use. While you are plumbing these, you might also consider adding an extra Tee and valve off of the Varios2 manifold. This can be used for a couple of things, later you may wish to add a UV sterilizer, calc reactor or just for general maintenance you can use it to pump water out. I see you have ball valves on your return lines, but you may want to consider a check valve. If you don't have one, the water will syphon back into the sump from the level that the return nozzles are located in the display, not just the overflow piping. There are pros and cons to the above suggestions, but in the end you have to decide what serves your plan the best and proceed accordingly. One other thing I did was install a leveling mat under the sump. This was more because I had an extra one, but I wouldn't put it back without the mat. It does two things, first is the obvious leveling, but it also makes a good splash protector/water barrier. If you haven't already, might want to check out Beananimal's page in regards to the overflow, in particular the height of the full siphon and primary returns below the water level. Another item you might want to consider is a cover for the sides of the overflow. Maybe have the accessible side removable so you can see if needed. This is just for aesthetics, so it's a matter of personal preference. Overall looks really nice, keep it up!
Thanks for your feedback. I really appreciate it. I definitely like your ideas regarding the varios2 setup. I plan on build some type of manifold w a couple t fittings and ball valves. I definitely what everything to be aesthetically pleasing. Not sure if I should go 3 ball valves or 2. I will not be installing check valves. I believe my sump I large enough as it is rated for up to 225 gal. In regards to the sump, I added a really thick and expensive piece of plywood along w a thin piece of foam board. I think I’m good there. I may add something to help with splashing though. Any products for that? About the overflow... what cover are you referring to? The overflow box is glass and comes with a black lid. The secondary and emergency drains come precut. Should I cut them more to help w the siphon? I will definitely check out that page. Thank you. More pics coming
 
OP
OP
coronarex

coronarex

Active Member
View Badges
Joined
Sep 1, 2017
Messages
479
Reaction score
254
Location
Eastern Shore of Maryland
Rating - 0%
0   0   0
Great build thread so far. I subbed because I have been researching a new tank and this was one of the candidates. Happy to say I pulled the trigger and ordered it. Keep up the good work and know that you inspired at least one person with your thread.
Happy you pulled the trigger Mike! You will love it. I’m going to go slow with this build as I’m enjoying my Nuvo 30. It’s on year 2 and started to look great. I’d def love to follow your build and copy some things you do :) Thanks Keith
 

SPS2020

Valuable Member
View Badges
Joined
Jun 24, 2020
Messages
2,277
Reaction score
5,118
Location
NC
Rating - 100%
1   0   0
My EXT 100 arrives on Tuesday, upgrading from a 36" 60 gallon setup. Just stumbled onto this thread and appreciate the posts!

Here is another build thread if you haven't seen it...custom stand though. I'll have the APS just like your setup.
 
OP
OP
coronarex

coronarex

Active Member
View Badges
Joined
Sep 1, 2017
Messages
479
Reaction score
254
Location
Eastern Shore of Maryland
Rating - 0%
0   0   0
My EXT 100 arrives on Tuesday, upgrading from a 36" 60 gallon setup. Just stumbled onto this thread and appreciate the posts!

Here is another build thread if you haven't seen it...custom stand though. I'll have the APS just like your setup.
Hey there! Im glad you found my thread. Not too long ago I was on AskBRS, insta, and on here looking for something to mimic. I Did find some inspiration. I have Also checked out that build thread. It is great!!! I love that he went with dual returns. He also mentioned the bean animal pipes being a smidge short and creating some noise. I have plenty of extra 3/4” pvc to cut if that’s the case. Another debate in the thread was which wavemakers to go with. I will be going barebottom and using MP40s. I’ll start with one and add as many as I need as the tank grows. What equipment do you plan on goin with?
 

SPS2020

Valuable Member
View Badges
Joined
Jun 24, 2020
Messages
2,277
Reaction score
5,118
Location
NC
Rating - 100%
1   0   0
:) Keep those posts and pics coming!

My plan:

Bare bottom. Been doing that for many years and like it. Had a DSB once, but breakdown is a PITA.

Hydor 2400 (single return with manifold). I may change my mind and go dual...or just have a spare on hand.

Random flow generator on each return. Use them now and like the performance.

JBJ 1\4 hp chiller off the manifold and going into one of the returns

Plumb for potential UV off manifold as well. Using a 24 watt Green Killing Machine now and it is awesome. I may drop that in the sump for the new build instead because it is so easy to maintain.

Two gyres (maybe the 4k or RedSea...big difference in price though); one on each side of the back wall so they blend in with the background. May go end-to-end if that doesn't work so well.

Two CoralPro RN-1's at the bottom on each side of the back wall near the bottom. Use these in reverse to blow all detritus into water column on a schedule.

4 AI Hydra 32HD's suspended from ceiling.

Trigger Systems Emerald 34 sump.

EuroReef CS6 protein skimmer...she's old, but works so well and easy to maintain.

Spectrapure Liter Meter for ATO (another oldie, but goodie).

Apex Neptune.

All schedule 80 plumbing

Minimalist aquascaping based on the rule of thirds.

I'm sure I'm forgetting something, but that is my high level plan. I'll have a build thread started soon.

Looking forward to seeing how yours progresses!!

Cheers!
 
OP
OP
coronarex

coronarex

Active Member
View Badges
Joined
Sep 1, 2017
Messages
479
Reaction score
254
Location
Eastern Shore of Maryland
Rating - 0%
0   0   0
:) Keep those posts and pics coming!

My plan:

Bare bottom. Been doing that for many years and like it. Had a DSB once, but breakdown is a PITA.

Hydor 2400 (single return with manifold). I may change my mind and go dual...or just have a spare on hand.

Random flow generator on each return. Use them now and like the performance.

JBJ 1\4 hp chiller off the manifold and going into one of the returns

Plumb for potential UV off manifold as well. Using a 24 watt Green Killing Machine now and it is awesome. I may drop that in the sump for the new build instead because it is so easy to maintain.

Two gyres (maybe the 4k or RedSea...big difference in price though); one on each side of the back wall so they blend in with the background. May go end-to-end if that doesn't work so well.

Two CoralPro RN-1's at the bottom on each side of the back wall near the bottom. Use these in reverse to blow all detritus into water column on a schedule.

4 AI Hydra 32HD's suspended from ceiling.

Trigger Systems Emerald 34 sump.

EuroReef CS6 protein skimmer...she's old, but works so well and easy to maintain.

Spectrapure Liter Meter for ATO (another oldie, but goodie).

Apex Neptune.

All schedule 80 plumbing

Minimalist aquascaping based on the rule of thirds.

I'm sure I'm forgetting something, but that is my high level plan. I'll have a build thread started soon.

Looking forward to seeing how yours progresses!!

Cheers!
Wow man that all sounds amazing. This will be my first BB tank. I plan on adding a manifold to run similar equipment. I have been playing with some fittings and will post a pic soon for feedback. I was actually thinking of using the RFG also. Maybe I can add them later.
Great idea w adding flow to the rear of the tank. I am thinkin of doing something similar. Especially after watching Jake Adams video. Great light choice. I will add AIs to my 30 if/when I take the Illumagic off. I think I’m going w a illumagic x90 and 2 48” Vitamini. That or Radions. Pics coming
 
OP
OP
coronarex

coronarex

Active Member
View Badges
Joined
Sep 1, 2017
Messages
479
Reaction score
254
Location
Eastern Shore of Maryland
Rating - 0%
0   0   0
Here are pics of the fittings I'm using to complete the return plumbing. Water will return from the 1 1/4" output/barbed fitting included with the Varios 8 > 1" soft tubing> 1" barb> 1" 90> 1" pipe> 1" ball valve" 1" pipe> 1" 90> 1" pipe> 1" T> 1" x 3/4" reducing bushing" 3/4" pipe>>>>>>>>>>>

I will post pics when complete.

In the other pics I have shown the manifold I built. What do you guys think? Im still figuring out placement. I think that will be the tricky part. I have a few ideas, which will require using some surface mounting clamps and drilling into the sump. What do you guys think of the # of valves? I think 3 valves is enough. Im thinking one for gfo/carbon and the other 2 for future additions. Maybe a UV, chiller, or Calrx.


Screen Shot 2020-07-12 at 4.46.26 PM.png
Screen Shot 2020-07-12 at 4.47.59 PM.png
Screen Shot 2020-07-12 at 4.48.14 PM.png
Screen Shot 2020-07-12 at 4.46.51 PM.png
Screen Shot 2020-07-12 at 4.47.08 PM.png
Screen Shot 2020-07-12 at 4.47.33 PM.png
 

SPS2020

Valuable Member
View Badges
Joined
Jun 24, 2020
Messages
2,277
Reaction score
5,118
Location
NC
Rating - 100%
1   0   0
You may want a valve before each return...especially if you decide to install a chiller. With an SPS dominant tank, you may find that you need a chiller to keep the temp swings in check. In my 65g build, I also stubbed out a ball valve for a future UV in addition to the chiller. Attached a couple of pics for reference. Overkill probably with the gate valves, versus ball valves, but I was not sure if fine tuning would be needed for UV or chiller flow.

These clamps are fantastic, but not sure how they would install on the APS stand...would require drilling.

Chiller barb return on right. Only one overflow on this guy. :-(

20200404_194906.jpg


Stubbed out for UV on left.

20200404_194921.jpg
 
Back
Top