Let’s Mix it Up! Designing and Using a Water Mixing Station

First-time Reefer

Community Member
View Badges
Joined
Apr 29, 2019
Messages
32
Reaction score
85
Rating - 0%
0   0   0
Finally finished my mixing station a couple months back, just now getting around to posting about it.

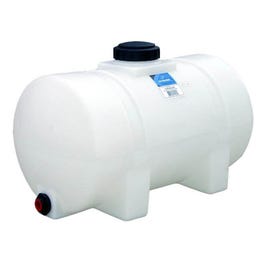
Two 25 gallon poly-tanks. Set up a pressure gauge on the discharge of the RO membrane and an in-line TDS meter for upstream and downstream of the filters. Top tank is fresh RO with a float valve. Out of that tank I have a 3-way valve. I can pull directly from the RO tank with the clear hose or gravity fill the saltwater tank (bottom tank). My mixing/distribution pump is a Jebao DCP-5000. I like it so far, but I've read mixed reviews about running these DC pumps. I still need to hook up the hose on my bypass to feed the display tank. Overall I'm happy with how it turned out.
20190524_211028.jpg
20190524_215041.jpg
20190524_215102.jpg
 

Michael Hull

Active Member
View Badges
Joined
Apr 18, 2019
Messages
180
Reaction score
142
Rating - 0%
0   0   0
My biggest question is on the transfer pump. I'll be probably 10' from mixing station to tank with about a 1' rise. Going to use 55gal containers. Recommendations for transfer pump?
 

Rich Klein

Active Member
View Badges
Joined
Nov 12, 2017
Messages
391
Reaction score
501
Location
San Jose
Rating - 0%
0   0   0
Thanks to many of your Posts I recently completed my Mixing Station, liberally stealing from all of your Ideas. I think that the only thing that I added was a center drain valve that helps me make sure that I don't contaminate my RODI tank water with remnants from the Salt Water in the pump path.

I built the stand out of 2x4s and 3/4 inch maple plywood. I wanted it high enough to be able to place buckets under each of the drains. I have a heater (with sensor) and a mixing pump in the salt water tank so that I can mix the water without running the large main pump (Octo 6) continuously.

85d5+Go5TxKoqB8gQHg3Dg.jpg
KgSFBruqT8agj%4xW8DboQ.jpg
qusSUWEwSqmx9kBae2GHGA.jpg
Dyt599v7S0GyhxxbYEE4pw.jpg
 
Last edited:
OP
OP
dbl

dbl

It Takes Less Energy to be Nice
View Badges
Joined
Mar 13, 2014
Messages
15,945
Reaction score
90,199
Location
SW Florida
Rating - 0%
0   0   0
Thanks to many of your Posts I recently completed my Mixing Station, liberally stealing from all of your Ideas. I think that the only thing that I added was a center drain valve that helps me make sure that I don't contaminate my RODI tank water with remnants from the Salt Water in the pump path.

I built the stand out of 2x4s and 3/4 inch maple plywood. I wanted it high enough to be able to place buckets under each of the drains. I have a heater (with sensor) and a mixing pump in the salt water tank so that I can mix the water without running the large main pump (Octo 6) continuously.

85d5+Go5TxKoqB8gQHg3Dg.jpg
KgSFBruqT8agj%4xW8DboQ.jpg
qusSUWEwSqmx9kBae2GHGA.jpg
Dyt599v7S0GyhxxbYEE4pw.jpg

@Rich Klein,

That's a great looking mixing station...very nicely done. I love the additional valve to flush the line. I just run mine with RODI water in the laundry sink until I can longer taste the salt...lol. Really good job sir.
 

MaddyP

'Til Reefdom Come...
View Badges
Joined
Jul 21, 2016
Messages
1,907
Reaction score
4,530
Location
Vancouver, WA
Rating - 0%
0   0   0
Hey @MaddyP, how has this setup gone for you. I'm almost sold on it in terms of simplicity, just wanted to get your feedback after using it. I plan on just doing continuous AWC's and want to limit complication, given that my saltwater station will be inside my house. How has the set up of the pipes in the mixing station gone? As you have quite a large pump running it, I assume there is plenty of flow to move the water to mix the salt as opposed to other builds that have the pipe coming in from the top?
Also, what was the CAD / Software you used for your tank design, notably this pic?
Hi @Daniel76, I loved this setup! In fact, when I set up a large tank in the future there will be many automated valves installed throughout the system. And yes, the pump was plenty strong enough to keep the saltwater tank mixing properly, this was actually a concern since the return line didn't go the top of the container.

There is more information on this setup in my build thread, even a video of the mixing station in action.


I believe that CAD work was done in Spaceclaim. I don't remember for sure as I use both Spaceclaim and Fusion360, both are great.
 

Hal3134

Active Member
View Badges
Joined
Mar 26, 2018
Messages
466
Reaction score
308
Location
Longmont, CO
Rating - 0%
0   0   0
I've noticed that many/most setups elevate the two storage tanks. I understand this when you are using a gravity drain into a bucket, for example. Why do people do this when they have a pump attached to the tank output and don't need a gravity drain?
 
OP
OP
dbl

dbl

It Takes Less Energy to be Nice
View Badges
Joined
Mar 13, 2014
Messages
15,945
Reaction score
90,199
Location
SW Florida
Rating - 0%
0   0   0
I've noticed that many/most setups elevate the two storage tanks. I understand this when you are using a gravity drain into a bucket, for example. Why do people do this when they have a pump attached to the tank output and don't need a gravity drain?

I won't speak for everyone, but I did it for the inevitable day when the pump fails or your power is out (in my case due to a hurricane) and you need some water.
 

Ikserk

Community Member
View Badges
Joined
Aug 20, 2013
Messages
60
Reaction score
45
Location
Minnesota USA
Rating - 0%
0   0   0
I've noticed that many/most setups elevate the two storage tanks. I understand this when you are using a gravity drain into a bucket, for example. Why do people do this when they have a pump attached to the tank output and don't need a gravity drain?

My reasoning was the bonus of being able to fully drain with gravity, but also so that the containers were not sitting on the cold basement concrete floor
 

BZOFIQ

2500 Club Member
View Badges
Joined
Jul 31, 2014
Messages
4,715
Reaction score
4,011
Location
NYC
Rating - 100%
9   0   0
I've noticed that many/most setups elevate the two storage tanks. I understand this when you are using a gravity drain into a bucket, for example. Why do people do this when they have a pump attached to the tank output and don't need a gravity drain?

I'm doing that to lift it off the basement floor and it gives me 4" of storage underneath for storage of hoses etc. Not sure why someone would need it high.
 

BZOFIQ

2500 Club Member
View Badges
Joined
Jul 31, 2014
Messages
4,715
Reaction score
4,011
Location
NYC
Rating - 100%
9   0   0
Side question: how long have you kept your RODI water in storage container before you deem it unusable?
 
OP
OP
dbl

dbl

It Takes Less Energy to be Nice
View Badges
Joined
Mar 13, 2014
Messages
15,945
Reaction score
90,199
Location
SW Florida
Rating - 0%
0   0   0
Side question: how long have you kept your RODI water in storage container before you deem it unusable?

As long as it's sealed well, it should last quite a while. You can always use a handheld TDS meter to test it if you're unsure. I always have 55 gallons at hand at all times and "some" portion of it has to be old since I never use all of it at once. :)
 

vetteguy53081

Well known Member and monster tank lover
View Badges
Joined
Aug 11, 2013
Messages
92,286
Reaction score
204,084
Location
Wisconsin -
Rating - 100%
14   0   0

Let’s Mix it Up!

There is one undeniable fact in this hobby – WE ALL NEED WATER! In fact, two types of water. Clean fresh water (FW) run through a quality RODI system and the obvious saltwater (SW). Secondly, we all know what a water change is. This is not an article on whether or not water changes are required or necessary, nor is it an article to discuss frequency. Your research and ultimate reefing philosophy will determine those answers for you.

Water changes can be done using something as simple as a 5 gallon bucket. If that is how you currently do it, and you’re okay with that, you can stop reading and move on. But if you’re looking for something a little more formal, and might I add potentially easier, you may want to continue reading. I’ll try not to bore your too much!

My personal goal was to never lift another bucket again…simple as that. So I started searching the internet for ideas. Between Google, forums, Yourtube and Mytube, I quickly realized I didn’t need to recreate the wheel. There is a plethora of designs out there to choose from…pick one. Remember, imitation is the highest form a flattery!

The most critical component of making water is obviously the RODI unit. All I will say is, if you don’t have one yet, get one! I am of the opinion that having control of your water is vital. Making your own (nothing against LFS’s, I love mine) is about the only way to insure you know the exact quality of your water.

The Equipment

Subject to the design you choose, here’s a simple breakdown of what you will and/or may need:

  • RODI unit you already have or will be buying (hint-hint)
  • A shut-off valve and float switch – no flooding necessary!
  • Water storage containers with lids – two of them preferably
    • One for FW, and one for new SW
    • These should be food-grade quality containers, preferably they will be NSF Approved
    • Size determined by your needs/system capacity
    • The grey Brute trash cans are very common and often used
    • Although more costly, the water storage containers found online and in farm supply stores work nicely as well
  • Plumbing
    • I like to use good old PVC (we usually have some laying around anyway right)
    • Ball valves, T’s, Elbows and Unions
  • Connections – Plumbing in to container walls and/or tops
    • Bulkheads for flat surfaces
    • Uniseals for curved surfaces
  • Pump for mixing
    • If designed properly, you can use one pump for mixing and distribution
  • Powerhead and Heater – resides in the SW container
  • A switched Power strip for easy control (optional)
  • Hose long enough to reach your display/sump/top-off reservoir
    • Or if you have the ability to hard plumb to your display, even better.
The Location

Obviously this will be unique to your environment. My biggest suggestion is in a controlled environment, meaning it’s heated and/or cooled depending on your climate. If you’re lucky enough to have a fish room, then it’s pretty obvious! If not, then maybe it’s a spare closet, the laundry room, the garage or basement may work if temperatures are at least somewhat stable. Note: Garages and basements, particularly non-insulated ones, can cause issues with RODI unit production during extreme temperatures, so choose your space wisely.

You may have to get creative. In my case, my wife wanted me to redo the foyer. Through intense negotiations (which I rarely win) I was able to commandeer the coat closet that had become the dumping grounds for all things junk. I took that space, which happened to back to our laundry room. So she got a new foyer and I got the perfect spot for a mixing station. Use your creativity and you’ll be surprised what you can come up with.

One thing you do have to keep in mind is access to water supply and drainage. That RODI unit you already had or will be getting soon (hint-hint) doesn’t come with its own water! That’s why a laundry room works great. You’ll have both the supply and drain for the washing machine right there at your disposal.

The Assembly

By now, you should have already flattered someone by using their design, but here is a breakdown of the basics. To try to make this easier, the image below is a picture of mine just after setting it up. I’ve labeled things and will refer to this image moving forward.

3.jpg

You can see my RODI unit mounted above. The lettered items are “equipment” and the numbered items are “valves”. This is merely for reference and by no means the only (or best for that matter) way of putting together a mixing station.
The main idea of doing all this is to mix and move water, so at a minimum, your new mixing station should be able to:
  • Transfer water between containers
  • Pump/circulate water within the SW mixing container for well, mixing!
  • Pump both FW and SW to the display and/or top-off reservoir.
  • You will want to be able to empty the containers in case of prolonged power outage or a visit from Mr. Murphy - the inevitable pump failure.
In both containers, you’ll need a connection towards the bottom. In the SW container, you’ll also want one towards the top of the container. This will allow circulation within the container for mixing. Your containers will determine how this accomplished – uniseal or bulkhead.

The Operations – (Using the picture above for reference)

Your RODI system will produce FW and be stored in the first container A. You will use this FW for top-offs, as well as supply your second container B with water that will become your new SW after mixing. With this design, and the turning of a few valves, pump C does all the work. Said differently, no more buckets!!! So let’s move some water:

For discussion purposes, assume all valves are closed (like pictured) at the beginning of each task – represented by numbered items below. I would recommend closing all valves at the end of any task to lessen the chances of cross-contaminating the FW and SW. You will also need a hose with a ball valve on the output end. Again, if you can hard plumb to your display/sump/ATO reservoir, all the better.

  1. Move FW to top-off reservoir in the stand under display (in my case)
    • Attach hose to the outlet of valve 2 (there is a hose bib converter on the end of that valve)
    • Open valves 2 and 4, turn on pump C to fill reservoir via hose
  2. Move FW to the SW container Bfor mixing
    1. o Open valve 1 and valve 4, turn on pump C to pump over to container B.
  3. Mixing new SW
    • o Put salt into container B
    • o Open valve 1 and valve 3, turn on pump C and begin mixing salt via circulation
    • Editor Note: In my case, I built a shelf over my mixing station, so I purchased the hopper D to add salt. Totally unnecessary if you have access to the top of your container.
  4. Move SW to Display for Water Change
    • Open valves 2 and valve 3, turn on pump C to pump SW to display via hose
  5. Empty Containers without pump due to power outage or visit from Mr. Murphy
    • Attached hose to end of either valve 5 or 6, and open the valve. Gravity will do its thing
Heating:

I have a heater inside container B. I only heat just prior to using the SW. Some will argue this is not necessary dependent on the quantity of your water change, which may very well be true. But since I have the heater already, I just try to match the display.

Water Storage and Continued Mixing:

This is another area of debate among hobbyists. We’ve all seen the threads asking “How long can I keep mixed saltwater?” And “Should I keep it mixed”. There are far too many choices/options to discuss here. Me personally, I mix up about 50 gallons at a time. I mix and heat just prior to performing a water change.

When it comes to storing your RODI water, the important factor is to keep it sealed as tightly as possible. Very simply put, RODI water has been stripped of all things bad, and if allowed, it will try to grab those bad things back! So an air tight lid is best and no stirring necessary.

Over time your containers interior may build up some nasty’s and need to be cleaned. An annual cleaning (or more often if necessary) is recommended – let vinegar be your friend.

Extras

You may have noticed on my station a couple things under the RODI unit. In addition to a powerhead and heater, I also have a salinity monitor and thermometer inside the SW container. I didn’t want to drill a hole in the lid, so I came up with this.
4.jpg
Are there fancier ways of doing this, sure? Did I have this stuff already lying amongst my fish stuff, heck yes! It works great and is essentially air tight once the uniseal is capped with the PVC. Lastly, although I do not have a picture, all the interior items in my SW container are zipped tied to a long piece of PVC that rests inside the container. So if need be, I can pull that one piece of PVC out and bring all the equipment with it. That is the one thing I thought of myself!!!

Let your imagination run wild with one goal in mind…what you can do to make things easier on yourself. This hobby can be difficult enough on its own. Something as simple as a well-designed mixing station can make your weekly/bi-weekly/monthly/whenever water changes a little easier.

I hope this has helped at least give you an idea of the what’s and how’s of a mixing station. Don’t be afraid to put yours together. Having control of the water quality will be something you will never regret. Never lifting another bucket isn’t bad either.

Happy Reefing!
Very well versed and illustrated
 
OP
OP
dbl

dbl

It Takes Less Energy to be Nice
View Badges
Joined
Mar 13, 2014
Messages
15,945
Reaction score
90,199
Location
SW Florida
Rating - 0%
0   0   0
I would be in the not category. Personally, I don't think I could trust any system, regardless of the number of failsafes, in fear that if something went wrong, 55 gallons is going to make a mess of things. :(
 

don_chuwish

Smells something fishy
View Badges
Joined
Mar 21, 2012
Messages
3,013
Reaction score
3,387
Location
A better place
Rating - 0%
0   0   0
I would be in the not category. Personally, I don't think I could trust any system, regardless of the number of failsafes, in fear that if something went wrong, 55 gallons is going to make a mess of things. :(
Agreed, and yet it is so tempting. I could gravity feed from mine!
 

stanleo

Valuable Member
View Badges
Joined
Jan 11, 2014
Messages
1,508
Reaction score
1,976
Location
Statesville, NC
Rating - 0%
0   0   0
@dbl , I am building a fish room and currently designing a mixing station and I am trying to find the storage containers for the water. I think these are right but they don't have a picture of them. Will they work?


Tentacled trailblazer in your tank: Have you ever kept a large starfish?

  • I currently have a starfish in my tank.

    Votes: 24 30.4%
  • Not currently, but I have kept a starfish in the past.

    Votes: 17 21.5%
  • I have never kept a starfish, but I hope to in the future.

    Votes: 21 26.6%
  • I have no plans to keep a starfish.

    Votes: 17 21.5%
  • Other.

    Votes: 0 0.0%
Back
Top