On the eve of my tank build, I’m getting all of the goodies together and I’ve realized... wow this hobby is expensive

I started to comb through my pictures of the stand assembly and thought, this would be a great time to document this somewhere and maybe help someone out in their journey...


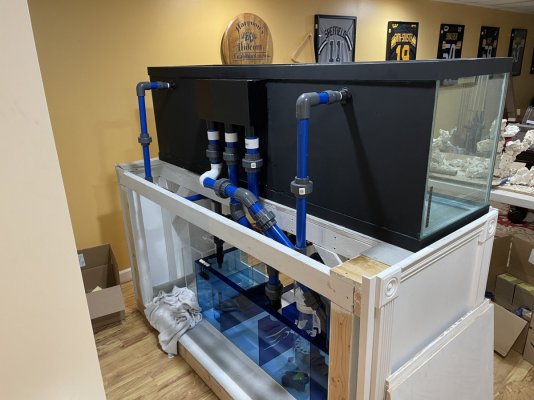
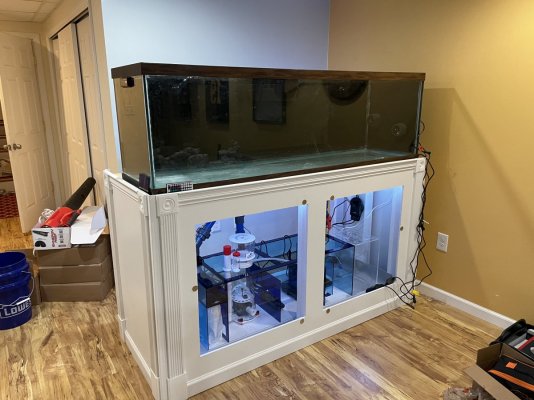
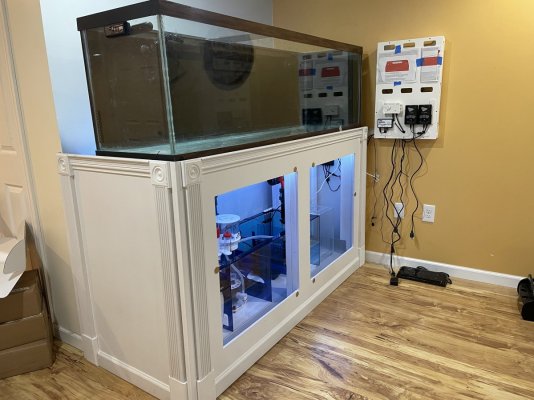
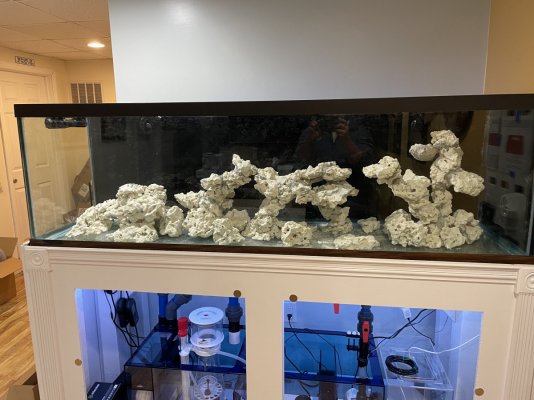
The stand was built with 4x4s at the corners of where the tank will be and 2x4s as the bracing additional vertical supports. The main portion of the stand that will hold the tank is built to size of the tank ~74” long and 18” wide, but I built the back of the stand a bit wider so I can drop down my plumbing and put 2x4s laterally that will be screwed into the studs of the wall for additional support. It’s built pretty tough. I wrapped the stand in 1/2” cabinet plywood and put several coats of Kilz exterior paint on it to seal the wood from the humidity of the sump. I then trimmed it out and painted it white to match the rest of the stand but I don’t have a photo of the trim painted. I plan on trimming out the door opening cuts and attaching the earth magnets to make it a pretty seamless process of opening and sealing the stand. I have drawn out plans of the stand and a full material list if anyone is interested.


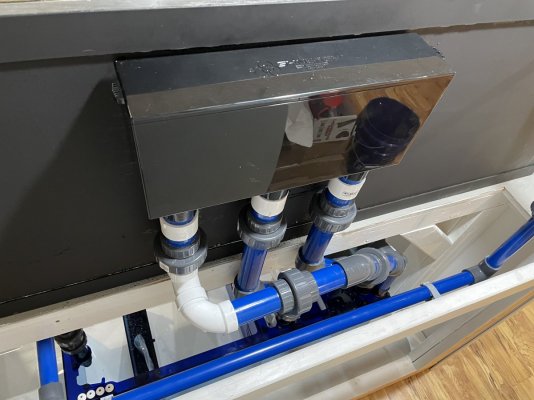
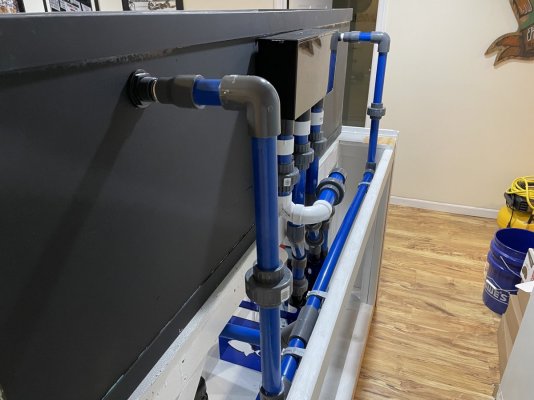
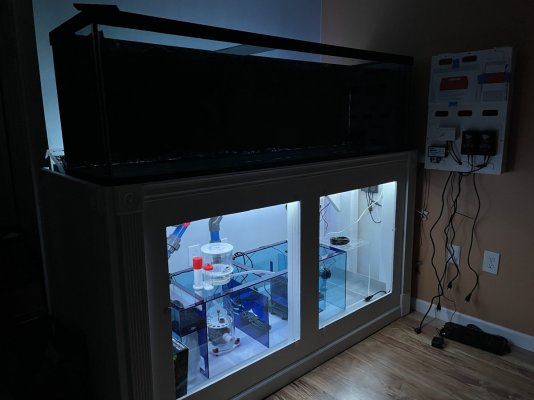
The tank itself is a 125g (72”x18”x23”) glass tank that I drilled for the Synergy Reef ghost overflow. It was super stressful to think about drilling it but when it was all said and done, it was easy and now every piece of glass I see, I want to put holes in it... I feel like a glass drilling expert! Don’t be afraid of drilling glass...


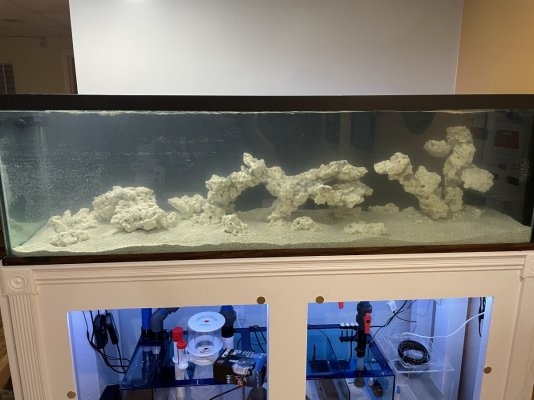
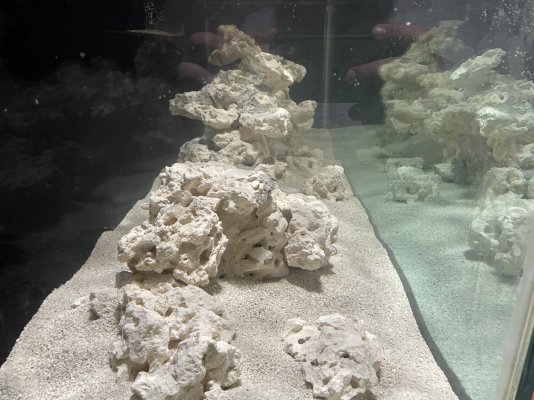
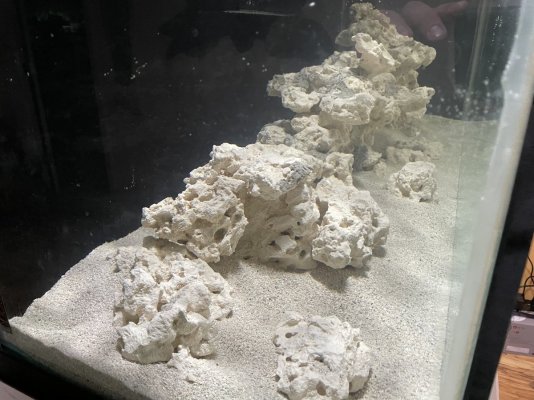
I ordered about 100lbs of reef saver dry rock and smashed it all up to make a Negative Space Aquascape. It was so backwards to think about smashing up my brand new rock but after it was all glued and mortared together, I was really glad I did this. The scape will allow for a ton of flow throughout the scape and leaves me with a TRULY UNIQUE scape that’s one of a kind. I did safe a few pounds of the dry rock (not smashed) to add to the base of my two structures and to create another small couple of islands.
Im planning on keeping a mixed reef thats SPS dominant so I didn’t want to build the scape too high to allow for coral growth but also give me plenty of places to put sticks. I do have a few cool shelves and spots for a few softies as I really do like to see some movement to breakup all of the stagnant SPS coral.
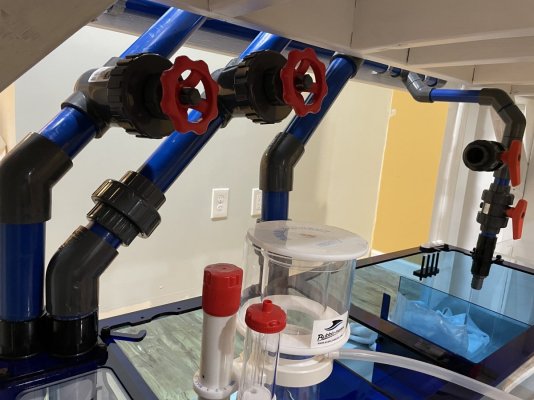
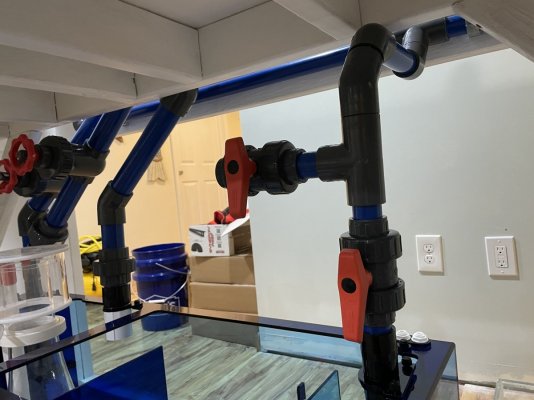
I am going to put the tank on the stand this weekend and plumb it out. I’ll post some more photos when it’s complete and water tested. After that will be figuring out a canopy design that will house my T5 LED hybrid light fixture that will have (4) T5 bulbs and (2) AI Hydra 64’s. I figured I have a few weeks of lights off cycling to figure out the canopy situation.
Overall this has been an AWESOME time building this tank for my first venture into saltwater. I’ve kept freshwater tanks for over 15 years and frankly, I may start breaking down some freshwater tanks and transition them into salt. I’ve got the reef bug!
I started to comb through my pictures of the stand assembly and thought, this would be a great time to document this somewhere and maybe help someone out in their journey...
The stand was built with 4x4s at the corners of where the tank will be and 2x4s as the bracing additional vertical supports. The main portion of the stand that will hold the tank is built to size of the tank ~74” long and 18” wide, but I built the back of the stand a bit wider so I can drop down my plumbing and put 2x4s laterally that will be screwed into the studs of the wall for additional support. It’s built pretty tough. I wrapped the stand in 1/2” cabinet plywood and put several coats of Kilz exterior paint on it to seal the wood from the humidity of the sump. I then trimmed it out and painted it white to match the rest of the stand but I don’t have a photo of the trim painted. I plan on trimming out the door opening cuts and attaching the earth magnets to make it a pretty seamless process of opening and sealing the stand. I have drawn out plans of the stand and a full material list if anyone is interested.
The tank itself is a 125g (72”x18”x23”) glass tank that I drilled for the Synergy Reef ghost overflow. It was super stressful to think about drilling it but when it was all said and done, it was easy and now every piece of glass I see, I want to put holes in it... I feel like a glass drilling expert! Don’t be afraid of drilling glass...
I ordered about 100lbs of reef saver dry rock and smashed it all up to make a Negative Space Aquascape. It was so backwards to think about smashing up my brand new rock but after it was all glued and mortared together, I was really glad I did this. The scape will allow for a ton of flow throughout the scape and leaves me with a TRULY UNIQUE scape that’s one of a kind. I did safe a few pounds of the dry rock (not smashed) to add to the base of my two structures and to create another small couple of islands.
Im planning on keeping a mixed reef thats SPS dominant so I didn’t want to build the scape too high to allow for coral growth but also give me plenty of places to put sticks. I do have a few cool shelves and spots for a few softies as I really do like to see some movement to breakup all of the stagnant SPS coral.
I am going to put the tank on the stand this weekend and plumb it out. I’ll post some more photos when it’s complete and water tested. After that will be figuring out a canopy design that will house my T5 LED hybrid light fixture that will have (4) T5 bulbs and (2) AI Hydra 64’s. I figured I have a few weeks of lights off cycling to figure out the canopy situation.
Overall this has been an AWESOME time building this tank for my first venture into saltwater. I’ve kept freshwater tanks for over 15 years and frankly, I may start breaking down some freshwater tanks and transition them into salt. I’ve got the reef bug!