Nolan Shinn

Active Member
View Badges
Joined
Oct 17, 2016
Messages
188
Reaction score
301
Location
Seattle
Rating - 0%
0   0   0
Hey gang!
I moved out of my apartment to a house in Seattle, so The Apartment Reef has been disassembled. On the bright side, the new house has a semi-finished basement, so I’m back in the big tank game!

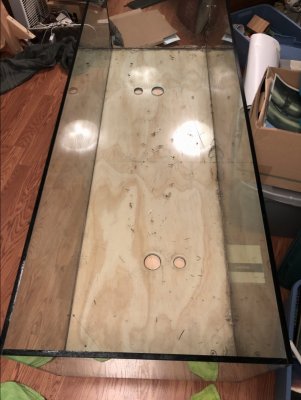
The new (to me) tank is a centerdrilled 150gallon tank I picked up from a nearby guy on Facebook. I’m so excited to aquascape another big tank! But before that happens I’ve gotta build a new stand, and figure out how I want to plumb the thing!

Here’s the build so far:
3F111CAB-4BEB-40FA-990E-2AEBC4420661.jpeg
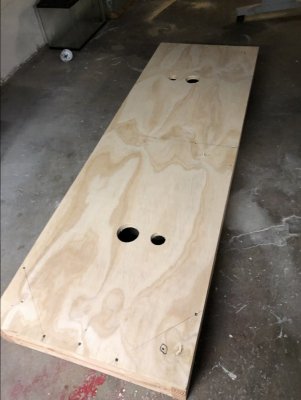
3/4” 7layer plywood. 2X6 support beams
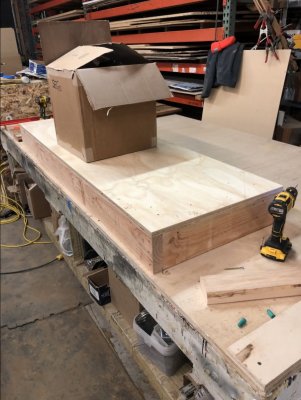
060E8EED-B114-4558-A63F-760A1056D641.jpeg
Fastening the plywood to the support beams.
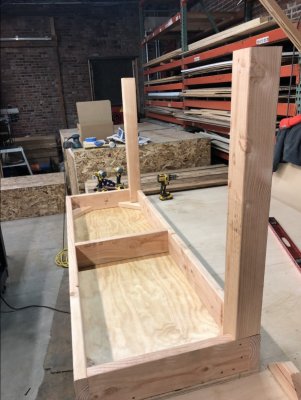
A1BA0BD2-263F-4552-AE4E-D6F6F35EAF4C.jpeg
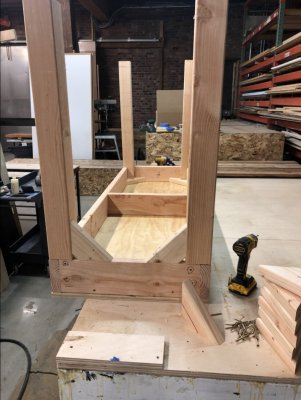
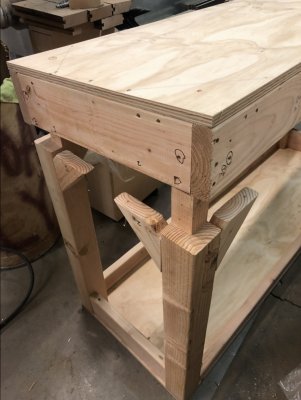
knotched 4X4 legs.

49CBD4A7-6CDA-4AA0-9157-97809E895117.jpeg
Corner braces make sure everything is square and rigid.
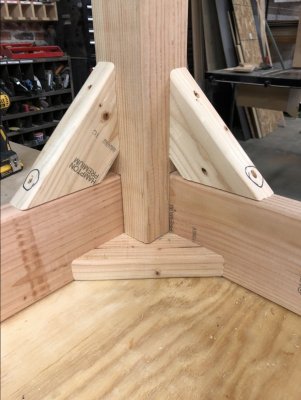
15901D2D-DE8B-4159-AC06-283B4E21C0E2.jpeg
Details no one will ever see when it’s all finished, but I take my bracing seriously hahaha...
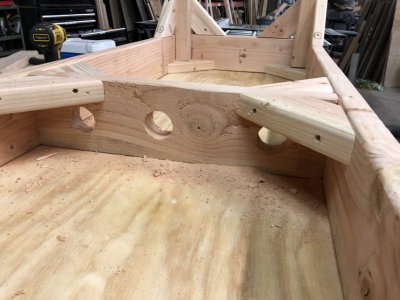
16CE2B5E-C817-4144-B960-0BAC4FC7D921.jpeg
Drilled crossbrace for wiring or plumbing.
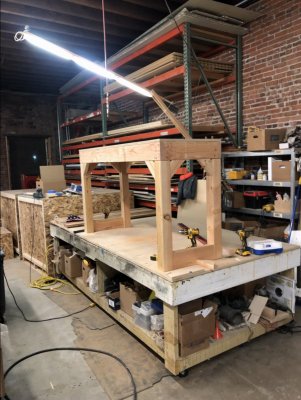
72E81BB2-A30A-4FA1-BB89-A16509F2E542.jpeg
All 4 legs mounted!

EAB0B90C-91F2-4442-B2EE-7E8E2356C298.jpeg
Now that the support structure is all together, it’s time to take it all apart, somehow fit it into my Mini Cooper, and get it home....

0DA31379-3734-4112-8EDA-60A1E8B3D4D4.jpeg
 
OP
OP
Nolan Shinn

Nolan Shinn

Active Member
View Badges
Joined
Oct 17, 2016
Messages
188
Reaction score
301
Location
Seattle
Rating - 0%
0   0   0
Thanks guys!


Unfortunately I didn’t get as far as I was hoping... the stand is in the basement and reassembled, but I still need to move it into the finished half of the basement and get the tank onto it....
5EEE64C5-B19C-435B-94FA-CE594CC550B9.jpeg
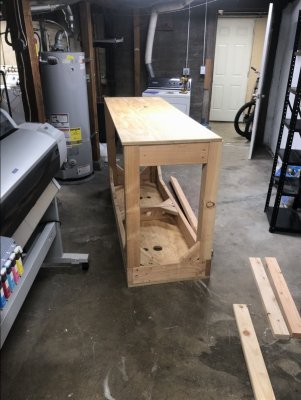
Gives you an idea of the size. I don’t have kids, and I like standing and looking at the tank, so I’ve got the the top of the stand at bar height (40”). Might be a little more inconvenient to clean the glass or place corals, but I think that’ll be offset by a better viewing experience and improved sump access.

102A92D0-6E25-45A1-8CBE-05F6FFEED4EC.jpeg


34DE9F8C-10B3-47CA-93C3-981BD8C529E9.jpeg
 

mch1984

Valuable Member
View Badges
Joined
Nov 20, 2017
Messages
2,000
Reaction score
6,756
Location
Midland, TX
Rating - 0%
0   0   0
Yeah short stands make for tough working space. I’m doing a frag tank now and the stand is way short. Plumbing was tricky. I like the stand and it looks tough, looking forward to see it come along.
 
OP
OP
Nolan Shinn

Nolan Shinn

Active Member
View Badges
Joined
Oct 17, 2016
Messages
188
Reaction score
301
Location
Seattle
Rating - 0%
0   0   0
I like the height, especially for the sump access. I don’t even have a sump and it’s already cramped in my cabinet.
That was my least favorite part of my last tank. Never enough cabinet space...


Well gang, the holidays have slowed me down more than I’d expected... here’s the current situation with the tank:
B2AABC76-6415-44E2-96AC-5C22F31B6B21.jpeg
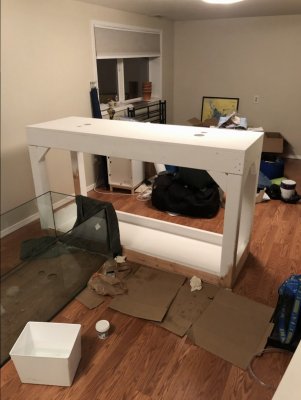
The glass is still on the ground, but at least the stand has been painted. Why white you may ask? All my tank stands have been black, and I wanted to try something new.

The cladding that goes around the outside of the stand is a kind of satin white, dry erase board material, that I’m hoping will be easy to wipe down or take notes on should I desire.

I’m hoping Christmas Day I’ll have time to install the cladding. Special plumbing fixtures like a wye check valve, union joint ball valves and two gate valves are arriving next Thursday, so with any luck I’ll be able to get the tank plumbed by New Years!

Happy holidays!
 
OP
OP
Nolan Shinn

Nolan Shinn

Active Member
View Badges
Joined
Oct 17, 2016
Messages
188
Reaction score
301
Location
Seattle
Rating - 0%
0   0   0
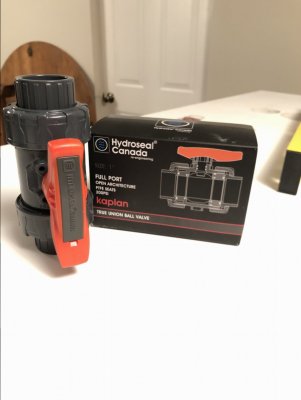
That valve looks expensive.

$15/each on amazon which seems like a lot for a 1” ball valve, but it’s got union joints at either end, so it comes out to roughly the same price as buying all three components separately.

It’s nothing compared to the mind blowing prices of Wye Check Valves...
 

mfinn

likes zoanthids
View Badges
Joined
Jul 22, 2006
Messages
11,888
Reaction score
8,398
Location
Olympia, WA.
Rating - 100%
5   0   0
$15/each on amazon which seems like a lot for a 1” ball valve, but it’s got union joints at either end, so it comes out to roughly the same price as buying all three components separately.

It’s nothing compared to the mind blowing prices of Wye Check Valves...
Hmm, not bad for a 1"true union ball valve. Cepex run $22.49 on BRS.
The Wye check valves are pricey.
 
OP
OP
Nolan Shinn

Nolan Shinn

Active Member
View Badges
Joined
Oct 17, 2016
Messages
188
Reaction score
301
Location
Seattle
Rating - 0%
0   0   0
I’ve been considering how best to plumb the dual overflow/return and I need some input from you knowledgeable reefers out there:

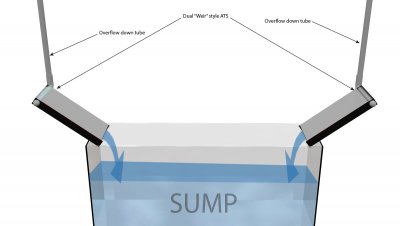
Is there any reason I couldn’t pipe both of my overflow down tubes through two algae turf skimmers?

In theory this would mean all of my tank water would filter through an ATS 10+ times and hour, which should help (once it matures) keep some of my parameters really stable with relatively little maintenance... right?

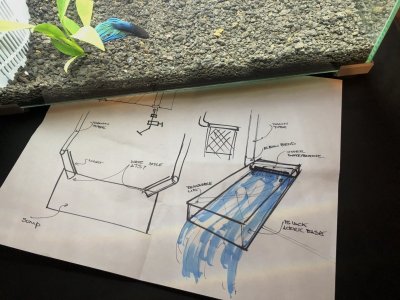
This afternoon I quickly sketched up a concept and modeled it to show you what I have in mind. Any thoughts or advice would be greatly appreciated!
FDF63816-16BE-43A5-B225-E972D53ECD84.jpeg
(Krug the betta is he best design partner)
My overflows are on opposing ends of my tank. So I’m thinking a “weir” system with a three sided acrylic flume on either end of my sump.
5936B33B-DACB-4D80-BD90-58EC5E06088F.jpeg
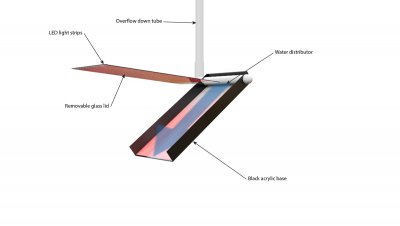
Each ATS flume has a clear acrylic lid, with a grid of grow LEDs facing into the flume.
80D34481-7532-424F-A69D-3DC1561F3F25.jpeg
The flume body is made of black acrylic or abs. Water overflowing from the tank enters the top of the flume through a slotted pvc tube.
9AACDBAD-DBBB-4163-8BB3-F29C82B42E8A.jpeg
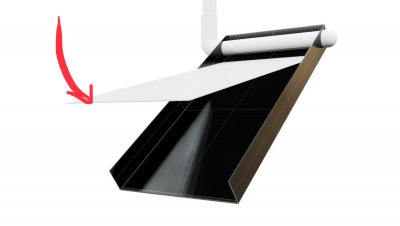
If I leave a small lip at the bottom of the flume, a sheet of frosted acrylic (red arrow) could slide in under the spray bar, and rest against the bottom lip. Algae grows on the surface of the frosted acrylic sheet.
28452673-60F0-4581-8070-52D675443644.jpeg
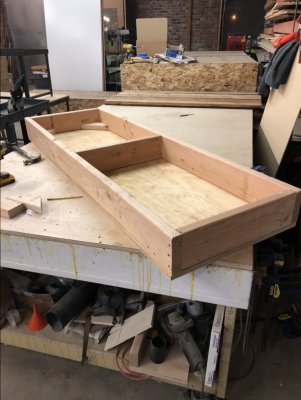
To clean, simply remove the flume lid, lift the frosted sheet off the bottom lip of the flume. Slide the sheet out of the box, scrape the algae off and reinsert.


Let me know what you think!
If it helps I’ll upload a layout of my sump tomorrow afternoon
 
Back
Top