Sky’s 150gal Build

SkyAquatic

Community Member
View Badges
Joined
Jan 19, 2023
Messages
51
Reaction score
146
Location
Asheville
Rating - 0%
0   0   0
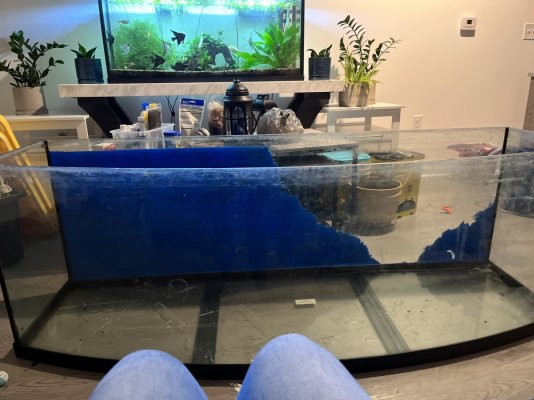
I just bought a 150gal saltwater build second hand the other day. I will add pictures soon I have to give it an extra good clean to make it pretty.

it’s in great condition and you can tell he took great care of it. He had an anemone die and didn’t catch it in time. It killed off the entire tank unfortunately. Which is why I plan to give it an extra deep clean even though he already cleaned it up himself.

He gave me everything below and the only thing I need to setup is a sump. I plan to DIY it myself. If anyone has tips on this it would be much appreciated.
-protein skimmer
-250 lbs of coral rock that went through a bleaching process. I will do another just to be safe.
-full spectrum lV lights (I don’t have it in front of me but I’ll post the brand when I post pics)
-heater (again I’ll post brand later)
-all the chemicals and nutrients he had. Plus the barometer and other Hanna water check tools.
-all the food he had left
-stand
-150gal bowfront
-more but I can’t remember ATM

Anyone that may have advice for equipment that was previously owned is welcome.

I plan to stock it after the entire tank set up is done with the following fish.
Green Mandarin
Black storm clownfish
Naked with dots clownfish
Longfin black ice clownfish
Shark nose goby
Kaudern’s cardinal fish
Spotted watchman goby
Yellow tang
Powder blue tang
Purple tang
Yellow belly regal blue tang
Blue ribbon eel
Flame angelfish
Coral beauty angelfish
I am aware under normal circumstances you wouldn’t put multiple tangs in a tank. I’ve done a lot of research on it and I will be putting them in all together all at once with the lights off that way there’s less aggression and they can find their own territories if anyone has advice on that as well, and has done it successfully I will gladly take it.

As far as corals, I have five I know I want but I’m still thinking about what else I will put in there.
Watermelon bubble tip anemone
Rose bubble tip anemone
Blue mushroom coral
Red pom-pom Xenia coral
Green polyp toadstool mushroom leather coral

That’s it as far as I know, I’m still considering what I’m gonna do. Right now first thing I’ve gotta work on is putting together that DIY sump.
 
OP
OP
SkyAquatic

SkyAquatic

Community Member
View Badges
Joined
Jan 19, 2023
Messages
51
Reaction score
146
Location
Asheville
Rating - 0%
0   0   0
Update Day 1:
I put sealer on the tank stand today. It’s mold resistant and protects it from water damage. Took about two hours I want to say. I’m painting the whole tank white which is why I went with one that has a white cast. The tank is currently in another room. I’ll be deep cleaning that Monday night. I will be checking the silicone seals as well. I’m excited to see it when it’s done!
840271C3-820E-473C-A466-10CBB14BD3BF.jpeg
8526226F-2B23-4E36-B228-025D229611E2.jpeg
20E5C6A2-DA4B-49CB-87A2-1C59EABE9D03.jpeg
 
OP
OP
SkyAquatic

SkyAquatic

Community Member
View Badges
Joined
Jan 19, 2023
Messages
51
Reaction score
146
Location
Asheville
Rating - 0%
0   0   0
8315A3A5-A192-47E2-BAC0-701F9C1B0C6D.jpeg
Update Day 2:
I finished the water resistant/mold resistant/and water proofing coats. As well as painted it all white today.

Tomorrow the tank goes up (the top part has dried for 3 days so it will be fine.) Then comes the deep clean on the tank and rock aquascaping. I think I will be using a band saw to cut shelves out of my coral rock. I really love that look and want to do a stairway ish feel on the two sides of the tank. In the center I’ll use a tall shelf set up with various sizing and depth. I’ll definitely need a fiberglass rod down the center of it for stability.
 

Gumbies R Us

Another Fish in the Sea
View Badges
Joined
Nov 10, 2022
Messages
9,852
Reaction score
18,927
Location
North Georgia
Rating - 0%
0   0   0
8315A3A5-A192-47E2-BAC0-701F9C1B0C6D.jpeg
Update Day 2:
I finished the water resistant/mold resistant/and water proofing coats. As well as painted it all white today.

Tomorrow the tank goes up (the top part has dried for 3 days so it will be fine.) Then comes the deep clean on the tank and rock aquascaping. I think I will be using a band saw to cut shelves out of my coral rock. I really love that look and want to do a stairway ish feel on the two sides of the tank. In the center I’ll use a tall shelf set up with various sizing and depth. I’ll definitely need a fiberglass rod down the center of it for stability.
Stand is looking really good!
 
OP
OP
SkyAquatic

SkyAquatic

Community Member
View Badges
Joined
Jan 19, 2023
Messages
51
Reaction score
146
Location
Asheville
Rating - 0%
0   0   0
Update Week 1:

So after finishing the stand I discovered that my tank seal popped on the bottom. It seems I have to reseal the entire thing. It was definitely unexpected but my father is going to help me lift the glass sections. I’ve been doing a deep dive on how to reseal tanks and make sure it’s done right. At the same time I discovered the previous owner had screwed into the supports on the top trim. They were compromised from how many holes had been drilled to do so. I am replacing the supports with custom cut tempered glass sections. The bottom trim seems fine fortunately so it won’t be a completely glass tank with no trim. I was worried about that as it’s such a large volume and I didn’t want leaks. Or worse… I’m trying to look on the bright side though because now I can get rid of the old black silicone and replace it all with clear. I like that look better anyways. I will be attempting it this weekend and posting an update on it soon! I will let you all know how it goes. Fingers crossed it holds water on the first try. I would be a tad disheartened to have to redo it all. I bought the silicone, razor, and acetone. It will be great practice before DIYing my sump and ato.
 
OP
OP
SkyAquatic

SkyAquatic

Community Member
View Badges
Joined
Jan 19, 2023
Messages
51
Reaction score
146
Location
Asheville
Rating - 0%
0   0   0
Oh and I almost forgot!
92EBAD89-6846-45E4-B1A2-598F395A5ED4.jpeg
Here is the stand put together and the doors added. I can’t put the tank on since it needed a level surface to reseal. I’m hoping in a week or so I can put the tank up. It first has to be sealed and filled up for a test run before that. It’s supposed to dry for at least 48hours but I’m gunna be conservative since it’s such a large volume.
 

Txoutlaw

Community Member
View Badges
Joined
Nov 23, 2022
Messages
63
Reaction score
76
Location
South TX-RGV
Rating - 0%
0   0   0
looks good! i would stick with black silicone cus you're are gonna have black silicone in between the glass from when the tank was built.unless you're going to take the tank completely apart and reassemble it?also,what brand of silicone did you buy?
 
Last edited:
OP
OP
SkyAquatic

SkyAquatic

Community Member
View Badges
Joined
Jan 19, 2023
Messages
51
Reaction score
146
Location
Asheville
Rating - 0%
0   0   0
looks good! i would stick with black silicone cus you're are gonna have black silicone in between the glass from when the tank was built.unless you're going to take the tank completely apart and reassemble it?also,what brand of silicone did you buy?
Yes I am taking the entire tank apart. I have too since the seal on one of the glass panes is completely compromised. I bought GE 100% silicone. It’s usually used on doors and window frames. I looked into quite a few silicones on aquarium websites and got advice from my lfs. They said it would work since it doesn’t contain mold resistant additives and other chemicals.
 
OP
OP
SkyAquatic

SkyAquatic

Community Member
View Badges
Joined
Jan 19, 2023
Messages
51
Reaction score
146
Location
Asheville
Rating - 0%
0   0   0
Update: I finally got the top aquarium trim off. I discovered that the holes in the lid from the screws damaged one section on the lip of the aquarium. It’s a small chip that didn’t dig too much into the glass but definitely was concerning. My lfs said it would be okay to continue and shouldn’t affect the strength. Especially since it was such a thin sliver of glass. I will say it took a lot longer to pop the top than expected. I’m still working on removing the silicone where it was connected. I can’t wait to finish it and post pics. I’ll let you all know how it goes when I remove each pane of glass. I gotta say it’s taking much longer than expected for this build but I think it will be worth it.
 
OP
OP
SkyAquatic

SkyAquatic

Community Member
View Badges
Joined
Jan 19, 2023
Messages
51
Reaction score
146
Location
Asheville
Rating - 0%
0   0   0
Update: *Pardon the mess in the pic it’s a ton of aquarium equipment behind it.* I got the top off and scraped the top silicone sealant. I’ve started scraping the blue paint off now. I’m planning on painting it black afterwards. I still have to clean the glass of old dust and debris from the previous owner as well. Here it is though. The tank itself. Minus the upgrades I’ll be making and custom lid.
My 55 gal freshwater tank even made a cameo. Haha
 

Attachments

  • 0099478C-C548-45DE-955B-A2097CADCEF9.jpeg
    0099478C-C548-45DE-955B-A2097CADCEF9.jpeg
    175.3 KB · Views: 34

Txoutlaw

Community Member
View Badges
Joined
Nov 23, 2022
Messages
63
Reaction score
76
Location
South TX-RGV
Rating - 0%
0   0   0
Yes I am taking the entire tank apart. I have too since the seal on one of the glass panes is completely compromised. I bought GE 100% silicone. It’s usually used on doors and window frames. I looked into quite a few silicones on aquarium websites and got advice from my lfs. They said it would work since it doesn’t contain mold resistant additives and other chemicals.
Yeah i've used the GE silicone before and to tell you the truth,i wouldn't use it. especially not on a tank of that size.i would go with the ASI brand of silicone.i've used it a lot resealing tanks and its really creates a strong bond.just fyi.
 
OP
OP
SkyAquatic

SkyAquatic

Community Member
View Badges
Joined
Jan 19, 2023
Messages
51
Reaction score
146
Location
Asheville
Rating - 0%
0   0   0
Update: I finally got the blue paint off and cleaned the inside glass panels on the aquarium. Tomorrow I’m cleaning the rest (including the bottom) and cutting the silicone to reseal the tank. After that I wait 48 hours for it to cure. Then do a water test and drain it again before setting on the stand. I’ve also contacted TopLids to make a custom tank lid for it. The middle evaporation cover will be etched with my R2R name.
Next Friday I’ll be picking up my 40 gallon breeder to DIY my sump and a 20 gal for my ato. As well as two Fuval sea EVO AIO 13.9 gallon tanks for quarantine. I’ll probably set up two separate build threads for those and post a few pics in here every once in a while. One will be for corals and inverts. The other for fish.
37623DB3-50CC-478B-A39A-43FE97D07F29.jpeg
A77910DA-FEC1-4DBB-8767-77A07B96633A.jpeg
D08DFA6A-832B-44AC-BC25-FFAF1BAEADAD.jpeg
 
OP
OP
SkyAquatic

SkyAquatic

Community Member
View Badges
Joined
Jan 19, 2023
Messages
51
Reaction score
146
Location
Asheville
Rating - 0%
0   0   0
Update: I got all the old silicone off the 150 aquarium and took the panels apart yesterday. I went to reseal it and found out I accidentally bought 4 tubes of white silicone. Haha so I have to go exchange them for clear tomorrow. I will reseal Sunday since I’ll be taking a much needed day off Saturday and going to a wine tasting. I set up a corals and invert’s QT tank today. More so for observation but I’ll be doing coral dips of course among other things. I’m setting up the fish QT next month as I have a lot going on the next few weeks doing the DT and it’s sump. I’ll be making a QT build thread for each and I’ll post a link to it here when it’s up. In the mean time here’s a few pics. I have 6 inverts in the tank. 4 blue leg hermit crabs and 2 red legged. Plus shells* pardon the sand dust it’s clearing but I kicked some up earlier.
1F9F29C0-BD88-4ABA-BC64-2813C2031978.jpeg
90DF9DEB-25DA-4FC6-8FF9-FD40C9C75996.jpeg
056F9854-4CA8-46B1-8C40-E3A77082BD8D.jpeg
0BA7FF86-F9A0-45E8-8621-A6A9613E9AF7.jpeg
 

More than just hot air: Is there a Pufferfish in your aquarium?

  • There is currently a pufferfish in my aquarium.

    Votes: 30 17.0%
  • There is not currently a pufferfish in my aquarium, but I have kept one in the past.

    Votes: 30 17.0%
  • There has never been a pufferfish in my aquarium, but I plan to keep one in the future.

    Votes: 32 18.2%
  • I have no plans to keep a pufferfish in my aquarium.

    Votes: 76 43.2%
  • Other.

    Votes: 8 4.5%
Back
Top