Urbanek's ADA Trio

OP
OP
urbaneks

urbaneks

Well-Known Member
View Badges
Joined
Feb 20, 2011
Messages
730
Reaction score
3,878
Location
Chandler, AZ
Rating - 0%
0   0   0
Aquascaping
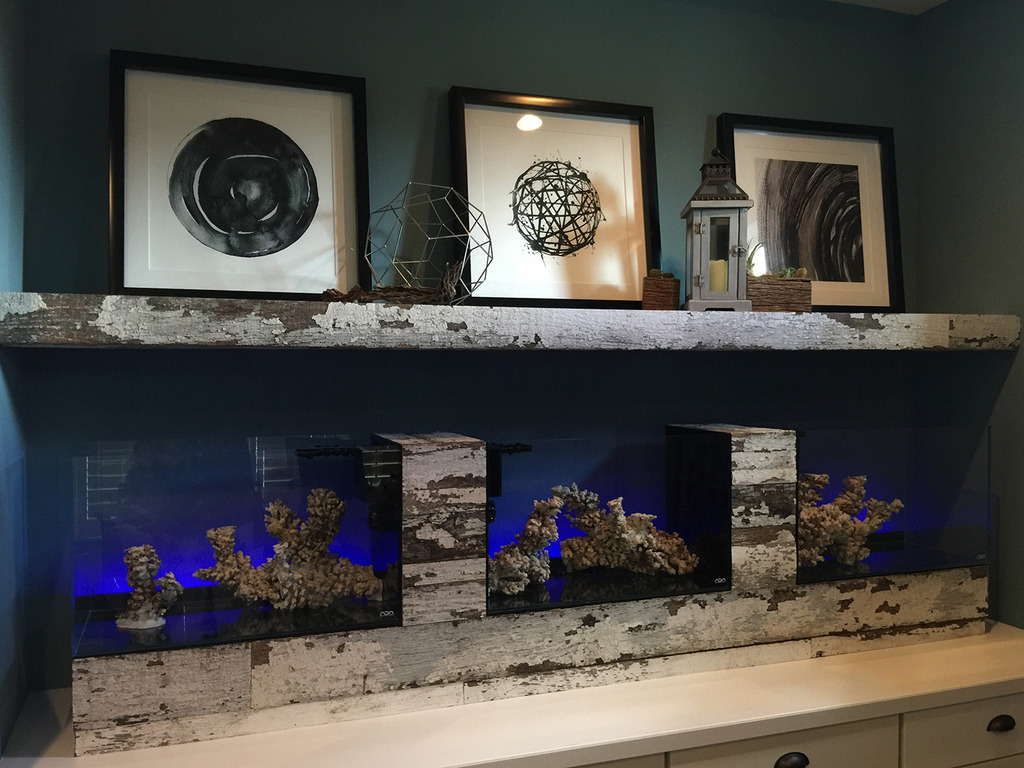
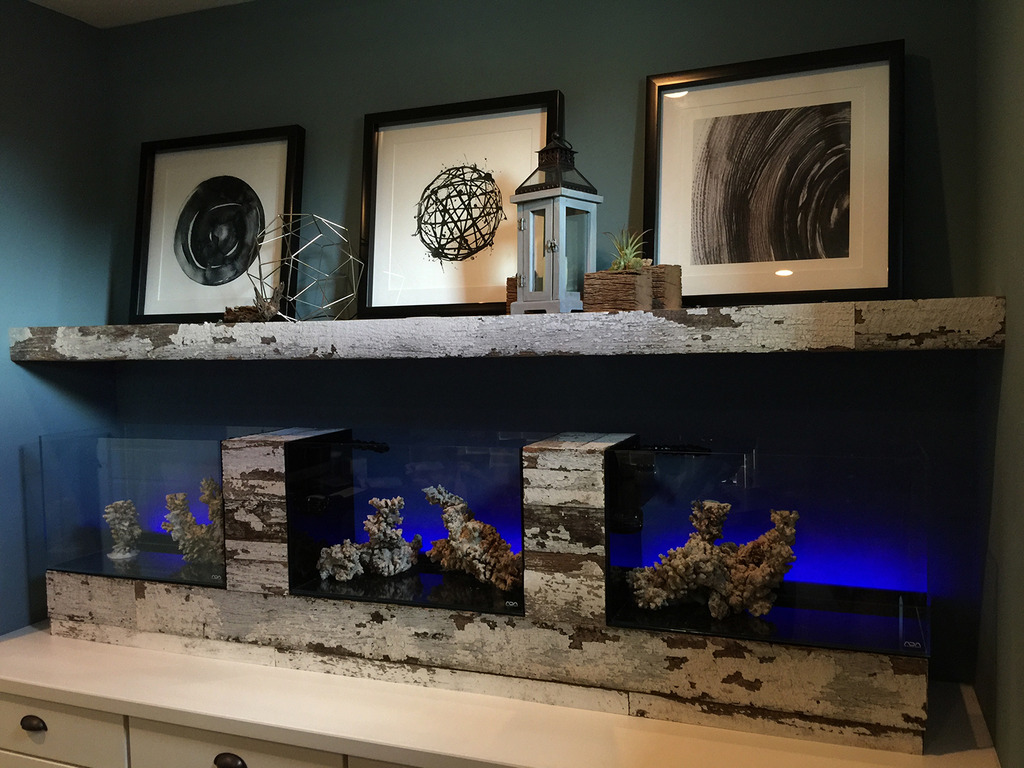
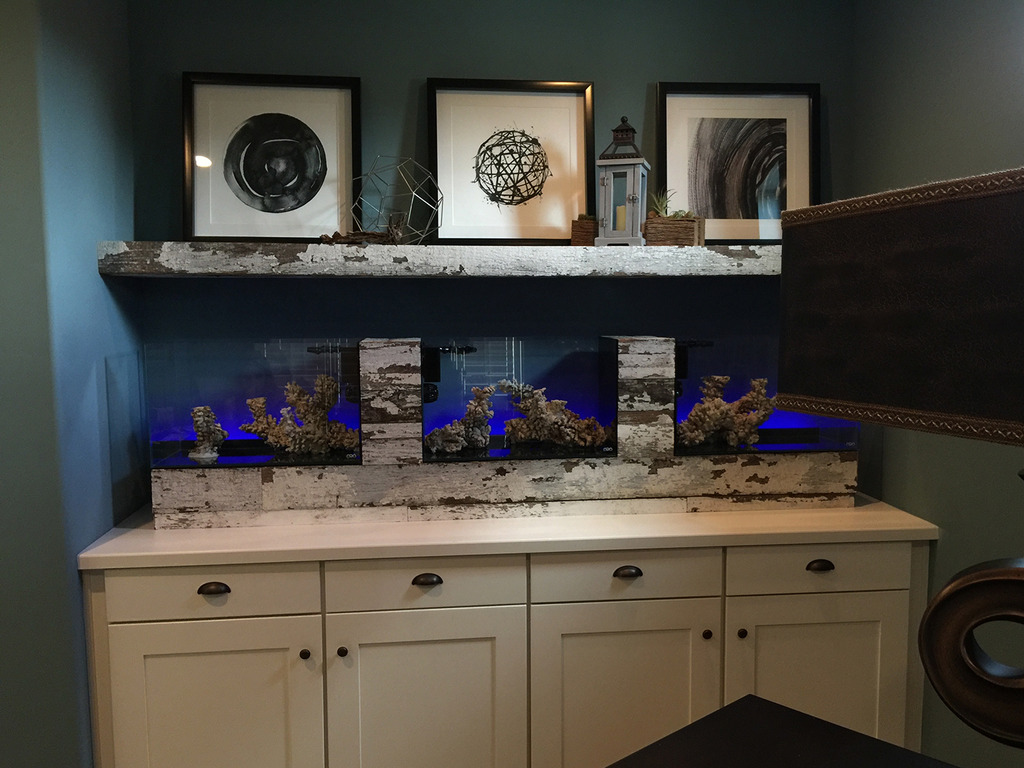
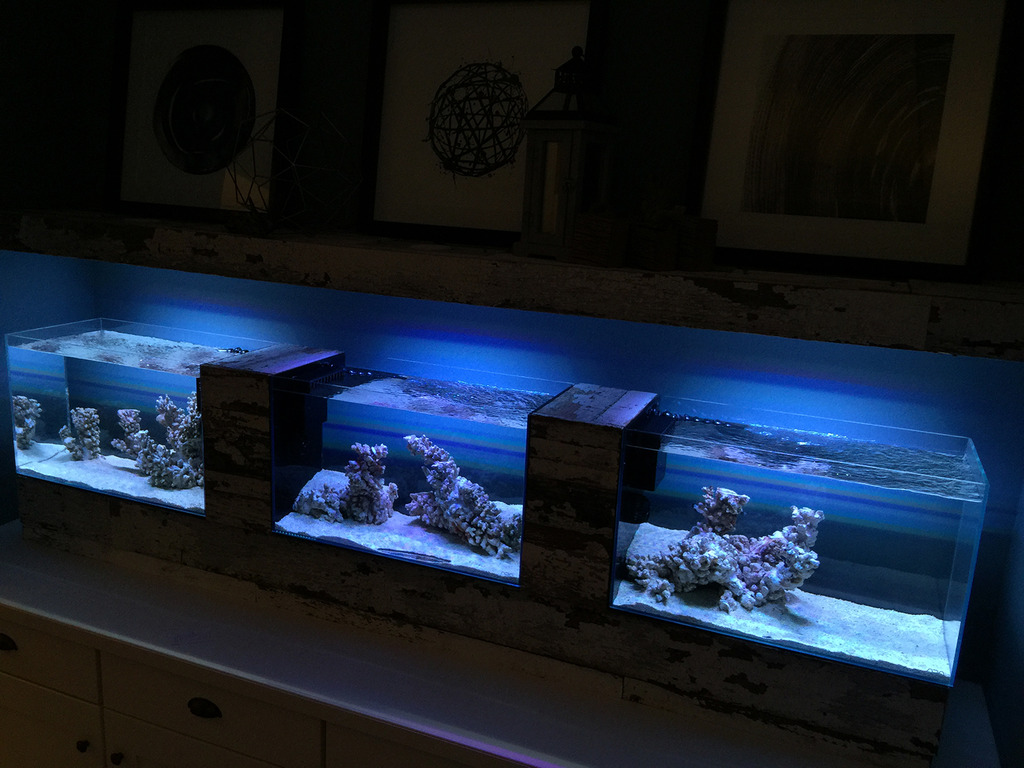
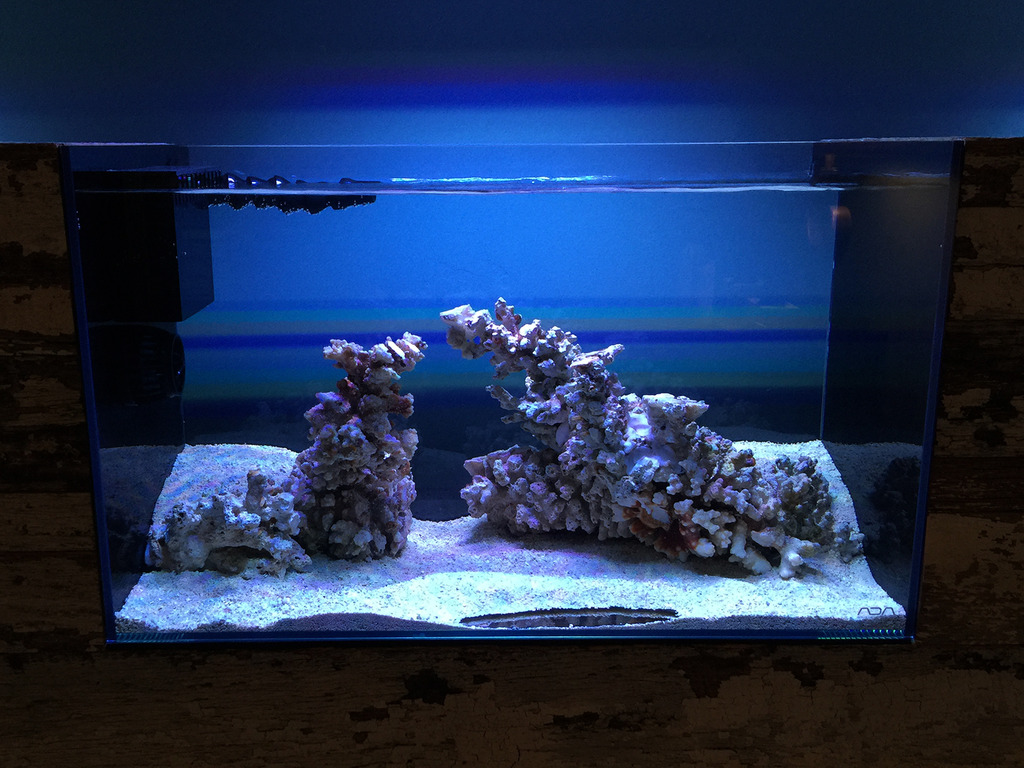
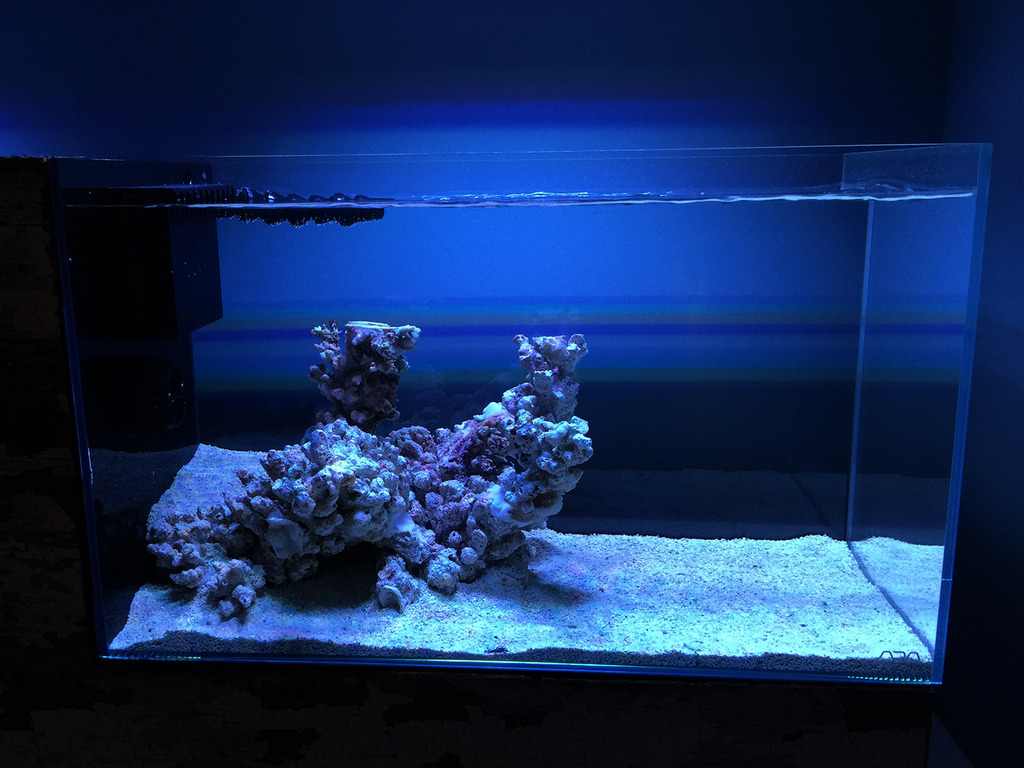
My goal for the aquascape is to transition from one tank to the next with both the rock work and sand. Rather than looking like 3 separate system, I'd like for the tanks to look as if they use to be one and were split by the wood work. I hope to be able to achieve something close to my vision. All of the rock and sand are being reused from my 250g build. The rock sat dry for about 4 months during our move and transition to the new house. I reserved my favorite branchy pieces of rock with the remainder being traded in at the LFS. The sand sat in buckets until I was ready to use it, at that time I rinsed it aggressively and allowed it to dry in the back yard. Before I get into the details of the aquascape, I want to put a plug in for AquaMaxx Reef Welder. I used this product to create the aquascape and I'd never do another aquascape without it. It's as simple as adding the beads to water, heating in the microwave for 1.5-2 minutes and then sculpting it in and around the joints. It hardens quickly and leaves very strong bonds.

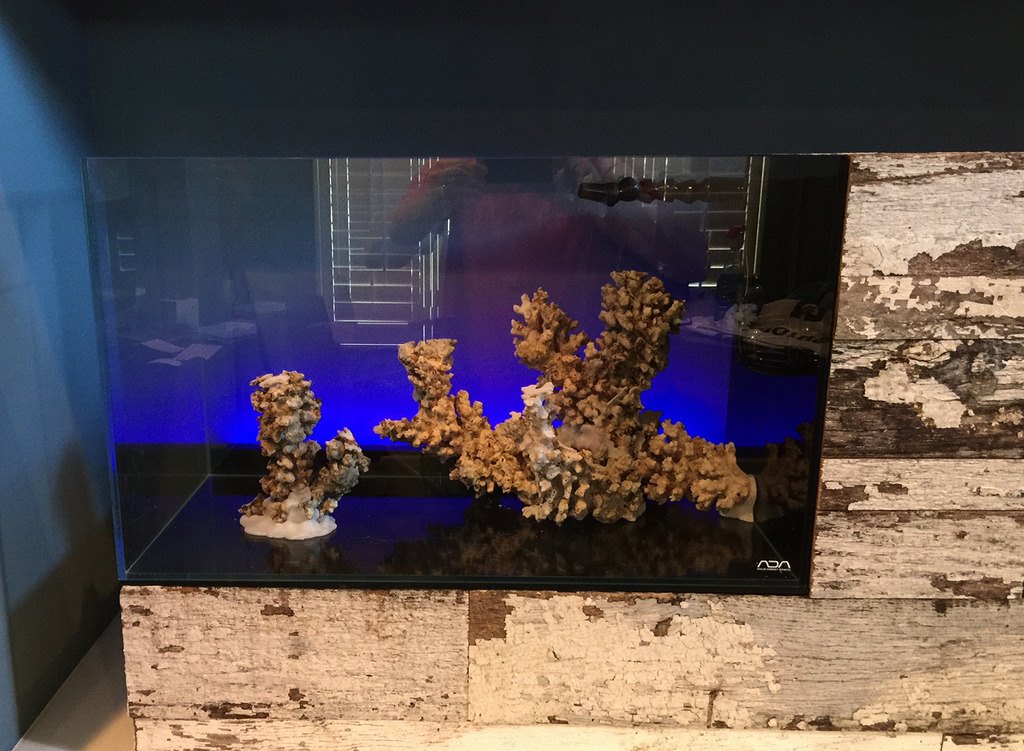
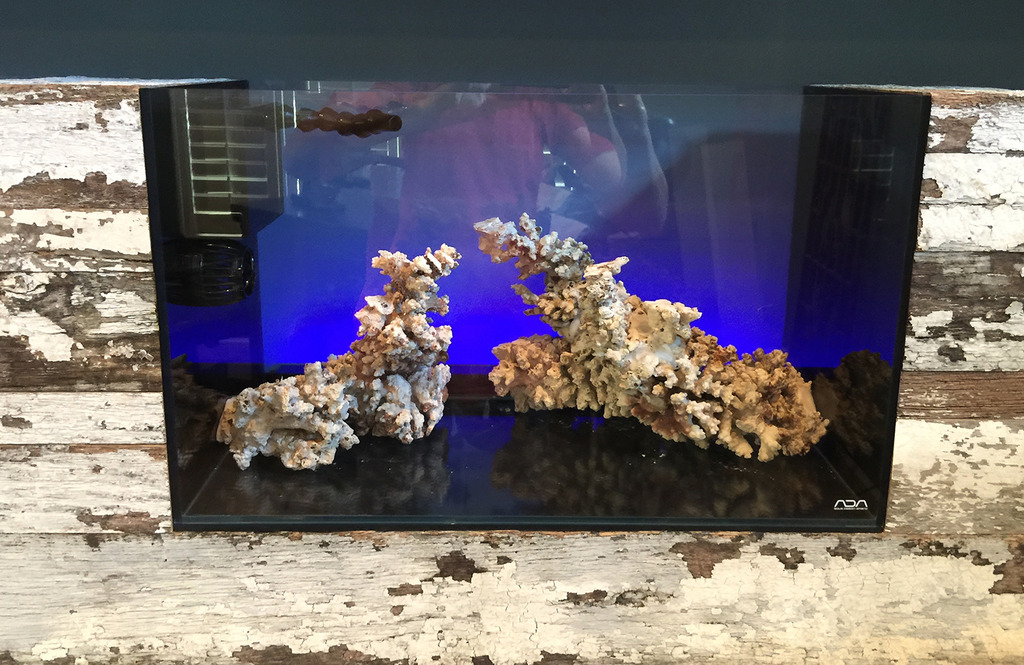
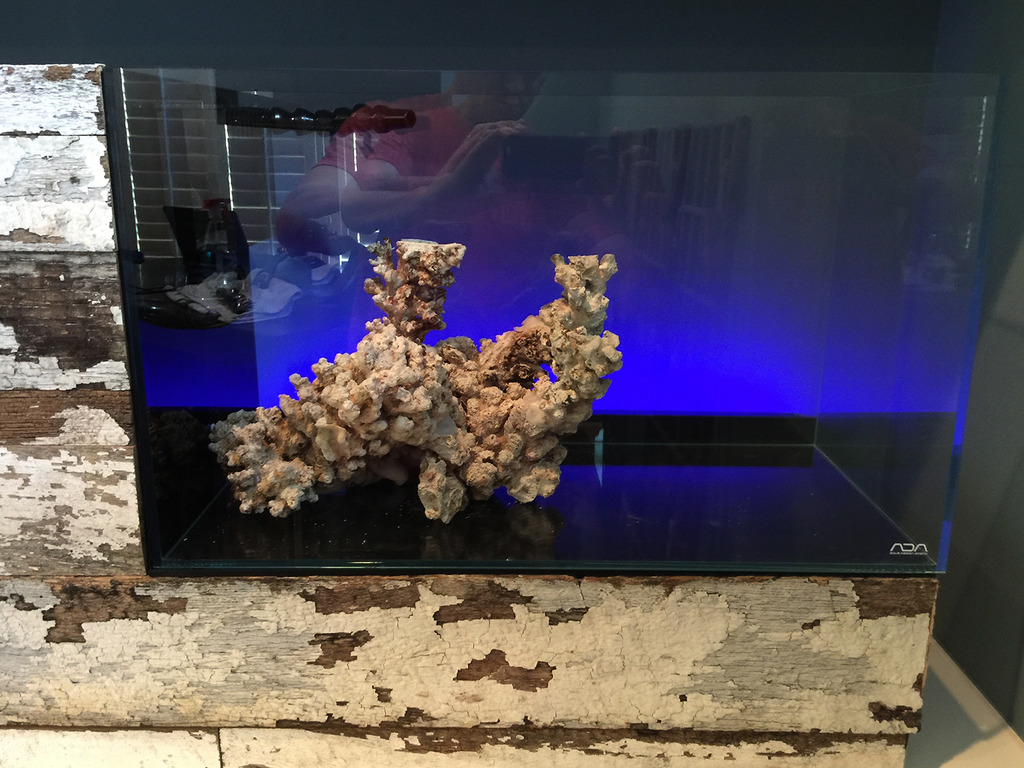
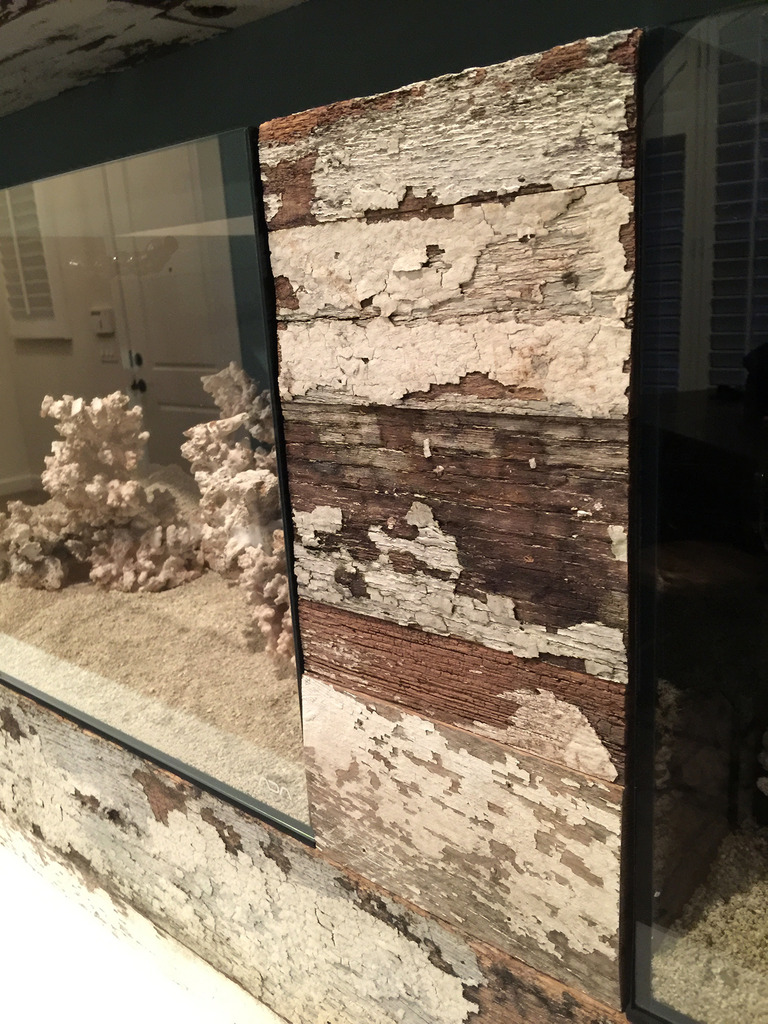
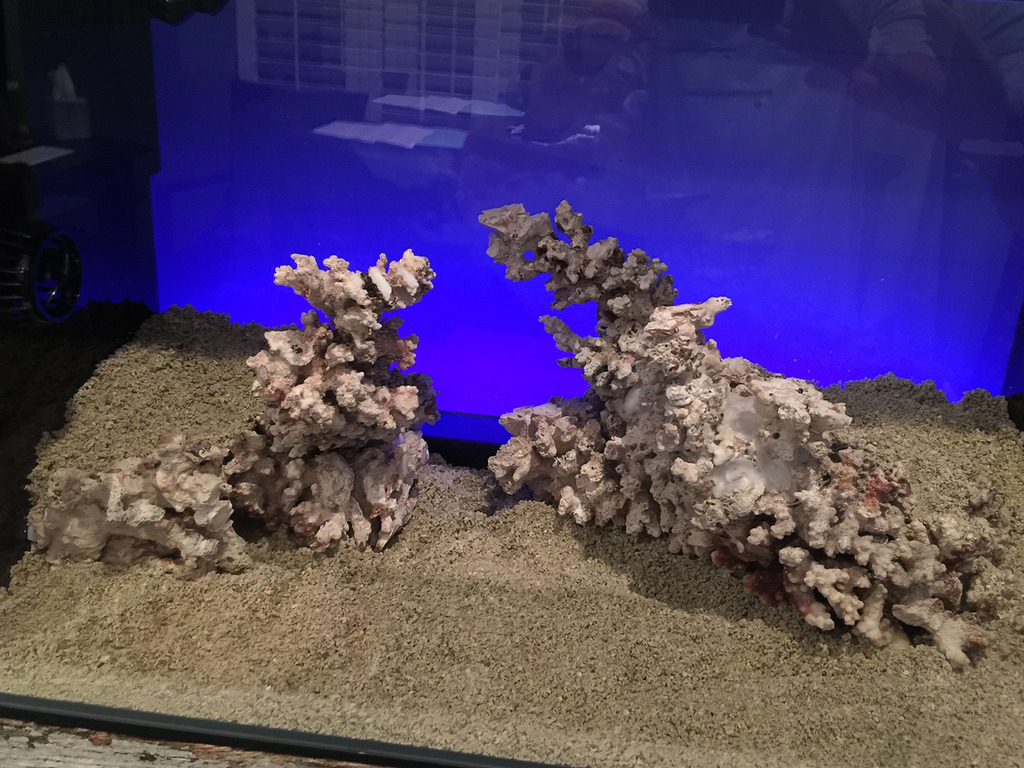
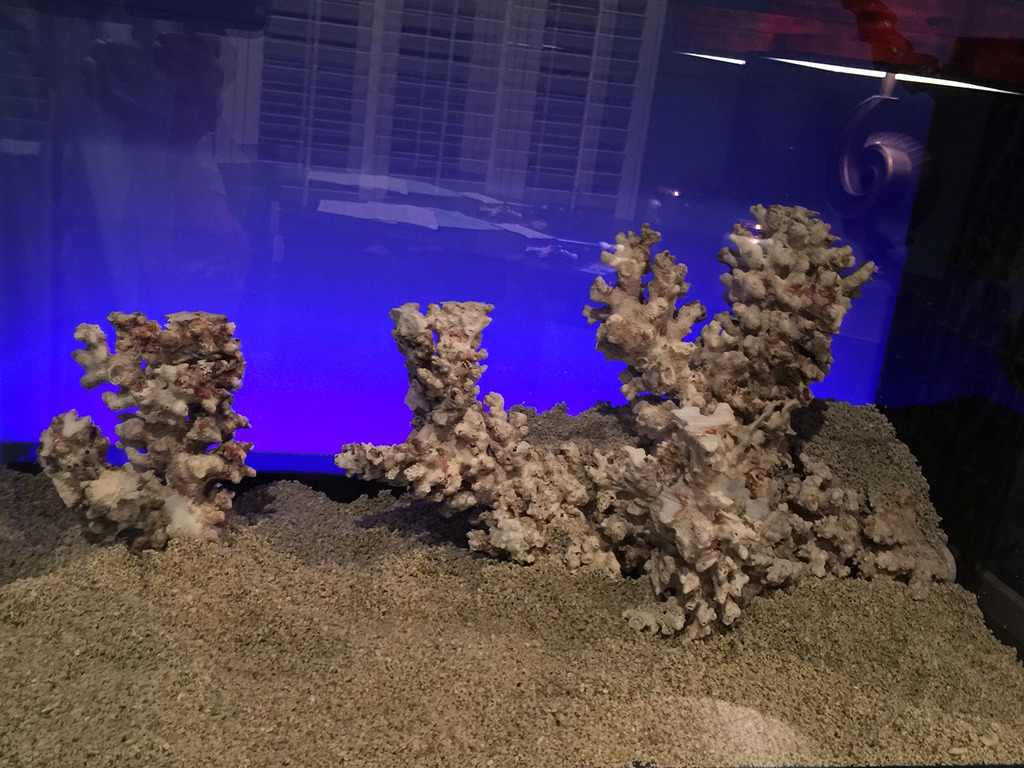
Each aquascape was accomplished with 3 or 4 smaller rocks combined with the Reef Welder to form larger individual rock forms. I used the Reef Welder on the back edges and sides of the scape which allowed me to butt the rocks up to the glass while having a perfectly flat side that matches up to the glass. This will allow me clean the glass right down to the rock work and create some deeper pockets for the sand to sit in. This provides some level changes in the aquascape with deeper sand in the back and shallow sand in the front. I also used the Reef Welder on the bottom of the rock structures to create nice flat surfaces for the rock to sit against the tanks. You can really see this best in the photo below of the left tank.

Left


Center


Right

Here are a few photos of how the rock work turned out from a few angles.

View from left of room


View from right of room


View from center of room


Tighter shot of left tank with some of the reclaimed wood displayed

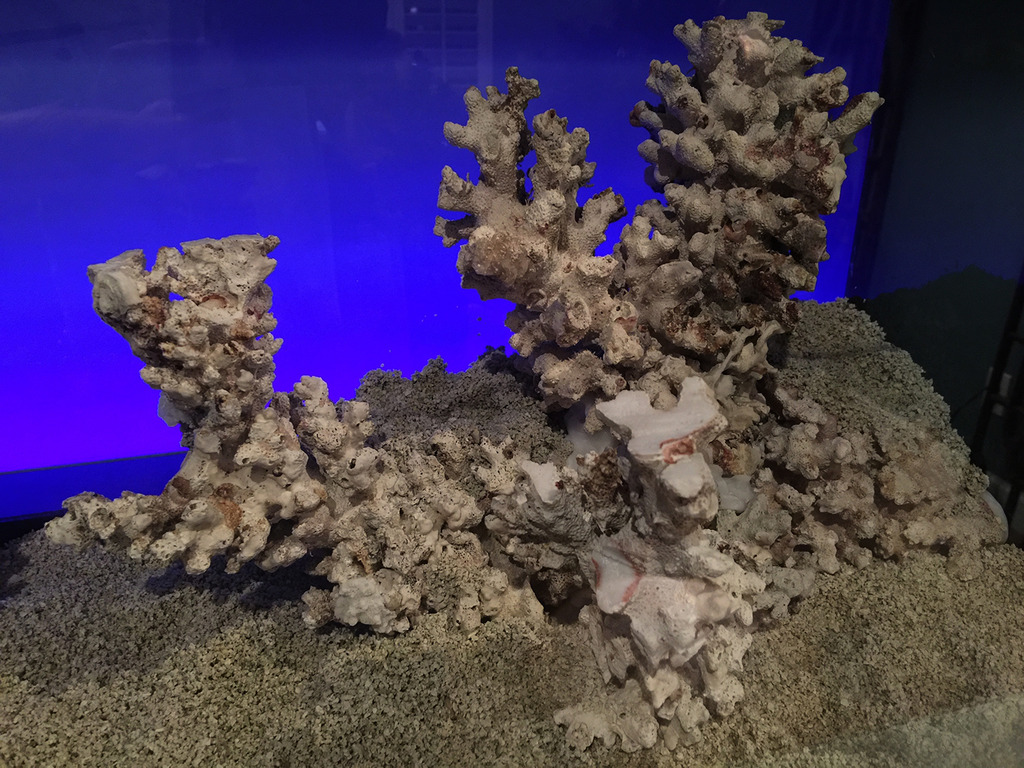
Here are some tighter shots that show the detail on the reef weld and rock. You will also notice that I used a coral saw to flatten out platforms on the top of each branch. This may look a bit unnatural right now but it will provide a nice flat area for SPS to encrust.


cmcoker

2500 Club Member
View Badges
Joined
Apr 26, 2014
Messages
3,959
Reaction score
4,084
Location
Texas
Rating - 0%
0   0   0
Nice! I used moldable plastic on my aqua scape as well, nad I really liked it. but I didn't think to put it on the bottom as you did.. When we eventually move, I will have to keep that in mind when setting back up!
 

Chrisfish

5000 Club Member
View Badges
Joined
Oct 29, 2015
Messages
7,488
Reaction score
26,844
Location
Hatteras
Rating - 0%
0   0   0
All I can say is WOW!! I love the aquascape(s) and the the old wood is beautiful :)
 
OP
OP
urbaneks

urbaneks

Well-Known Member
View Badges
Joined
Feb 20, 2011
Messages
730
Reaction score
3,878
Location
Chandler, AZ
Rating - 0%
0   0   0
Urbanek my current 75p I bought used from a local fish store here in El Paso TX. Which is rare to find them here. But it only had one owner prior , but they hade it for over about the 6-7 years so the aquarium has had its time, maybe even older closer to 10yrs. So I going all over the place on a new tank or to stay with a new ADA tank. It two small bubbles on the upper part of the silicon , one on the right front panel and one on the back panel on the upper left corner. I have the table drilled with a glass holes overflow 700gph and I have a 3/4in return line on it. It's currently a FW planted tank. But I am in the process of going reef , but deciding on what to do about the tank.

Thanks for the added info. Sounds like the root cause of the defect in the silicon came from the previous owner. I will carry on with my normal routine in hopes that I don't have a similar issue. With all of that said, I would not hesitate to get another ADA. Of course you have to drill and add the overflow but you get a great product.

I know I'm repeating but Congrats!!!
You can't stop amazing me. Love the builds, details and pics (still can't forget the 365).
Keep on the sharing effort and best of luck.
And what are your plans for stocking the tanks?

Alfrareef - I love the kind words. It's nice to hop on the computer to find comments.

Tank stocking is still TBD but a few things that I know I want are; a pair of designer clowns, a pair of Yasha Gobies with a pistol shrimp companion, Tanaka's Possum Wrasse, Cherub Angel, Pom Pom Crab, pair of Sexy Shrimp. Each tank with have 3-4 pieces of killer SPS and I'll have a few LPS and softies as well.

I love that old wood! Good stuff

Sheldon - Thanks so much! I too love the old wood! :) I'm currently working on a bar/table top that's being made from Hemlock barn floor threshing. The wood came to me with who knows how old of cow crap packed into all the wood's beautiful imperfections. I spent most of today getting the wood planed, strait lined and joined. Sanding next weekend, staining the weekend after.

Nice! I used moldable plastic on my aqua scape as well, and I really liked it. but I didn't think to put it on the bottom as you did.. When we eventually move, I will have to keep that in mind when setting back up!

Great stuff isn't it? I'm super happy that the product is now available. It's a game changer for sure.

All I can say is WOW!! I love the aquascape(s) and the the old wood is beautiful :)

THANKS! Really appreciate it.
 

dbraun15

Well-Known Member
View Badges
Joined
Aug 13, 2009
Messages
706
Reaction score
724
Location
Youngsville, LA
Rating - 0%
0   0   0
Amazing attention to detail...I wish my brain worked that way! Can't wait to see this mature. I really enjoyed your last photo project and look forward to seeing what you're going to do with this!
 
OP
OP
urbaneks

urbaneks

Well-Known Member
View Badges
Joined
Feb 20, 2011
Messages
730
Reaction score
3,878
Location
Chandler, AZ
Rating - 0%
0   0   0
I must say.. easy on the eyes.
Jerel - Thanks for the view and comment.

Very cool, making me rethink k my 60p set up!
Sheldon - I'm a new big fan of ADA.

Amazing attention to detail...I wish my brain worked that way! Can't wait to see this mature. I really enjoyed your last photo project and look forward to seeing what you're going to do with this!
Thanks for the very kind words. I appreciate the views and comments. Not sure how my brain works. :)
 

najer

Valuable Member
View Badges
Joined
Jul 9, 2016
Messages
20,453
Reaction score
144,449
Location
Humble, England
Rating - 0%
0   0   0
Love the scapes, my display has a glass divide at 3/5 along, the scape follows through, sort of.
 

MRRBW

Active Member
View Badges
Joined
Apr 1, 2014
Messages
439
Reaction score
153
Location
Montreal, Qc
Rating - 0%
0   0   0
The flow from tank to tank can really be seen with your aquascape. One question, are you worried about the paint from the shelf and light flaking off into your aquariums or is the wood sealed?
 
OP
OP
urbaneks

urbaneks

Well-Known Member
View Badges
Joined
Feb 20, 2011
Messages
730
Reaction score
3,878
Location
Chandler, AZ
Rating - 0%
0   0   0
Love the scapes, my display has a glass divide at 3/5 along, the scape follows through, sort of.
Thanks so much for the view and comment.

The flow from tank to tank can really be seen with your aquascape. One question, are you worried about the paint from the shelf and light flaking off into your aquariums or is the wood sealed?
Thanks for the observation and comment. I'm not worried about paint flaking off. The bottom of the shelf was sanded before the tanks went in to knock any lose pieces down. I did not put any seal on the wood. I wanted to keep it bare and natural.
 

Preme

Valuable Member
View Badges
Joined
Jun 27, 2016
Messages
1,317
Reaction score
1,240
Rating - 0%
0   0   0
That looks so sick man! Love how each scape flows from one tank to the next. Are you planning on stocking similar corals in each tank or different types in each system?
 

zibba

Valuable Member
View Badges
Joined
Mar 16, 2012
Messages
1,214
Reaction score
200
Location
Phoenix, AZ
Rating - 0%
0   0   0
First time back to the forums for awhile and saw this thread for the first time. I got the benefit of seeing all of these pictures via text and a lot of the progress in person but wanted to drop a line so I get auto-updates on this thread.

As I've said before, you're truly an artist and it's a privilege to watch you shape the direction of this hobby with your different builds.
 
Last edited:

Txdragonslayer

Well-Known Member
View Badges
Joined
Jul 1, 2015
Messages
693
Reaction score
427
Rating - 0%
0   0   0
Jerel - Thanks for the view and comment.


Sheldon - I'm a new big fan of ADA.


Thanks for the very kind words. I appreciate the views and comments. Not sure how my brain works. :)
I have loved Takashi Amanos work for some time. I dabble in planted tanks, but my heart always brings me back to reef
 
OP
OP
urbaneks

urbaneks

Well-Known Member
View Badges
Joined
Feb 20, 2011
Messages
730
Reaction score
3,878
Location
Chandler, AZ
Rating - 0%
0   0   0
Tanks are Salty
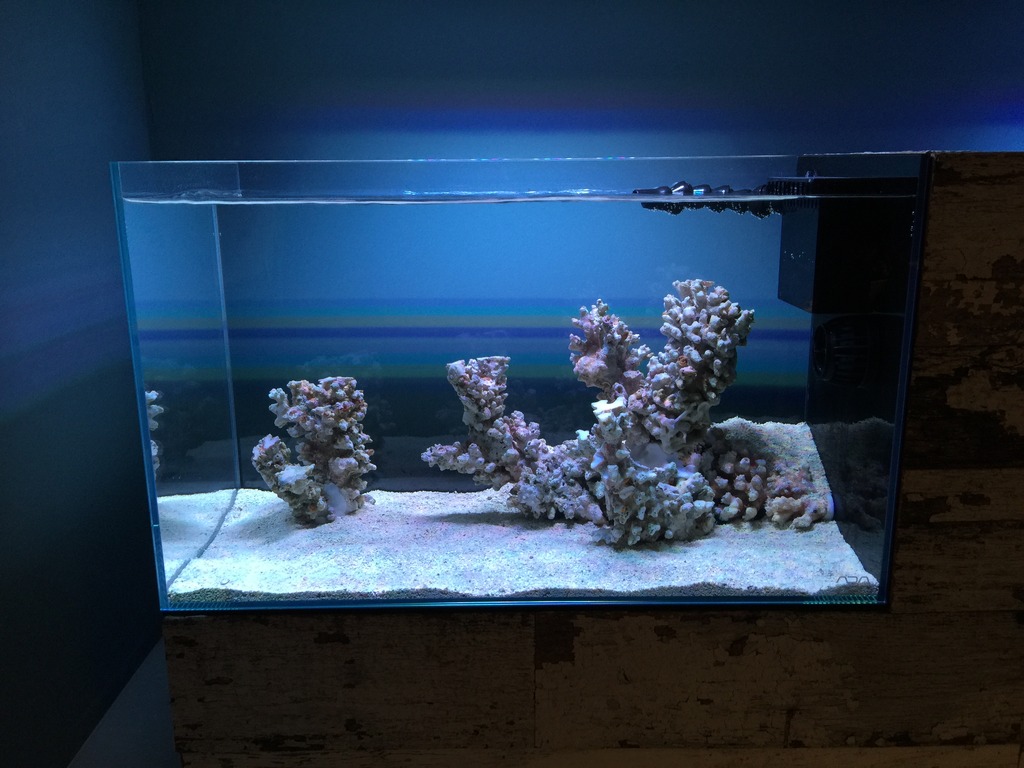
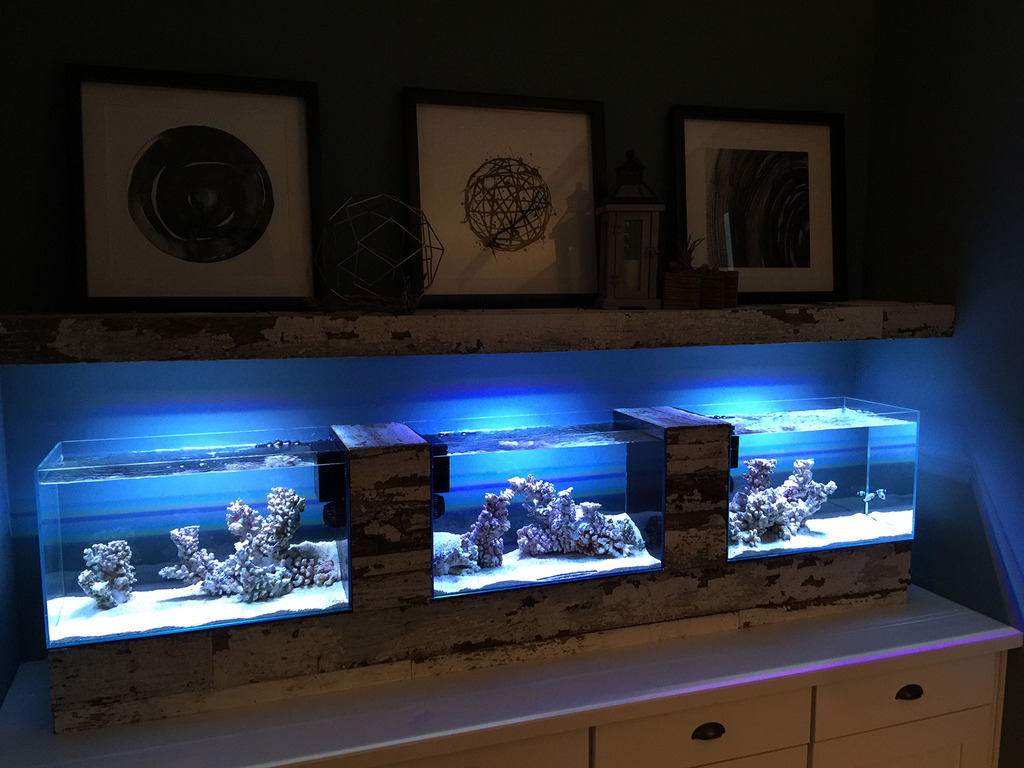
A giant step forward, the tanks are wet! I'm happy to report that the water is in and I've started dosing bacteria daily to get the tank ready for a couple fish. Here are a few photos to mark the big day. Here soon, I will get the good camera out to see if I can get some better photos. Everything has been phone pics up to this point.

Thanks goes to all that have view, liked and commented thus far. I'm looking forward to getting the system cycle and start stocking.


A View from the Left


A View from the Right


Left


Center


Right
 

Daniel@R2R

Living the Reef Life
View Badges
Joined
Nov 18, 2012
Messages
37,488
Reaction score
63,897
Location
Fontana, California
Rating - 100%
1   0   0
Wow!!! This truly is a stunning build!!! Great work, and I can't wait to see this with livestock!!
 
Back
Top