HELP! Sump cracked!

Chee-tomorpha

Active Member
View Badges
Joined
Oct 5, 2017
Messages
427
Reaction score
255
Location
Hugo, MN
Rating - 0%
0   0   0
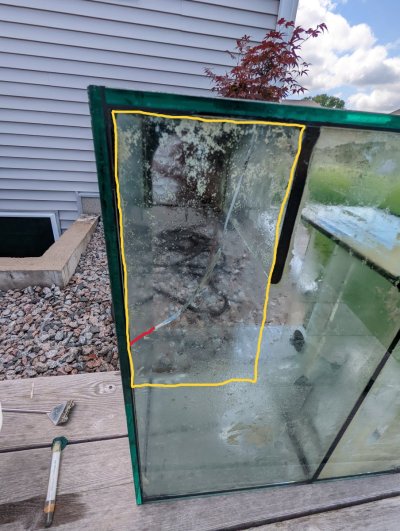
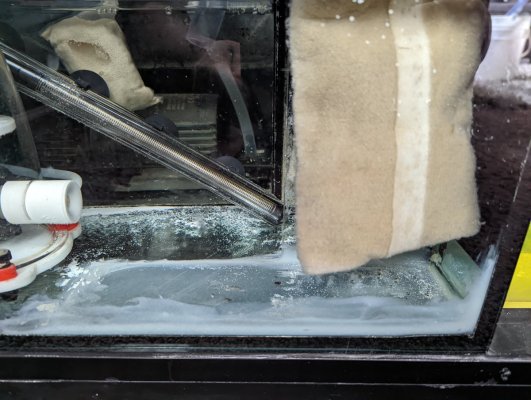
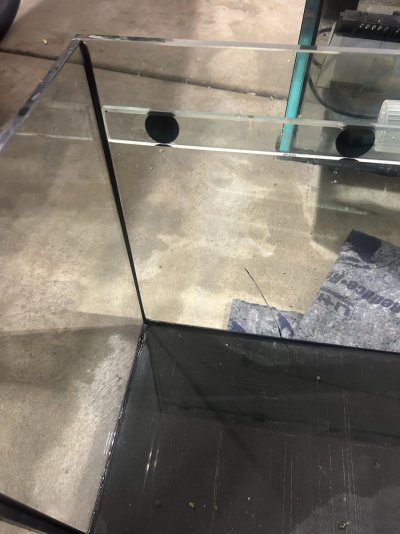
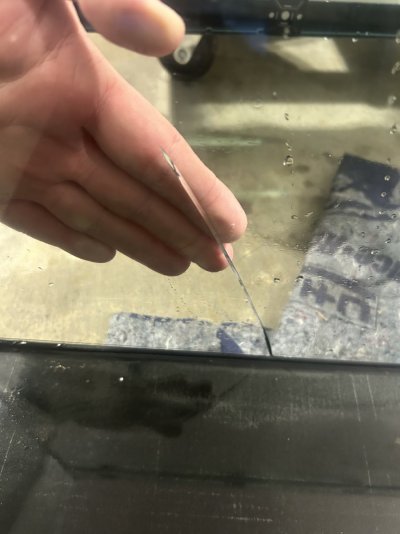
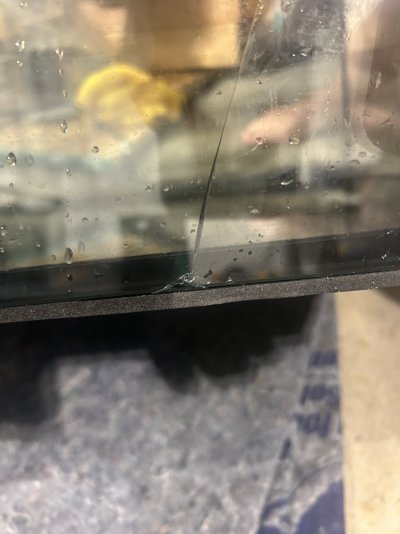
I was going to refill some Alk, Ca, and Mg and found a puddle in my cabinet. I took everything out and found that my sump is cracked at a corner!

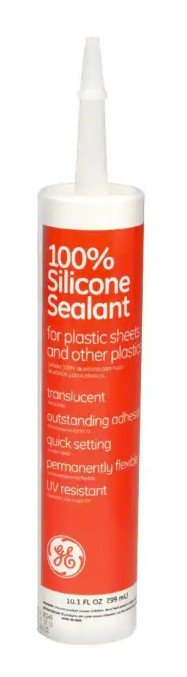
Can this be patched up? I'm thinking since it sits on the floor of the cabinet, there's no stress on it that I could just put a new piece of glass on top and caulk it in. It should work, right?

PXL_20220706_210417358.jpg
 

KrisReef

10K Club member
View Badges
Joined
May 15, 2018
Messages
11,651
Reaction score
27,478
Location
ADX Florence
Rating - 0%
0   0   0
Another piece of glass inside of that area might work for now. Problem may come if the crack at the top of your photo decides to crack a new fault going to the right and under the baffle nearest it?

If I tried to fix this like you suggest I would use a boatload of 100% aquarium safe silicone and fill the cavity between the old broken glass and the new patch.

A second bottom pane glued in the same fashion on the outside still will not protect against future pressure crack and leaks from the current broken area. So to answer your question; maybe. HTH, gl.
 

vetteguy53081

Well known Member and monster tank lover
View Badges
Joined
Aug 11, 2013
Messages
91,699
Reaction score
202,408
Location
Wisconsin -
Rating - 100%
13   0   0
With glass , im leery about any patching or cements as glass cracks can spread. A new glass panels is best or used acrylic sump
 
OP
OP
Chee-tomorpha

Chee-tomorpha

Active Member
View Badges
Joined
Oct 5, 2017
Messages
427
Reaction score
255
Location
Hugo, MN
Rating - 0%
0   0   0
Another piece of glass inside of that area might work for now. Problem may come if the crack at the top of your photo decides to crack a new fault going to the right and under the baffle nearest it?

If I tried to fix this like you suggest I would use a boatload of 100% aquarium safe silicone and fill the cavity between the old broken glass and the new patch.

A second bottom pane glued in the same fashion on the outside still will not protect against future pressure crack and leaks from the current broken area. So to answer your question; maybe. HTH, gl.
This will be a temporary fix until my new build is ready to go - I hope in the next few months as I have just started. I have used your recommendation and used 1/2 a tube of red GE 100% silicone in the patch.
 
OP
OP
Chee-tomorpha

Chee-tomorpha

Active Member
View Badges
Joined
Oct 5, 2017
Messages
427
Reaction score
255
Location
Hugo, MN
Rating - 0%
0   0   0
Why did it crack in the first place, that's the real question, is stand unlevel or was there something under it ?

what thickness glass ? is that the bottom pane or side pane? Photo a little confusing.
I'm not sure, but I did a rebuild on this 250 about 4-5 months back. It must have started then because now that I think about it, I did notice the foam pad getting wet. I thought it was just me spilling RO top-off water when servicing the reservoir.

It is an OEM Red Sea sump that came with the 250. I've never had an issue up til now with it.
 
OP
OP
Chee-tomorpha

Chee-tomorpha

Active Member
View Badges
Joined
Oct 5, 2017
Messages
427
Reaction score
255
Location
Hugo, MN
Rating - 0%
0   0   0
With glass , im leery about any patching or cements as glass cracks can spread. A new glass panels is best or used acrylic sump
I forced the crack to complete and luckily it terminated in the direction it was already going. So the entire corner is now separate from the rest and kind of floats - still attached along the silicone.

This will be temporary - albeit a long temporary as I get the new peninsula build completed.
 
Last edited:
OP
OP
Chee-tomorpha

Chee-tomorpha

Active Member
View Badges
Joined
Oct 5, 2017
Messages
427
Reaction score
255
Location
Hugo, MN
Rating - 0%
0   0   0
Since I was in a bind. I went ahead and got 3/32 thick glass, it's all I could find in a pinch from the big box stores near me and work late into the night.

In the first picture, I forced the crack to complete and it completed along the red line. The yellow line is of the cut 3/32 glass I used. I allowed it to cure for at least 2 hours until it was no longer tacky, and got everything back in and running around midnight last night. The tube's recommendation was to give it at least 12 hours to fully cure so I hope it doesn't fail, fingers are crossed.

So far this morning there are no leaks or damp foam pad. It seems pretty dry. I just need this to last until my Peninsula 500 build is ready for the transfer.
 

Attachments

  • PXL_20220706_210417358.jpg
    PXL_20220706_210417358.jpg
    242.1 KB · Views: 50
  • PXL_20220707_124115186.jpg
    PXL_20220707_124115186.jpg
    194.8 KB · Views: 45
  • Screenshot 2022-07-07 074850.jpg
    Screenshot 2022-07-07 074850.jpg
    20.7 KB · Views: 40

KrisReef

10K Club member
View Badges
Joined
May 15, 2018
Messages
11,651
Reaction score
27,478
Location
ADX Florence
Rating - 0%
0   0   0
Since I was in a bind. I went ahead and got 3/32 thick glass, it's all I could find in a pinch from the big box stores near me and work late into the night.

In the first picture, I forced the crack to complete and it completed along the red line. The yellow line is of the cut 3/32 glass I used. I allowed it to cure for at least 2 hours until it was no longer tacky, and got everything back in and running around midnight last night. The tube's recommendation was to give it at least 12 hours to fully cure so I hope it doesn't fail, fingers are crossed.

So far this morning there are no leaks or damp foam pad. It seems pretty dry. I just need this to last until my Peninsula 500 build is ready for the transfer.
Nicely done! Don’t move anything in or around the area, or the sump until you are ready to replace it. Since it’s holding water now I think you should be dry and ok for the near future as long as you don’t try to move anything around.
 
OP
OP
Chee-tomorpha

Chee-tomorpha

Active Member
View Badges
Joined
Oct 5, 2017
Messages
427
Reaction score
255
Location
Hugo, MN
Rating - 0%
0   0   0
Nicely done! Don’t move anything in or around the area, or the sump until you are ready to replace it. Since it’s holding water now I think you should be dry and ok for the near future as long as you don’t try to move anything around.
So far so good. Been dry since the patch.

Making progress on the new build so hopefully it'll get water before weekend arrives. Hopefully this 250 holds till then, I speculate another month, maybe two.
 
OP
OP
Chee-tomorpha

Chee-tomorpha

Active Member
View Badges
Joined
Oct 5, 2017
Messages
427
Reaction score
255
Location
Hugo, MN
Rating - 0%
0   0   0
Full shot of the sump area on the 250.

I was quoted for a replacement sump. First have to get approval from the boss, but was thinking about going with a v3 sump as a replacement. The boss doesn't want two tanks running but I was thinking to keep this running as a backup/frag tank since it will be older and more stable then the new build. I assume the plumbing will need to change. Anyone do this? And was it worth the conversion?

PXL_20220720_193507111.jpg
 

Mr bigolsworth

Active Member
View Badges
Joined
Jun 23, 2012
Messages
222
Reaction score
76
Location
Henderson NV. (Right outside Las Vegas)
Rating - 0%
0   0   0
Full shot of the sump area on the 250.

I was quoted for a replacement sump. First have to get approval from the boss, but was thinking about going with a v3 sump as a replacement. The boss doesn't want two tanks running but I was thinking to keep this running as a backup/frag tank since it will be older and more stable then the new build. I assume the plumbing will need to change. Anyone do this? And was it worth the conversion?

PXL_20220720_193507111.jpg
Well I had a small ouch on my tank and cracked the sump. Curious how your repair held up as I’m looking to do something similar.
 

Mr bigolsworth

Active Member
View Badges
Joined
Jun 23, 2012
Messages
222
Reaction score
76
Location
Henderson NV. (Right outside Las Vegas)
Rating - 0%
0   0   0
It's still holding up. I haven't moved it and has been running as my frag tank since.
I’m thinking of repairing my sump and beefing out the inside and outside.
 

Attachments

  • IMG_5907.jpeg
    IMG_5907.jpeg
    164.3 KB · Views: 13
  • IMG_5906.jpeg
    IMG_5906.jpeg
    116.3 KB · Views: 7
  • IMG_5908.jpeg
    IMG_5908.jpeg
    113.9 KB · Views: 11

Troylee

all about the diy!!!!!
View Badges
Joined
Jan 15, 2010
Messages
18,349
Reaction score
14,291
Location
Vegas baby!!!!
Rating - 0%
0   0   0
I’m thinking of repairing my sump and beefing out the inside and outside.
I’d suggest getting a diamond drill bit and drilling a hole in the end of that crack before patching it. After that you should be okay for awhile.
 

Caring for your picky eaters: What do you feed your finicky fish?

  • Live foods

    Votes: 14 27.5%
  • Frozen meaty foods

    Votes: 42 82.4%
  • Soft pellets

    Votes: 7 13.7%
  • Masstick (or comparable)

    Votes: 3 5.9%
  • Other

    Votes: 2 3.9%
Back
Top