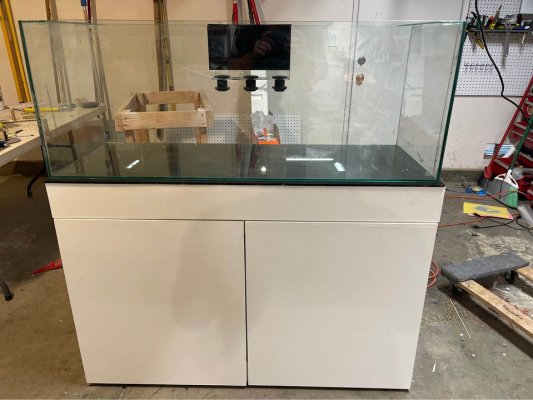
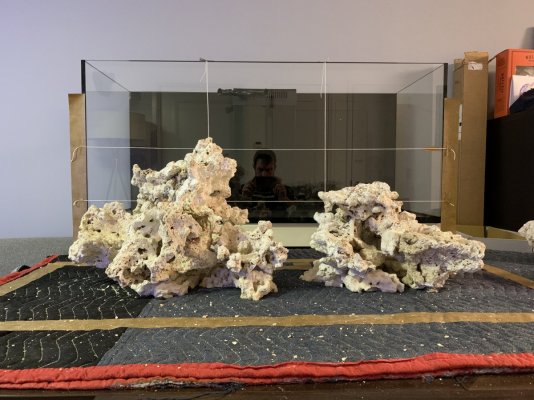
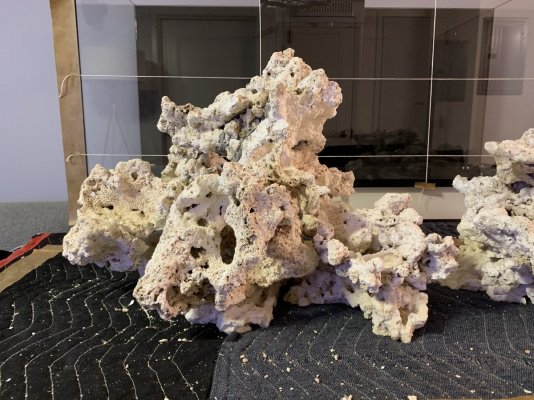
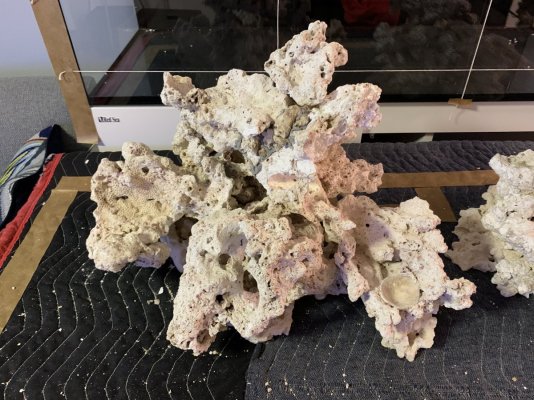
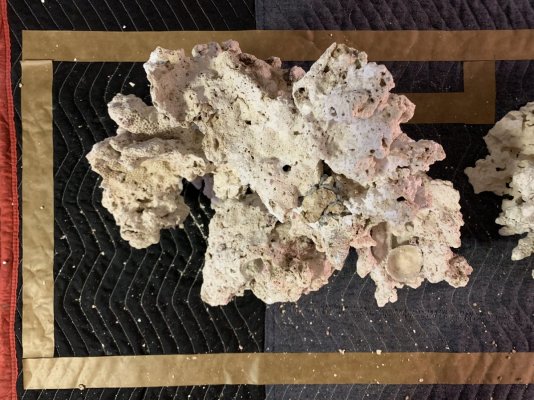
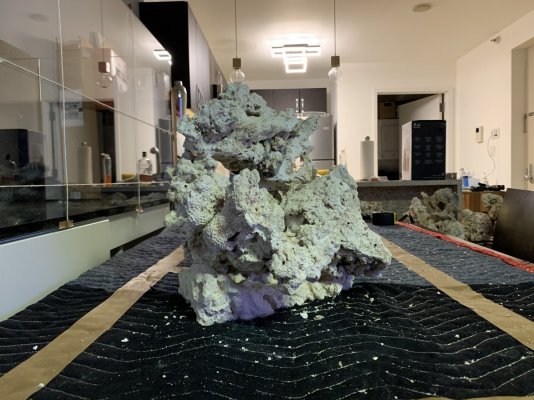
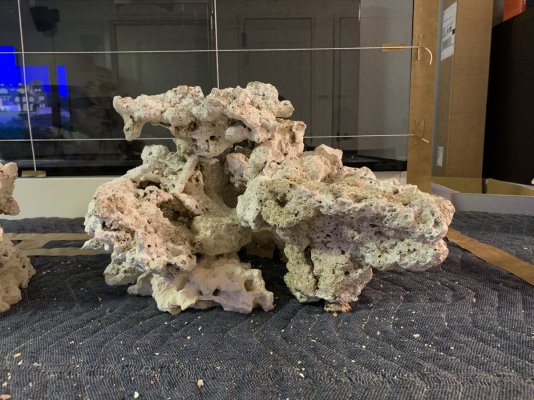
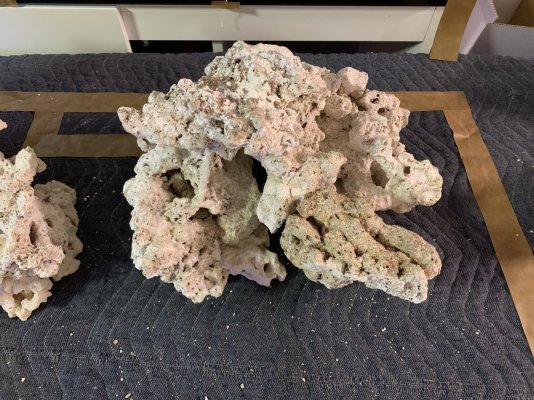
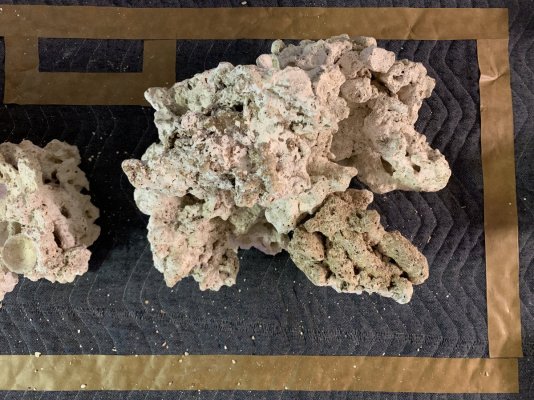
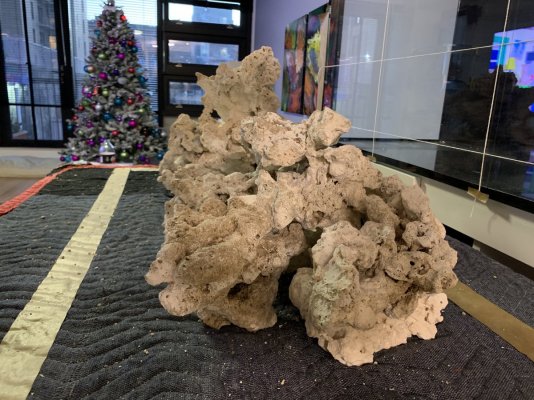
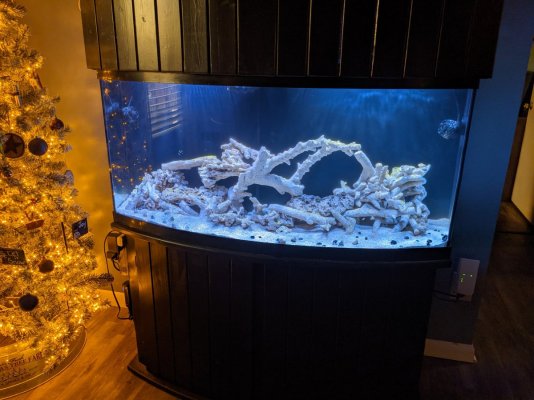
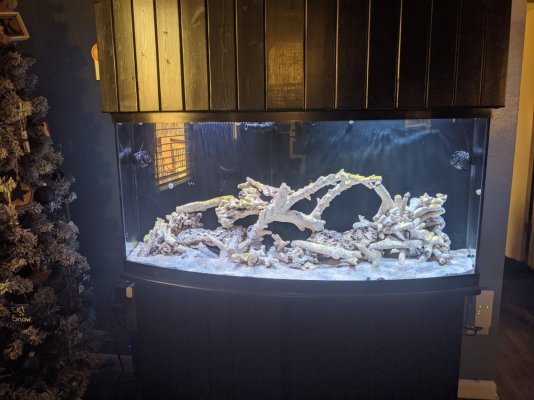
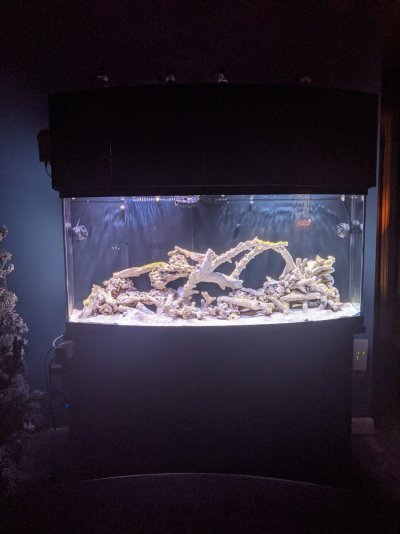
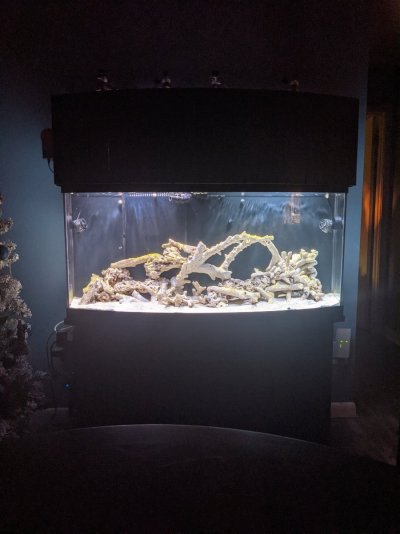
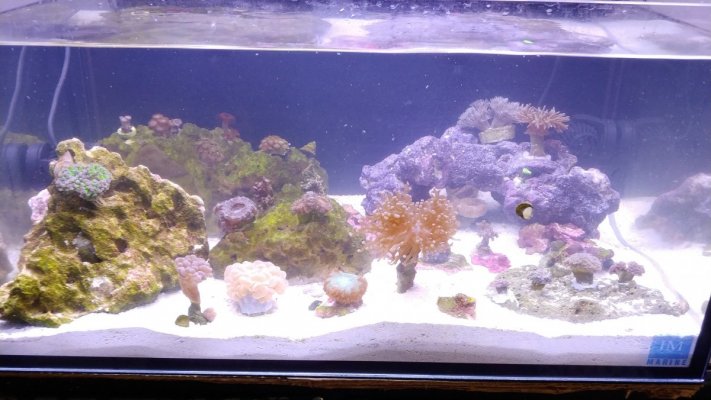
That looks like a neat aquascape with a lot of the right points I like: fairly natural in appearance, nice shelves and caves for fish, plenty of surface area for different corals with ideal conditions in mind, somewhat full in appearance while leaving some empty space, emptier toward the front while fuller in the back.40 breeder, 3 AI 16 Prime HD's
Look's like a pile of rocks right now, but I tried to picture my goals. The shelf in the center with branching SPS corals. Monti's on the outer peaks. Torches, Hammers, Duncan's, frogspawn across the mid level. Zoa's, mushrooms, acan's along bottom and on sand. Though about taking out the center base rock to leave a large negative space. ??
I've added sand since this picture.

Navigation
Install the app
How to install the app on iOS
Follow along with the video below to see how to install our site as a web app on your home screen.
Note: This feature may not be available in some browsers.
More options
You are using an out of date browser. It may not display this or other websites correctly.
You should upgrade or use an alternative browser.
You should upgrade or use an alternative browser.
Is your aquascape balanced?
- Thread starter Queenofreef
- Start date
- Tagged users None
hi,
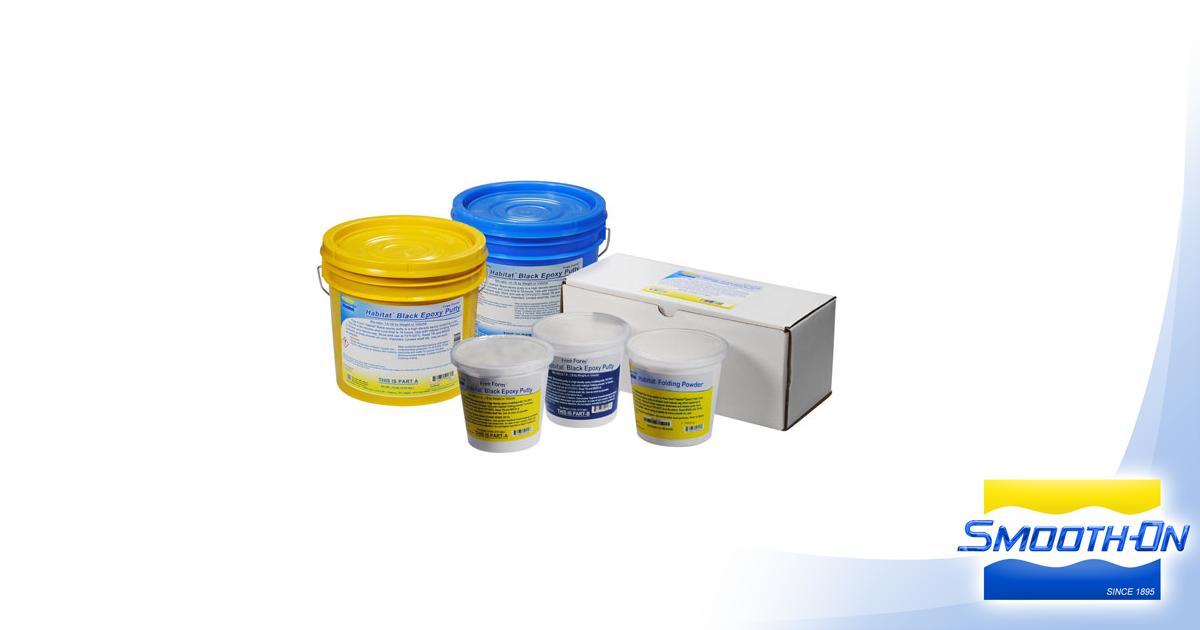
yes that is what I used. They sell another product call Habitat Fire Safe that I have not yet worked with, but will try next time. It's also rated aquarium safe and from the pics on their site and on a suppliers site, Reynolds Advanced Materials, it appears to dry a lighter grey to an off white. The Reynolds site has some aquarium project videos. I see you're in L.A. The Reynolds office there was a great help to me when I was doing mine.
Seems like their entire “free form” line all have the same safety sheet.hi,
yes that is what I used. They sell another product call Habitat Fire Safe that I have not yet worked with, but will try next time. It's also rated aquarium safe and from the pics on their site and on a suppliers site, Reynolds Advanced Materials, it appears to dry a lighter grey to an off white. The Reynolds site has some aquarium project videos. I see you're in L.A. The Reynolds office there was a great help to me when I was doing mine.
so I’m assuming they’d all be reed safe, I wonder how well the “Free Sculpt” works.
I don't see where it sez it's aquarium safe. also I used pvc for the inside "skeleton". Free Sculpt doesn't list that as something it will bond to.Seems like their entire “free form” line all have the same safety sheet.
so I’m assuming they’d all be reed safe, I wonder how well the “Free Sculpt” works.
your scapes are awesome, your videos are what inspired my first aquascape. also your videos are not boring to watch.
Thanks for your contributions to the reefing community.
Thanks for your contributions to the reefing community.
Aquascaping from a design perspective is rarely discussed. I’ve always wondered why we don’t talk much about what makes a scape look visually appealing, so I’ve started a series where I apply common principles of design used in art, photography, graphic design, etc. to reef aquascapes.
This is the first video in the series where I talk about creating balance with your rockwork and how you can use combinations of symmetrical, asymmetrical, and radial balance to create an aesthetically pleasing scape.
This is not a hard-line rule for how to aquascape, but rather a perspective of viewing your aquascape design. Obviously practical considerations must always come first. However, viewing my scapes this way has helped me tremendously and I hope it’s useful to you guys as well!
Let me know what you think
Awesome video, super informative. Right on.
Aquascaping from a design perspective is rarely discussed. I’ve always wondered why we don’t talk much about what makes a scape look visually appealing, so I’ve started a series where I apply common principles of design used in art, photography, graphic design, etc. to reef aquascapes.
This is the first video in the series where I talk about creating balance with your rockwork and how you can use combinations of symmetrical, asymmetrical, and radial balance to create an aesthetically pleasing scape.
This is not a hard-line rule for how to aquascape, but rather a perspective of viewing your aquascape design. Obviously practical considerations must always come first. However, viewing my scapes this way has helped me tremendously and I hope it’s useful to you guys as well!
Let me know what you think
This is the link to my first ever reef aquarium rockscape which is literally new and still cycling! I just recorded this for this post. There are some things I wish I did different but it’s too late to make any changes! Lol I did however consider ample spacing between the rocks in the rockscape and did not allow for the structure to go up more than half way to allow for coral growth in the future. Wish I made it a tad bit shorter though.
40 breeder, 3 AI 16 Prime HD's
Look's like a pile of rocks right now, but I tried to picture my goals. The shelf in the center with branching SPS corals. Monti's on the outer peaks. Torches, Hammers, Duncan's, frogspawn across the mid level. Zoa's, mushrooms, acan's along bottom and on sand. Though about taking out the center base rock to leave a large negative space. ??
I've added sand since this picture.

I really the idea of adding the negative space and having the two structures meet with the overhang, that would be so sexy. Going to look awesome, post updates please!!40 breeder, 3 AI 16 Prime HD's
Look's like a pile of rocks right now, but I tried to picture my goals. The shelf in the center with branching SPS corals. Monti's on the outer peaks. Torches, Hammers, Duncan's, frogspawn across the mid level. Zoa's, mushrooms, acan's along bottom and on sand. Though about taking out the center base rock to leave a large negative space. ??
I've added sand since this picture.

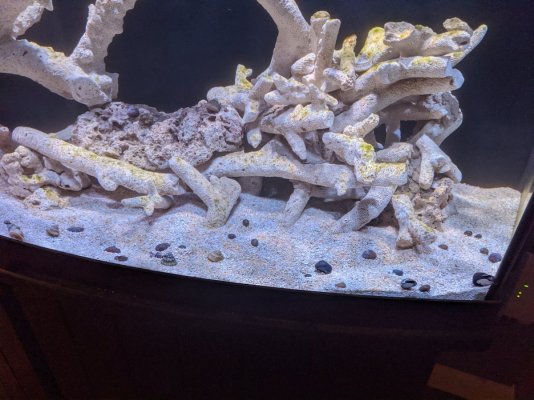
I love Tonga branch scapes! Wish I could make them haha. Do you have any pictures straight on?I think i did a good job...

Aw thank you!! And yes, it was super frustrating process to say the least haha.This is awesome, VERY well done, I'm sure this took a LONG time and a lot of patience.
What putty/epoxy did you use? Did you use any clamps/support while doing this?
I used super glue and Bob Smoth Insta set when designing, and cemented it using E Marco 400 (pink). I have a video series on my YT channel documenting how I made it if you’re interested! I didn’t use any clamps or support- just building pieces on top of each other and letting it dry and adding more, repeat. Long process but worth it, I’m so happy with how it turned out.
Sure do! disregard the ugly stage that has slowly arrived... Tanks just about 3 months now. Just added first set of CUC. Took some with and without my Ice cap camera filter.I love Tonga branch scapes! Wish I could make them haha. Do you have any pictures straight on?
Attachments
Its very well done and well built!Aw thank you!! And yes, it was super frustrating process to say the least haha.
I used super glue and Bob Smoth Insta set when designing, and cemented it using E Marco 400 (pink). I have a video series on my YT channel documenting how I made it if you’re interested! I didn’t use any clamps or support- just building pieces on top of each other and letting it dry and adding more, repeat. Long process but worth it, I’m so happy with how it turned out.
Thanks for the info I will definitely check it out.
I watched the one on this page I'll browse a few of your others.
I don't see where it sez it's aquarium safe. also I used pvc for the inside "skeleton". Free Sculpt doesn't list that as something it will bond to.
Curing - Free Form™ SCULPT will reach full properties after 24 hours at room temperature. Cured epoxy is waterproof and can be sanded or machined. If machining or sanding, wear NIOSH approved particulate mask to prevent inhalation of particles.
Painting – Cured Free Form™ SCULPT can be primed and painted with acrylic enamel paints. Let paint fully dry before handling.
Heat Resistance – Fully cured putty with a minimum thickness of ½” (1.27 cm) will resist temperatures up to 150° F / 65° C.
Removing Uncured Free Form™ SCULPT - Remove as much uncured material from the surface as possible. Clean any residue with soap and water. Optional - Use E-POX-EE KLEENER™ available from Smooth-On.
Shelf Life - In an unopened container, at 73° F / 23° C, shelf life is 2 years. Use entire contents as soon as possible after opening.
--------------------------------------
This is from the site page info on the Free Form Sculpt. Says it's waterproof, which makes me think it wouldn't leach into the water, but Unsure.
I'm thinking if it's truly waterproof I could sculpt something with wire or metal as a base, making it much easier/sturdier and could create custom shapes really nicely. I'm mainly thinking of using this on parts of my scape, On something like arches and ridges and small ledges. I do want to incorporate some Stax Marco Rock.
Also in the safety data sheet it list all the products on the same sheet. I think I'll give them a call and ask some questions about it.
They do some crazy things with this stuff....
Last edited:
I personally wouldn't make the leap of faith that it has been tested out and proven aquarium proof with out having that in writing. the Black and Fire Safe state that. I would not use any metal that was going into the tank. if you were to get a hairline crack, it could cause all kinds of problems. water has a funny way of finding it's way in to places it is unwanted.
Curing - Free Form™ SCULPT will reach full properties after 24 hours at room temperature. Cured epoxy is waterproof and can be sanded or machined. If machining or sanding, wear NIOSH approved particulate mask to prevent inhalation of particles.
Painting – Cured Free Form™ SCULPT can be primed and painted with acrylic enamel paints. Let paint fully dry before handling.
Heat Resistance – Fully cured putty with a minimum thickness of ½” (1.27 cm) will resist temperatures up to 150° F / 65° C.
Removing Uncured Free Form™ SCULPT - Remove as much uncured material from the surface as possible. Clean any residue with soap and water. Optional - Use E-POX-EE KLEENER™ available from Smooth-On.
Shelf Life - In an unopened container, at 73° F / 23° C, shelf life is 2 years. Use entire contents as soon as possible after opening.
--------------------------------------
This is from the site page info on the Free Form Sculpt. Says it's waterproof, which makes me think it wouldn't leach into the water, but Unsure.
I'm thinking if it's truly waterproof I could sculpt something with wire or metal as a base, making it much easier/sturdier and could create custom shapes really nicely. I'm mainly thinking of using this on parts of my scape, On something like arches and ridges and small ledges. I do want to incorporate some Stax Marco Rock.
Also in the safety data sheet it list all the products on the same sheet. I think I'll give them a call and ask some questions about it.

Im mid watching this video they made about the Christmas Tree.I personally wouldn't make the leap of faith that it has been tested out and proven aquarium proof with out having that in writing. the Black and Fire Safe state that. I would not use any metal that was going into the tank. if you were to get a hairline crack, it could cause all kinds of problems. water has a funny way of finding it's way in to places it is unwanted.
They list everything they used in it, I'll just make sure I use one of the materials they used, they made super awesome structures with it and I'm sure it'll be fine for what I have planned!
Yeah I know if it leaches it'll be a tank crasher, so I see your point, even if it is, maybe one day it breaks or something happens. But it looks like it has plenty of structure without much support even.
They put it in a Shark Tank so I'm sure it's def Reef Safe.
is that on the Smooth On or Reynolds Advanced Material site? I forget which.Im mid watching this video they made about the Christmas Tree.
They list everything they used in it, I'll just make sure I use one of the materials they used, they made super awesome structures with it and I'm sure it'll be fine for what I have planned!
Yeah I know if it leaches it'll be a tank crasher, so I see your point, even if it is, maybe one day it breaks or something happens. But it looks like it has plenty of structure without much support even.
They put it in a Shark Tank so I'm sure it's def Reef Safe.
I think it's not bad but I should go higher lol

smooth-onis that on the Smooth On or Reynolds Advanced Material site? I forget which.
Similar threads
-
- Poll
- Replies
- 10
- Views
- 490
-
- Poll
- Replies
- 42
- Views
- 3,312
-
- Poll
- Replies
- 21
- Views
- 2,104
-
- Poll
- Replies
- 34
- Views
- 2,118


