

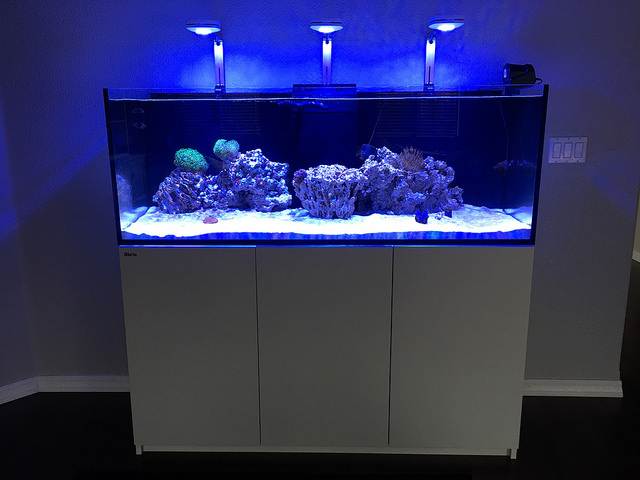
Current state of tank:
This is my first post on R2R so hopefully I am doing this correctly.
A little back story first, I have been in and out of the hobby since about 2010. The in and out part mostly because of my living situation. I started with a 40 breeder. In college for my senior project, I built a marine tank that mixes up salt and water automatically and then performs automated water changes. Eventually, I came across a free 14 biocube. That worked well while living in studios and apartments. I have been collecting things as I go through out the years. My wife and I recently purchased a home and finally have no limit on the amount of gallons! So first I had to decide on a tank for my new space.
I obviously wanted a Reef Savvy tank from Felix's family, so I went to his site first and got a quote. I figured shipping could not be that bad, as I had purchased my first car on eBay and to ship a car from TX to CA, door to door was about $700. So I figured an aquarium can't be that bad. They were extremely responsive. They quoted me for a 60”x24”x18”H without the tank stand $2,625.00, $831.77 + $300.00 for crate and packing materials, to my location in CA. This was not too bad, but then I still needed a stand. I was thinking about building my own, but they will give you a better warranty on the tank if you get their stand. So I kept that in mind.
I started looking around to see what other options are out there. I have seen the Red Sea series tanks in LFS's before and I loved how most everything was done for you. Since I wanted to customize some of the things, the Reefer series seemed to line up perfectly for what I was looking for.
After doing some reading here on R2R, the obvious choice was to put the tank in the room where you see it the most...the living room. Next, I had to see which model worked best in my space. I taped some outlines of the 350, 425, and 450:


It was pretty clear right away that this huge wall required a larger tank, so when I saw the XL series, I knew I was on the right track. I had two concerns though; the side view of the fireplace and the heat from it. I found some furniture not in-use and lined it up to get a sense of the size. As you can tell, I am more of a visual person.


Added the dog leash to get the full affect haha. Tested out the heat from the fireplace and it was not bad at all.

So it was decided! I would go with the RSR 450. I taped it off on the wall, once again to get a visual sense of the tank. Our dog was a bit interested in what the heck I was doing. Since its a big purchase, we left it up for a few weeks to make sure it was what we wanted.

I ordered the tank from bulkreefsupply.com. I choose them because they always have free shipping, no tax ;) and 5%-10% back in points toward future purchases!
While I waited for it to arrive, I prepped the electrical and the network. I decided not to do a GFCI outlet for a few reasons, but I mainly wanted to get the tank as close to the wall as possible.

I had some trouble locating where the cat5 cable was ending up in the wall, so I used my cell phone camera to help navigate! Once I knew where it ended up, I was able to grab it with my hand and pull it through.

I chose a brush wall plate because I am thinking about running an air line for my protein skimmer up into the attic and then out to a vent to pull air from outside.

After about two weeks went by, I called BRS to check in to see how delivery would work since they are drop shipped from the Red Sea in TX. BRS indicated that once it arrives at the local hub, the freight company will call me from a random phone number to schedule a delivery date and time and to make sure I answer. Once I received their call, we scheduled a day and time and I arranged to work from home that day. Lucky, I did because they did not call before they came and arrived earlier then scheduled. The nice man placed it in the garage for me with his pallet mover. Everything arrived safely, woohoo!
Everything came in one wooden crate. Stand is in the box on the left. Its super heavy! I ended up opening it up right where it was at and taking each individual piece into the house.

Sump box was inside the tank.

Comes nicely wrapped up and all put together. I ended up putting white RTA on four of the sides.

Pipes and Misc parts

I built the stand, but I removed the little white plastic feet on the bottom for 2 reasons: 1) looked cheap, and 2) I didn't want pressure points on the laminate floors.


This glass tank was incredibly heavy! Luckily, I had the forearm forklift near by from our recent move. It felt almost as heavy as a fridge! Even getting the straps under the tank was challenging. After a few unsuccessful attempts to lift it with my wife, I ended up borrowing the neighbor's help. We padded our arms with towels and were able to get this beast onto the stand.


It does not block the fireplace view by much.

Alright, beginning stages of the plumping. Again, I am a visual person so I started with cardboard

Ordered up some schedule 80 PVC parts from BRS:

M1 Pump ordered from BRS:

This was my first attempt. I used the same standard 3/4'' thread with extra tape to try and fill those gaps with the metric pipe thread.
I dry fit everything, I wanted to use the least amount of 90 degree angles because I was worried about head loss so I didn't bring it all the way up and back down.

I also wanted to have the chiller in line. I drilled some holes and used furniture covers to protect the cabinet.


Within a day or two, I got a slow dripping leak on the threaded inlet adapter. I tried everything to get it to seal, even pipe dope (probably not good for a marine tank). After doing some online research, I found that you can order parts directly from Read Sea. So, I ended up ordering a second emergency down pipe for around $25 from Red Sea.
The emergency down pipe 25mm pipe. From BRS I ordered:
"25mm to 3⁄4" Metric to Standard PVC Adapter"
http://www.bulkreefsupply.com/metric-to-standard-pvc-adapters.html
and from CoralVue:
"25mm Metric Standard Coupling"
http://www.coralvue.com/metric-standard-coupling
Here is what I came up with: Display Tank -> Red Sea emergency pipe -> Coupling -> PVC Adapter -> 3/4'' Pipe. Best part, no more leaks!

I ended up not connecting the chiller in line right now. The town I live in almost never gets hotter then 72 degrees. None of the houses out here even come with AC because it's really not needed. I plan to try out some fans in the sump if it ever gets too hot. I also want the extra room in that cabinet.
I also decided NOT to add anything else in line of the return pump. First, it's the heart of the system and second, I read that a lot of people are having to keep dialing the return Red Sea knob around to get it to stop gurgling. It looks like it's mostly because they have attached some sort of reactor to the return line. From what it looks like, those reactors can change pressure as they clog up or media dissolves. I'd rather add a second smaller pump to a reactor. For now, I have not figured that out yet. I am just floating the media in filter bags. Who knows, I may change my mind down the line.
I also want to point out that it is helpful if you rotate the emergency pipe a bit away from the back wall. When you first turn the pump on or off, bubbles are shot down both pipes and I was getting a very small amount of water flow over the side because of the bubbles were coming up so fast. After rotating the pipe, that seems to have resolved it. I just wish this sump was a bit higher.

Here is the end result of the plumping, right now. I got the "official Red Sea fug light" haha. The light was bleeding out too much at night and I couldn't take it. Drilled some holes and that took care of it!
I plan to build an acrylic baffle for a fug. I found a company out of the states that makes one, but I am not sure the skimmer will work with it.

On to the electronics. I cut some of the cheap wood that the tank was boxed up in, for now. I painted it and stood it up. I have not mounted it to the cabinet yet because I have not made up my mind.
I have the 4 outlet apex Jr connected to the UPS for life support if the power goes out. I believe it is only the flow pumps and maybe the return pump. Estimated backup time is about 50 minutes.

I have to fill up the ATO tank every other day it seems, so I am trying to figure out how I can safely add a water storage tank that is easily accessible to add water too. Or, I may tube it in from the garage. I am just worried that purified water sitting in RO/DI tubing in the attic would mold over time?
I won some prizes at MACNA 2016 and did some bartering to get the AI Prime +HD's.

Here is the power of just one light. I think it was at its factory setting of all LEDs=60%.


I ended up going with BRS pukani rock. I think it was ~50lbs. I placed it on acrylic sheets to give it a more rigid bottom in case a rock topples down. I am not too impressed with my aquascaping skills at this point. I defaulted to the rock wall just to get things out of the biocube. I may cure another 50lbs in the garage and then play around with the shapes more.
I ended up curing the rock for a few months in the tank with just fresh water. The reef mini flake sand was added later. My official curing with salt/start up day was September 17, 2016.
Lastly, I picked up the dry mate cleaning mat from Drs. Foster and Smith:
http://www.drsfostersmith.com/product/prod_display.cfm?pcatid=14697

I think that the next addition to the tank will be some Apex WAV pumps.:)
Water filtration:

This is my first post on R2R so hopefully I am doing this correctly.
A little back story first, I have been in and out of the hobby since about 2010. The in and out part mostly because of my living situation. I started with a 40 breeder. In college for my senior project, I built a marine tank that mixes up salt and water automatically and then performs automated water changes. Eventually, I came across a free 14 biocube. That worked well while living in studios and apartments. I have been collecting things as I go through out the years. My wife and I recently purchased a home and finally have no limit on the amount of gallons! So first I had to decide on a tank for my new space.
I obviously wanted a Reef Savvy tank from Felix's family, so I went to his site first and got a quote. I figured shipping could not be that bad, as I had purchased my first car on eBay and to ship a car from TX to CA, door to door was about $700. So I figured an aquarium can't be that bad. They were extremely responsive. They quoted me for a 60”x24”x18”H without the tank stand $2,625.00, $831.77 + $300.00 for crate and packing materials, to my location in CA. This was not too bad, but then I still needed a stand. I was thinking about building my own, but they will give you a better warranty on the tank if you get their stand. So I kept that in mind.
I started looking around to see what other options are out there. I have seen the Red Sea series tanks in LFS's before and I loved how most everything was done for you. Since I wanted to customize some of the things, the Reefer series seemed to line up perfectly for what I was looking for.
After doing some reading here on R2R, the obvious choice was to put the tank in the room where you see it the most...the living room. Next, I had to see which model worked best in my space. I taped some outlines of the 350, 425, and 450:
It was pretty clear right away that this huge wall required a larger tank, so when I saw the XL series, I knew I was on the right track. I had two concerns though; the side view of the fireplace and the heat from it. I found some furniture not in-use and lined it up to get a sense of the size. As you can tell, I am more of a visual person.
Added the dog leash to get the full affect haha. Tested out the heat from the fireplace and it was not bad at all.
So it was decided! I would go with the RSR 450. I taped it off on the wall, once again to get a visual sense of the tank. Our dog was a bit interested in what the heck I was doing. Since its a big purchase, we left it up for a few weeks to make sure it was what we wanted.
I ordered the tank from bulkreefsupply.com. I choose them because they always have free shipping, no tax ;) and 5%-10% back in points toward future purchases!
While I waited for it to arrive, I prepped the electrical and the network. I decided not to do a GFCI outlet for a few reasons, but I mainly wanted to get the tank as close to the wall as possible.
I had some trouble locating where the cat5 cable was ending up in the wall, so I used my cell phone camera to help navigate! Once I knew where it ended up, I was able to grab it with my hand and pull it through.
I chose a brush wall plate because I am thinking about running an air line for my protein skimmer up into the attic and then out to a vent to pull air from outside.
After about two weeks went by, I called BRS to check in to see how delivery would work since they are drop shipped from the Red Sea in TX. BRS indicated that once it arrives at the local hub, the freight company will call me from a random phone number to schedule a delivery date and time and to make sure I answer. Once I received their call, we scheduled a day and time and I arranged to work from home that day. Lucky, I did because they did not call before they came and arrived earlier then scheduled. The nice man placed it in the garage for me with his pallet mover. Everything arrived safely, woohoo!
Everything came in one wooden crate. Stand is in the box on the left. Its super heavy! I ended up opening it up right where it was at and taking each individual piece into the house.
Sump box was inside the tank.
Comes nicely wrapped up and all put together. I ended up putting white RTA on four of the sides.
Pipes and Misc parts
I built the stand, but I removed the little white plastic feet on the bottom for 2 reasons: 1) looked cheap, and 2) I didn't want pressure points on the laminate floors.
This glass tank was incredibly heavy! Luckily, I had the forearm forklift near by from our recent move. It felt almost as heavy as a fridge! Even getting the straps under the tank was challenging. After a few unsuccessful attempts to lift it with my wife, I ended up borrowing the neighbor's help. We padded our arms with towels and were able to get this beast onto the stand.
It does not block the fireplace view by much.
Alright, beginning stages of the plumping. Again, I am a visual person so I started with cardboard
Ordered up some schedule 80 PVC parts from BRS:
M1 Pump ordered from BRS:
This was my first attempt. I used the same standard 3/4'' thread with extra tape to try and fill those gaps with the metric pipe thread.
I dry fit everything, I wanted to use the least amount of 90 degree angles because I was worried about head loss so I didn't bring it all the way up and back down.
I also wanted to have the chiller in line. I drilled some holes and used furniture covers to protect the cabinet.
Within a day or two, I got a slow dripping leak on the threaded inlet adapter. I tried everything to get it to seal, even pipe dope (probably not good for a marine tank). After doing some online research, I found that you can order parts directly from Read Sea. So, I ended up ordering a second emergency down pipe for around $25 from Red Sea.
The emergency down pipe 25mm pipe. From BRS I ordered:
"25mm to 3⁄4" Metric to Standard PVC Adapter"
http://www.bulkreefsupply.com/metric-to-standard-pvc-adapters.html
and from CoralVue:
"25mm Metric Standard Coupling"
http://www.coralvue.com/metric-standard-coupling
Here is what I came up with: Display Tank -> Red Sea emergency pipe -> Coupling -> PVC Adapter -> 3/4'' Pipe. Best part, no more leaks!
I ended up not connecting the chiller in line right now. The town I live in almost never gets hotter then 72 degrees. None of the houses out here even come with AC because it's really not needed. I plan to try out some fans in the sump if it ever gets too hot. I also want the extra room in that cabinet.
I also decided NOT to add anything else in line of the return pump. First, it's the heart of the system and second, I read that a lot of people are having to keep dialing the return Red Sea knob around to get it to stop gurgling. It looks like it's mostly because they have attached some sort of reactor to the return line. From what it looks like, those reactors can change pressure as they clog up or media dissolves. I'd rather add a second smaller pump to a reactor. For now, I have not figured that out yet. I am just floating the media in filter bags. Who knows, I may change my mind down the line.
I also want to point out that it is helpful if you rotate the emergency pipe a bit away from the back wall. When you first turn the pump on or off, bubbles are shot down both pipes and I was getting a very small amount of water flow over the side because of the bubbles were coming up so fast. After rotating the pipe, that seems to have resolved it. I just wish this sump was a bit higher.
Here is the end result of the plumping, right now. I got the "official Red Sea fug light" haha. The light was bleeding out too much at night and I couldn't take it. Drilled some holes and that took care of it!
I plan to build an acrylic baffle for a fug. I found a company out of the states that makes one, but I am not sure the skimmer will work with it.
On to the electronics. I cut some of the cheap wood that the tank was boxed up in, for now. I painted it and stood it up. I have not mounted it to the cabinet yet because I have not made up my mind.
I have the 4 outlet apex Jr connected to the UPS for life support if the power goes out. I believe it is only the flow pumps and maybe the return pump. Estimated backup time is about 50 minutes.
I have to fill up the ATO tank every other day it seems, so I am trying to figure out how I can safely add a water storage tank that is easily accessible to add water too. Or, I may tube it in from the garage. I am just worried that purified water sitting in RO/DI tubing in the attic would mold over time?
I won some prizes at MACNA 2016 and did some bartering to get the AI Prime +HD's.
Here is the power of just one light. I think it was at its factory setting of all LEDs=60%.
I ended up going with BRS pukani rock. I think it was ~50lbs. I placed it on acrylic sheets to give it a more rigid bottom in case a rock topples down. I am not too impressed with my aquascaping skills at this point. I defaulted to the rock wall just to get things out of the biocube. I may cure another 50lbs in the garage and then play around with the shapes more.
I ended up curing the rock for a few months in the tank with just fresh water. The reef mini flake sand was added later. My official curing with salt/start up day was September 17, 2016.
Lastly, I picked up the dry mate cleaning mat from Drs. Foster and Smith:
http://www.drsfostersmith.com/product/prod_display.cfm?pcatid=14697
I think that the next addition to the tank will be some Apex WAV pumps.:)
Water filtration:
Last edited:


