8020 light stand advice needed!

xxoczukxx

Active Member
View Badges
Joined
Apr 20, 2017
Messages
340
Reaction score
133
Rating - 0%
0   0   0
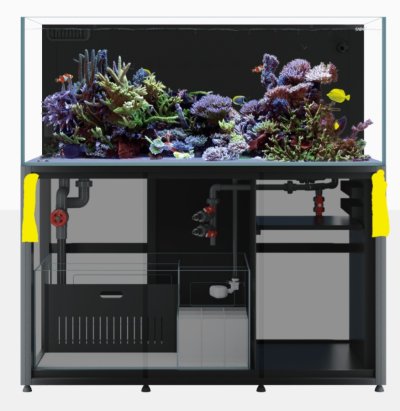
I am in the strange position where I want to hang my lights over my upcoming tank, however I do not want to drill into the walls or the ceiling and the back of the stand I am getting appears to be straight metal with no place that I could attach a light stand to.

With that in mind, I designed this standing light stand using 8020's design software.

My main issue however, is that I think I put too many of the corner things and fasteners on because my total came out to $825....

I'd really love if anyone more knowledgeable with this stuff could help me refine this build as I think I may have overdone it? Lights I assume should not be more than 10-15 pounds (potentially 3 xr15s or 2 xr15 and one xr30.

Also since I forgot to put it in the drawing, the width of the horizontal bars are 39", making the entire stand 41" wide when accounting for the width of the bars on the ends.

1747322892578.png


1747323073349.png
 

Mr. Mojo Rising

10K Club member
View Badges
Joined
Feb 14, 2021
Messages
13,339
Reaction score
15,814
Location
Toronto
Rating - 0%
0   0   0
If you search on amazon, you can find a lot of racks that sit on the aquarium and you can hang the lights, there's one picture below but there are other kinds. I've used one of these before, they are reliable, but can get in the way for maintenance and water change. You should easily find one of these less than $100.

I've also seen a few racks similar to your drawing, that the rack does not sit on the aquarium but on the floor. I didn't like the design of these as they were bigger, I guess to balance to hold the light, and aesthetically not very nice to have an exoskeleton around the tank.

Good luck.

1747323328684.png
 
OP
OP
xxoczukxx

xxoczukxx

Active Member
View Badges
Joined
Apr 20, 2017
Messages
340
Reaction score
133
Rating - 0%
0   0   0
If you search on amazon, you can find a lot of racks that sit on the aquarium and you can hang the lights, there's one picture below but there are other kinds. I've used one of these before, they are reliable, but can get in the way for maintenance and water change. You should easily find one of these less than $100.

I've also seen a few racks similar to your drawing, that the rack does not sit on the aquarium but on the floor. I didn't like the design of these as they were bigger, I guess to balance to hold the light, and aesthetically not very nice to have an exoskeleton around the tank.

Good luck.

1747323328684.png
I am avoiding those types of light stands on purpose, I don't like the look of light stands or mounts that sit on the lip of the glass.

The stand I designed is skinnier than the width of the tank and the legs would be fully hidden in the space beneath the tank as with the levelling legs it should leave a slightly larger than 1" gap that the 1" bars can slide under. The only visible part of the light stand will be the bars coming up behind the tank and then of course the arms coming forward to hold the lights
 

RocketEngineer

Valuable Member
View Badges
Joined
Sep 3, 2019
Messages
1,355
Reaction score
1,515
Rating - 0%
0   0   0
IMG_2325.jpeg

Magenta: Remove the brackets where you have plates. Doesn’t help, just adds cost.
Orange: This should be one piece. Or remove that front bar entirely.
Green: Add braces here. These will make the whole thing a lot more rigid when loaded.
 
OP
OP
xxoczukxx

xxoczukxx

Active Member
View Badges
Joined
Apr 20, 2017
Messages
340
Reaction score
133
Rating - 0%
0   0   0
IMG_2325.jpeg

Magenta: Remove the brackets where you have plates. Doesn’t help, just adds cost.
Orange: This should be one piece. Or remove that front bar entirely.
Green: Add braces here. These will make the whole thing a lot more rigid when loaded.
This will sit behind/under the tank stand.

Orange i will probably remove those bars the gap is required to slide it under the tank as there is a center leveling foot, green i wouldnt be able to add those as the stand would be about an inch off of the back of the tank
 

Txoutlaw

Active Member
View Badges
Joined
Nov 23, 2022
Messages
113
Reaction score
88
Location
South TX-RGV
Rating - 0%
0   0   0
Have you setup the
Tank yet? If not I can give you an idea and it will cut down on all that material making it cheaper. You said the stand is metal right? Post a pic and let me see the stand.
 
OP
OP
xxoczukxx

xxoczukxx

Active Member
View Badges
Joined
Apr 20, 2017
Messages
340
Reaction score
133
Rating - 0%
0   0   0
Have you setup the
Tank yet? If not I can give you an idea and it will cut down on all that material making it cheaper. You said the stand is metal right? Post a pic and let me see the stand.
I dont have it yet but you can get an idea of the stand like 6 minutes into this video!


Its been hard finding good videos or pictures of the rear
 

Txoutlaw

Active Member
View Badges
Joined
Nov 23, 2022
Messages
113
Reaction score
88
Location
South TX-RGV
Rating - 0%
0   0   0
Ok.i have a couple of questions..

Do you own a drill or have access to one?
What about a grinder?
 

Txoutlaw

Active Member
View Badges
Joined
Nov 23, 2022
Messages
113
Reaction score
88
Location
South TX-RGV
Rating - 0%
0   0   0
No it wouldn't.ive been a welder and fabricator for 25yrs so I'm sure it would effect it at all.
I have a taken a couple of screen shots of some pics.one being yours and one off the net.im going to post them and explain what you could do.
 

Txoutlaw

Active Member
View Badges
Joined
Nov 23, 2022
Messages
113
Reaction score
88
Location
South TX-RGV
Rating - 0%
0   0   0
This pic shows how much material you'll use off of your original sketch. You'll probably need to make it the width of the stand because of the attachment points.also that way you could add more lights if need be.
 

Attachments

  • Screenshot_20250626_013807_Chrome.jpg
    Screenshot_20250626_013807_Chrome.jpg
    748.5 KB · Views: 30

Txoutlaw

Active Member
View Badges
Joined
Nov 23, 2022
Messages
113
Reaction score
88
Location
South TX-RGV
Rating - 0%
0   0   0
Ok.here's how it will be attached. You'll need about a 2 foot section of either aluminum or steel square tubing. Cut it in half making two 1' foot pieces.then on each of the ends cut them at a 45° angle.this is so you can either drill a small hole on the ends and bolt it to the stand or use self tapping screws to attach them to the stand.in this pic let's just imagine this is the back of the stand. The yellow is where you'll mount the 1'foot square pieces vertically.
 

Attachments

  • Screenshot_20250626_015556_Chrome.jpg
    Screenshot_20250626_015556_Chrome.jpg
    240.3 KB · Views: 29

Txoutlaw

Active Member
View Badges
Joined
Nov 23, 2022
Messages
113
Reaction score
88
Location
South TX-RGV
Rating - 0%
0   0   0
Find out what size aluminum your ordering for you light bracket and then find some square tubing that it will allow the bracket aluminum to slide into.sorta like sleeving it.once you got the tubing mounted to your stand. Figure out your light height and screw in a self tapping screw into the square tubing.that way when you slide your aluminum light bracket in it will stop on that self tapping screw.it would be better to do it this way so you can slide the light bracket off if you ever need to work on it.
 

Txoutlaw

Active Member
View Badges
Joined
Nov 23, 2022
Messages
113
Reaction score
88
Location
South TX-RGV
Rating - 0%
0   0   0
I hope that helps.if you have anymore questions or are confused about cutting the 45° in the mounting tubing to attach it to the stand. I'll go out in my garage later today and cut some square tubing to show you what I'm talking about.
 
OP
OP
xxoczukxx

xxoczukxx

Active Member
View Badges
Joined
Apr 20, 2017
Messages
340
Reaction score
133
Rating - 0%
0   0   0
I hope that helps.if you have anymore questions or are confused about cutting the 45° in the mounting tubing to attach it to the stand. I'll go out in my garage later today and cut some square tubing to show you what I'm talking about.

Thank you for the suggestion and detailed explanation!
 

TOP 10 Trending Threads

WHAT AMOUNT OF LIVE ROCK AND SAND SHOULD BE PRIORITIZED FOR OPTIMAL BIODIVERSITY/FILTRATION?

  • 100% live rock + bagged sand

    Votes: 37 27.6%
  • 100% dry rock + 100% live sand

    Votes: 45 33.6%
  • 50/50 live/dry rock, 50/50 live/bagged sand

    Votes: 30 22.4%
  • 75% live rock, 25% live sand

    Votes: 12 9.0%
  • 25% live rock, 75% live sand

    Votes: 10 7.5%
Back
Top