naaa

mixer911

Make them green with envy
View Badges
Joined
Jun 11, 2009
Messages
2,422
Reaction score
748
Location
Murfreesboro
Rating - 0%
0   0   0
Right now Estimated with a Bucket I am getting about 2k to 2100 flow. I have experimented with the Bean animal over flow and it actually does work at a length this short when the water is flowing straight down then at a Distance.

My issue with the Over flow is NOT Flow or even noise from the back box drain down .I believe my issue is a Under Current Just beneath the water Surface in front of the over flow .I have been experimenting with Creating the best flow into the weir to pull the most Debris out of the tank. I had this issue with one i notched similar thou mine was done with a Router Jig i made not molded where the teeth were wider at the top.

Lowering the flow rate by bypassing more water to the sump or throttling down the pump with at Ball valve on the Output at the return pump does solve the issue when you get the flow down to around 1200 gph . This causes the water to flow Over the weir at the bottom of the notch pulling the water not just at the surface but slightly below up and over .
My stated flow rates are tested with a Bucket and timer so not totally accurate but close enough

Here is what happens as best i can describe.
If i put flake food in the tank to feed the fish and watch it go across the top of the tank It goes right into the over flow and out as it should.But partials Just under the surface of the water as it approaches the over flow box it gets pushes out and away . Meaning the box is only skimming the Very top surface and not pulling debris up and over the weir teeth that are under the surface. Im talking like 1/32 maybe 1/64th inch of water. My Water surface is about mid ways on the teeth. If i slow my pump to what i guess is around 1k a hour (did not test this rate ) To where the water level going over the weir is just at the bottom of the teeth the undercurrent pushing away from the box does not appear to be there.
My Plan to test to see if the above is the issue or if its just the face that 16 inch is not enough surface area to skim from or some other issue Maybe EVEN HUMAN ERROR. I am going to build a new weir with a Slot at the water level of my tank and one with square notched teeth . There is also plenty of water drop from the inside box to the exterior box to pull debris thru.

I just know that this undercurrent pushing debris right below the surface is keeping my tank from clearing up . Above is my theory based on my experience over the years as i am sure you have done extensive testing on the device as well. I also know not every tank or plumbing system works the same.

I do think your Product is well build and Perfect for most tanks that do not need more then 1k to 1500 gph which apparently is what your over flow box was designed for . Not the 3 k that its capable of . I would recommend this product for tanks who need that range of flow every day of the week if they do not have the experience , tools or time to build one..

I think one flaw in this box design is the fact you MUST Glue onto it. The output on bottom of the external over flow box should be Male Threaded . AND Have a Warning Label to use Teflon pipe sealant not Tape to seal it . As sealant will not break abs or poly carbonate like tape will.

I hope you find this as Respectful and explanatory of my issue and what i Believe the cause is as i have tried to make it and that this is not a Complaint or bashing the Product ,In My opinion right now Its just capable of properly skimming for more then 1 to 1.5 k of water as apparently were your Initial recommendations . I also knew before i installed it this weir was a Issue based on my Past experience tweaking my internal overflow weir for best performance not just GPH...

Erica Renee .

Ok, I think understand better what you are saying in this post. The one thing I don't get is why you're getting a cloudy tank. How long has the tank been running? Being "cloudy" is not a normal issue that we have to address as this is usually not something caused by the overflow. There are many factors that can cause a cloudy tank. We get more questions on how to plumb it. I have never plumbed it the way you did and that was my first thing to address since it was done differently than normal.With your plumbing, if it is performing higher flow rates with the way you have it plumbed and you are getting 2K+ thru it, then that's good. If it works for you that is great. Part of this hobby is doing things differently, I respect that. I may do some testing with that and see how it works out as well.


I see if I can directly answer these for you.

My issue with the Over flow is NOT Flow or even noise from the back box drain down .I believe my issue is a Under Current Just beneath the water Surface in front of the over flow .I have been experimenting with Creating the best flow into the weir to pull the most Debris out of the tank. I had this issue with one i notched similar thou mine was done with a Router Jig i made not molded where the teeth were wider at the top.
No noise issues is a GOOD thing and one of the primary reasons for our design. The weirs are mainly designed to keep livestock from entering the overflow box. That is why the toothed design is used. Is it the best for flow, no, everyone knows this. An open design is the best all around for flow and skimming, but you risk livestock being sucked over the overflow. So there is a balance between form and function here. Surface skimming was our other main design feature we wanted to make sure we had, and it does have great surface skimming. I have not experienced the undercurrent though. I will do some tests to see what I can see and use dye to see what happens.


Lowering the flow rate by bypassing more water to the sump or throttling down the pump with at Ball valve on the Output at the return pump does solve the issue when you get the flow down to around 1200 gph . This causes the water to flow Over the weir at the bottom of the notch pulling the water not just at the surface but slightly below up and over .
My stated flow rates are tested with a Bucket and timer so not totally accurate but close enough
Good information. I will test this and see. Approximate flow rates are fine. It's not a nuclear reactor we are dealing with :D


Here is what happens as best i can describe.
If i put flake food in the tank to feed the fish and watch it go across the top of the tank It goes right into the over flow and out as it should.But partials Just under the surface of the water as it approaches the over flow box it gets pushes out and away . Meaning the box is only skimming the Very top surface and not pulling debris up and over the weir teeth that are under the surface. Im talking like 1/32 maybe 1/64th inch of water. My Water surface is about mid ways on the teeth. If i slow my pump to what i guess is around 1k a hour (did not test this rate ) To where the water level going over the weir is just at the bottom of the teeth the undercurrent pushing away from the box does not appear to be there.
My Plan to test to see if the above is the issue or if its just the face that 16 inch is not enough surface area to skim from or some other issue Maybe EVEN HUMAN ERROR. I am going to build a new weir with a Slot at the water level of my tank and one with square notched teeth . There is also plenty of water drop from the inside box to the exterior box to pull debris thru.
Look forward to hearing your test results and I will also do some testing as well.

I just know that this undercurrent pushing debris right below the surface is keeping my tank from clearing up . Above is my theory based on my experience over the years as i am sure you have done extensive testing on the device as well. I also know not every tank or plumbing system works the same.
Agreed, every tank and system perform different. It doesn't make sense why this would keep your tank from not clearing up. Cloudiness is usually bacterial in most cases. We have not seen any issues with tanks that use our overflows being cloudy. This is a first.

I do think your Product is well build and Perfect for most tanks that do not need more then 1k to 1500 gph which apparently is what your over flow box was designed for . Not the 3 k that its capable of . I would recommend this product for tanks who need that range of flow every day of the week if they do not have the experience , tools or time to build one..
Thank you for the compliments. Our listed flow rate is a guideline to help people understand the capabilities of the overflow and help determine their needs. It's not something that is a hard rule or meant to be a one size fits all and still requires some knowledge of the overflow to size it properly. You can use multiple overflows for larger systems. to increase flow rates. I like to use car analogies with these. You have a car that is capable of doing 120 mph. Is is good to run it at full capacity long term, probably not. The ideal flow rate for this overflow flow is around 1000-1500 gph and the MAX flow rate is 2500 GPH. It can handle higher flow rates, but it's not recommended to run at those rates. My personal recommendation with a tank this size, if asked, would have been to use 2 16" overflows to allow for more flow to be drained into the sump. We have customers contact us all the time and ask before they setup their tanks to make sure they are properly sizing their tanks. That being said, we have customers that only run one on larger tanks and are happy with the performance. This is where it really depends on how the system is designed from the beginning.

I think one flaw in this box design is the fact you MUST Glue onto it. The output on bottom of the external over flow box should be Male Threaded . AND Have a Warning Label to use Teflon pipe sealant not Tape to seal it . As sealant will not break abs or poly carbonate like tape will.
How is it a flaw, they work fine with socket glued fittings. It may not be your preference, but it does work. I wouldn't call that a flaw.

I hope you find this as Respectful and explanatory of my issue and what i Believe the cause is as i have tried to make it and that this is not a Complaint or bashing the Product ,In My opinion right now Its just capable of properly skimming for more then 1 to 1.5 k of water as apparently were your Initial recommendations . I also knew before i installed it this weir was a Issue based on my Past experience tweaking my internal overflow weir for best performance not just GPH...
I totally find this respectfull and have to say Thank You for taking the time to write this out so I can see it and help out. I don't take these questions as bashing or a complaint, I try to see what is going on and try to address it the best I can. I take the feedback and I try and use it to better our products. As you mentioned every system is different and acts differently with flow, so I like to try and help, but I do not have any magical answers to every setup. Initially we rated this overflow with a MAX flow of 1500 GPH, but after further testing found that they can handle higher flow rates. So we deiced to up the MAX rate to 2500 gph. As with the car analogy I mentioned above, this is why I chose to up the MAX flow rate. Otherwise people would assume this can only be used on a 75 gallon or less, which is not the case. Most tanks up to 180 Gallons can use 1 box and be fine.

Hopefully this helps some. I know it may not have a direct answer and a magic bullet solution, but that is why I am trying to help and see what we can come up with.
 
OP
OP
E

Erica-Renee

Valuable Member
View Badges
Joined
Oct 4, 2017
Messages
1,596
Reaction score
3,290
Location
lost
Rating - 0%
0   0   0
Ok, I think understand better what you are saying in this post. The one thing I don't get is why you're getting a cloudy tank. How long has the tank been running? Being "cloudy" is not a normal issue that we have to address as this is usually not something caused by the overflow. There are many factors that can cause a cloudy tank. We get more questions on how to plumb it. I have never plumbed it the way you did and that was my first thing to address since it was done differently than normal.With your plumbing, if it is performing higher flow rates with the way you have it plumbed and you are getting 2K+ thru it, then that's good. If it works for you that is great. Part of this hobby is doing things differently, I respect that. I may do some testing with that and see how it works out as well.


I see if I can directly answer these for you.

My issue with the Over flow is NOT Flow or even noise from the back box drain down .I believe my issue is a Under Current Just beneath the water Surface in front of the over flow .I have been experimenting with Creating the best flow into the weir to pull the most Debris out of the tank. I had this issue with one i notched similar thou mine was done with a Router Jig i made not molded where the teeth were wider at the top.
No noise issues is a GOOD thing and one of the primary reasons for our design. The weirs are mainly designed to keep livestock from entering the overflow box. That is why the toothed design is used. Is it the best for flow, no, everyone knows this. An open design is the best all around for flow and skimming, but you risk livestock being sucked over the overflow. So there is a balance between form and function here. Surface skimming was our other main design feature we wanted to make sure we had, and it does have great surface skimming. I have not experienced the undercurrent though. I will do some tests to see what I can see and use dye to see what happens.


Lowering the flow rate by bypassing more water to the sump or throttling down the pump with at Ball valve on the Output at the return pump does solve the issue when you get the flow down to around 1200 gph . This causes the water to flow Over the weir at the bottom of the notch pulling the water not just at the surface but slightly below up and over .
My stated flow rates are tested with a Bucket and timer so not totally accurate but close enough
Good information. I will test this and see. Approximate flow rates are fine. It's not a nuclear reactor we are dealing with :D


Here is what happens as best i can describe.
If i put flake food in the tank to feed the fish and watch it go across the top of the tank It goes right into the over flow and out as it should.But partials Just under the surface of the water as it approaches the over flow box it gets pushes out and away . Meaning the box is only skimming the Very top surface and not pulling debris up and over the weir teeth that are under the surface. Im talking like 1/32 maybe 1/64th inch of water. My Water surface is about mid ways on the teeth. If i slow my pump to what i guess is around 1k a hour (did not test this rate ) To where the water level going over the weir is just at the bottom of the teeth the undercurrent pushing away from the box does not appear to be there.
My Plan to test to see if the above is the issue or if its just the face that 16 inch is not enough surface area to skim from or some other issue Maybe EVEN HUMAN ERROR. I am going to build a new weir with a Slot at the water level of my tank and one with square notched teeth . There is also plenty of water drop from the inside box to the exterior box to pull debris thru.
Look forward to hearing your test results and I will also do some testing as well.

I just know that this undercurrent pushing debris right below the surface is keeping my tank from clearing up . Above is my theory based on my experience over the years as i am sure you have done extensive testing on the device as well. I also know not every tank or plumbing system works the same.
Agreed, every tank and system perform different. It doesn't make sense why this would keep your tank from not clearing up. Cloudiness is usually bacterial in most cases. We have not seen any issues with tanks that use our overflows being cloudy. This is a first.

I do think your Product is well build and Perfect for most tanks that do not need more then 1k to 1500 gph which apparently is what your over flow box was designed for . Not the 3 k that its capable of . I would recommend this product for tanks who need that range of flow every day of the week if they do not have the experience , tools or time to build one..
Thank you for the compliments. Our listed flow rate is a guideline to help people understand the capabilities of the overflow and help determine their needs. It's not something that is a hard rule or meant to be a one size fits all and still requires some knowledge of the overflow to size it properly. You can use multiple overflows for larger systems. to increase flow rates. I like to use car analogies with these. You have a car that is capable of doing 120 mph. Is is good to run it at full capacity long term, probably not. The ideal flow rate for this overflow flow is around 1000-1500 gph and the MAX flow rate is 2500 GPH. It can handle higher flow rates, but it's not recommended to run at those rates. My personal recommendation with a tank this size, if asked, would have been to use 2 16" overflows to allow for more flow to be drained into the sump. We have customers contact us all the time and ask before they setup their tanks to make sure they are properly sizing their tanks. That being said, we have customers that only run one on larger tanks and are happy with the performance. This is where it really depends on how the system is designed from the beginning.

I think one flaw in this box design is the fact you MUST Glue onto it. The output on bottom of the external over flow box should be Male Threaded . AND Have a Warning Label to use Teflon pipe sealant not Tape to seal it . As sealant will not break abs or poly carbonate like tape will.
How is it a flaw, they work fine with socket glued fittings. It may not be your preference, but it does work. I wouldn't call that a flaw.

I hope you find this as Respectful and explanatory of my issue and what i Believe the cause is as i have tried to make it and that this is not a Complaint or bashing the Product ,In My opinion right now Its just capable of properly skimming for more then 1 to 1.5 k of water as apparently were your Initial recommendations . I also knew before i installed it this weir was a Issue based on my Past experience tweaking my internal overflow weir for best performance not just GPH...
I totally find this respectfull and have to say Thank You for taking the time to write this out so I can see it and help out. I don't take these questions as bashing or a complaint, I try to see what is going on and try to address it the best I can. I take the feedback and I try and use it to better our products. As you mentioned every system is different and acts differently with flow, so I like to try and help, but I do not have any magical answers to every setup. Initially we rated this overflow with a MAX flow of 1500 GPH, but after further testing found that they can handle higher flow rates. So we deiced to up the MAX rate to 2500 gph. As with the car analogy I mentioned above, this is why I chose to up the MAX flow rate. Otherwise people would assume this can only be used on a 75 gallon or less, which is not the case. Most tanks up to 180 Gallons can use 1 box and be fine.

Hopefully this helps some. I know it may not have a direct answer and a magic bullet solution, but that is why I am trying to help and see what we can come up with.

The reason the tank is not clearing up after stirring up the sand by still moving and adjusting rock and scraping Algae Is because of two things . ONE Is my fault that being installing a 16 inch over flow on a 6 ft tank . 2. what my post is all about.. at the flow rate i am running . Water flowing thru just above half way on the weir teeth. I can watch debris head toward the over flow box like its going to go over . Just as it gets there it gets pushes back into the tank in the area at the bottom of the teeth. Like a water fall pushing air under the water on the upper side before it goes over the wall. In nature this is caused by rough or uneven rock causing turbulence under the top faster moving water .

My thinking is straight teeth might solve this for me.. I will test this hopefully next week with a new weir fabrication and testing. If I find its just that 16 inch is not wide enough i will build a new Inside box and save this one for the upcoming planted tank upgrade .
 

mixer911

Make them green with envy
View Badges
Joined
Jun 11, 2009
Messages
2,422
Reaction score
748
Location
Murfreesboro
Rating - 0%
0   0   0
The reason the tank is not clearing up after stirring up the sand by still moving and adjusting rock and scraping Algae Is because of two things . ONE Is my fault that being installing a 16 inch over flow on a 6 ft tank . 2. what my post is all about.. at the flow rate i am running . Water flowing thru just above half way on the weir teeth. I can watch debris head toward the over flow box like its going to go over . Just as it gets there it gets pushes back into the tank in the area at the bottom of the teeth. Like a water fall pushing air under the water on the upper side before it goes over the wall. In nature this is caused by rough or uneven rock causing turbulence under the top faster moving water .

My thinking is straight teeth might solve this for me.. I will test this hopefully next week with a new weir fabrication and testing. If I find its just that 16 inch is not wide enough i will build a new Inside box and save this one for the upcoming planted tank upgrade .
Gotcha. I would also just let the tank settle down for a bit. I wouldn't react too fast as you just set this tank up. I know that it's existing livestock, rock, ect, but it will still to some time for bacterial populations to get back in check. Heavier debris will settle to the bottom as well and can be siphoned out. But I suspect after the initial sand storm settles that you will be fine. Either way I like the planted tank idea too! [emoji1]
 

Sarah24!

2500 Club Member
View Badges
Joined
Feb 6, 2017
Messages
3,280
Reaction score
11,885
Location
Idaho
Rating - 0%
0   0   0
Hello,

It’s definitely looking good finally there are pics lol. Since your having an undercurrent problem, have your tried changing the flow from the wave makers and gyres?
 
OP
OP
E

Erica-Renee

Valuable Member
View Badges
Joined
Oct 4, 2017
Messages
1,596
Reaction score
3,290
Location
lost
Rating - 0%
0   0   0
Hello,

It’s definitely looking good finally there are pics lol. Since your having an undercurrent problem, have your tried changing the flow from the wave makers and gyres?

Yes it even happens when they are off. Actually i think its worse.. I am going to try to put a limewood air stone in there next to the box to capture Images or video Thou i am not sure it will work ..

Thanks .
 

laverda

2500 Club Member
View Badges
Joined
Jun 6, 2008
Messages
2,893
Reaction score
2,165
Location
Anaheim
Rating - 0%
0   0   0
Why are you running so much flow through your sump? There is no real need to and it cost a lot in larger pumps, heat and electricity to pump water that high. 5 times tank volume is plenty of flow. Some go as low as 2.5 times.
Connecting all your drains together pretty much defeats the purpose of having 3 drains. If you drain gets clogged past where they join the emergency drain will be useless. It looks like the plumbing is all the same size. If you have to have just one drain I would make it larger after they connect together.
 
OP
OP
E

Erica-Renee

Valuable Member
View Badges
Joined
Oct 4, 2017
Messages
1,596
Reaction score
3,290
Location
lost
Rating - 0%
0   0   0
Why are you running so much flow through your sump? There is no real need to and it cost a lot in larger pumps, heat and electricity to pump water that high. 5 times tank volume is plenty of flow. Some go as low as 2.5 times.
Connecting all your drains together pretty much defeats the purpose of having 3 drains. If you drain gets clogged past where they join the emergency drain will be useless. It looks like the plumbing is all the same size. If you have to have just one drain I would make it larger after they connect together.

First of all the Amount of water running thru the sump it to keep the tank and Sand bed cleaner and it Makes the TANK Itself more hands off . Less algae on the glass and so on .
The 3 Drains from the box are 1-1/2 inch dropping into 2-1/2 inch drain that goes down into the sump/ Refugium tanks.
The whole system is ran by 1 PUMP Its a reeflow Hammer head that is about 5 years old had has ran everyday. This pump never needs cleaning or servicing other then once every few years when they start dripping from there seal the only part that ever needs servicing ,
There is ABSOLUTELY NO Possible way the 2-1/2 inch pipe can get stopped up that would require something large enough to get into it. NOT Going to happen.
My opinion is the 2.5 tank volume turn over is NO WHERE Near enough .. If you think about even the average canister filter designed for a 70 gallon tank has 500-700 gph turn over ..Keeping things suspended in the tank Volume longer until it gets removed into the sump is NOT Better then higher turn over rate and getting debris , Algae from scrapping and non eaten food out and gone.. I also run mostly filter media free , But use a VERY Large settling area in the sump for detritus to collect , I vacuum it out of that area . Much easier then messing with your tanks sand bed .

The plumbing behind this tank is NOT NEW . This has been in use for 5 years .

Only 3 things have changed with this Build

1. Tank of course
2. Over flow box (from my custom built one ) I am expecting i will go back to the design of my last over flow
3. NEW Sump Which is not installed as of yet
4.Reef-pi Aquarium controller Project thanks to @Ranjib His project thread is in my signature .
5. Completely Rebuilding the Tank surround to better match the interior of our home and function we need

Anyway this is how I have been doing it for years . Tweaking things along the way to make the tank work better for my Life and Marine inhabitants .Just because it might be different then other people does make it less accurate ..
 
OP
OP
E

Erica-Renee

Valuable Member
View Badges
Joined
Oct 4, 2017
Messages
1,596
Reaction score
3,290
Location
lost
Rating - 0%
0   0   0
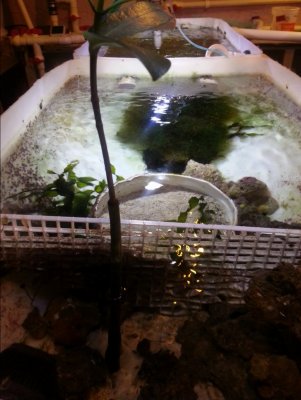
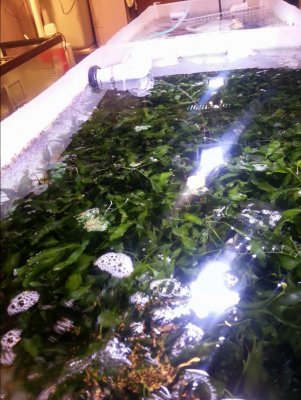
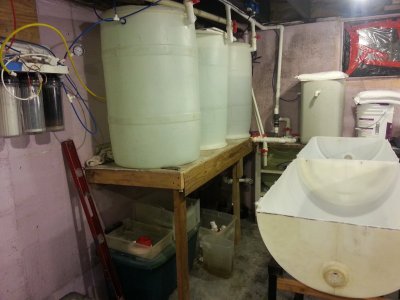
Not part of the new Build , But i am going to move these and Stack them on top each other to save some space in the Room . This is the HEART Of my System to keep it maintenance free other them some harvesting.
IMG_20160307_174555.jpg IMG_20160307_174448.jpg 20150813_205126.jpg

These are old pictures so it does not look exactly the same But the same design and Function..
 
OP
OP
E

Erica-Renee

Valuable Member
View Badges
Joined
Oct 4, 2017
Messages
1,596
Reaction score
3,290
Location
lost
Rating - 0%
0   0   0
20131205_125247.jpg


This was Our Original tank we put in years ago when we bought this house. this is 90 gallon and 29 gallon Bow front Rusty sitting on the Stool .Of Course i BUILT It all
 

Victoria M

5000 Club Member
View Badges
Joined
Jan 6, 2017
Messages
5,615
Reaction score
22,735
Location
Sylvania, OH
Rating - 0%
0   0   0
Not part of the new Build , But i am going to move these and Stack them on top each other to save some space in the Room . This is the HEART Of my System to keep it maintenance free other them some harvesting.
IMG_20160307_174555.jpg IMG_20160307_174448.jpg 20150813_205126.jpg

These are old pictures so it does not look exactly the same But the same design and Function..
I would like a bit more information of the flow through the sump filtration! That looks like fun!
 
OP
OP
E

Erica-Renee

Valuable Member
View Badges
Joined
Oct 4, 2017
Messages
1,596
Reaction score
3,290
Location
lost
Rating - 0%
0   0   0
I would like a bit more information of the flow through the sump filtration! That looks like fun!
AHH Humm.. Ok

The drain from the Display tank in the living room Drains down in a Pre manifold box (this box is to see if adjusting the Drain manifold is causing Drain backup) The Drain manifold has 3 Ball Vales and one NON Valves .
1st Ball valve is to control the water going to the Refug at the far end. The water flows thru that tank into the second tank then out into the Sump
2nd ball valve Is plumbed into the algae turf scrubber . this is at the far end of the settling tank in the first sump.
3rd ball valve goes right down into the settling tanks Algae scrubber chamber . This is used for extra water .
Now The most important. Everyone will Tell you YELL at you and Complain your gonna have a flood using a manifold on the tank drain. This 4th manifold drain actually is a elbow facing up. It then has two elbows turning the flow back down and goes again into the sump.Its large enough alone to handle all the flow from the display tank drain . 2-1/2 inch If i miscalculate or one or all of the other 3 ball valves get shut off the water will rise in the manifold and go thru this pipe
The Return pump is a REEFLO hammerhead . This sump supports more then 1 Display tank by the way .. One of the tanks is seasonal ..(in the sum room) One is a 400 gallon Lagoon pond .
Someday i might post some info about the pond But for now we will concentrate on the Reef tank ..

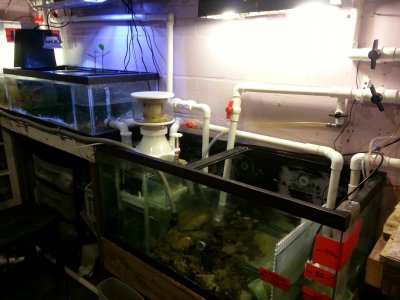
Hope this helps OHH Here is a image of the sump tanks .

20150708_141312.jpg 20151014_205802.jpg

Sump System... Very OLD IMAGE Mrs Mingi the My pet Vlamingi tang in the pond .
 
OP
OP
E

Erica-Renee

Valuable Member
View Badges
Joined
Oct 4, 2017
Messages
1,596
Reaction score
3,290
Location
lost
Rating - 0%
0   0   0
So are the barrel sumps are off line now? And the new sump is your old aquarium? I just remembered that you were going to change things out.
Everything is Running and working now. The barrels are the Refugium The sump tanks in the image above will be replaced with the old Display tank . The Fuge tanks will be moved over into the corner .
 

Brew12

Electrical Gru
View Badges
Joined
Aug 14, 2016
Messages
22,488
Reaction score
61,034
Location
Decatur, AL
Rating - 0%
0   0   0
Erica, I absolutely love what you are doing with your build. I'm jealous that my house is on a slab so I don't have a basement built. I hope you don't mind if I comment on a few of the recently made comments.

I fall into the category that has lower flow rates through the sump. If I had a basement build, I would put as much flow through my sump as possible. I do lower flow rates for noise reasons. In an SPS system, high flow rates are very important. Not all flow is created equally. Return pump flow through an overflow will provide much more total flow through a tank than an equally sized power head. So for those with an under tank sump like mine, run lower flows for noise. If you have a basement build, get as much flow as possible. imo you will only benefit.

I also want to comment on the 3 drain lines combined into a single pipe. I understand why people are concerned but this isn't a problem. The synergy overflow has 1 1/2" drain lines into a larger diameter common pipe. While this looks wrong at first glance, it isn't. You can think of this larger diameter pipe as an extension of the return section of the sump. It can handle way more flow than the pump can provide and will be impossible to clog. If it were a horizontal sump section no one would think twice. This is a very intelligent and efficient way to safely combine the 3 drain lines.

Have I said I absolutely love your build?
 
OP
OP
E

Erica-Renee

Valuable Member
View Badges
Joined
Oct 4, 2017
Messages
1,596
Reaction score
3,290
Location
lost
Rating - 0%
0   0   0
Erica, I absolutely love what you are doing with your build. I'm jealous that my house is on a slab so I don't have a basement built. I hope you don't mind if I comment on a few of the recently made comments.

I fall into the category that has lower flow rates through the sump. If I had a basement build, I would put as much flow through my sump as possible. I do lower flow rates for noise reasons. In an SPS system, high flow rates are very important. Not all flow is created equally. Return pump flow through an overflow will provide much more total flow through a tank than an equally sized power head. So for those with an under tank sump like mine, run lower flows for noise. If you have a basement build, get as much flow as possible. imo you will only benefit.

I also want to comment on the 3 drain lines combined into a single pipe. I understand why people are concerned but this isn't a problem. The synergy overflow has 1 1/2" drain lines into a larger diameter common pipe. While this looks wrong at first glance, it isn't. You can think of this larger diameter pipe as an extension of the return section of the sump. It can handle way more flow than the pump can provide and will be impossible to clog. If it were a horizontal sump section no one would think twice. This is a very intelligent and efficient way to safely combine the 3 drain lines.

Have I said I absolutely love your build?
Thank you very much..
what people who comment on my design go by what they are told by other people or told how they should design and configure there tanks.NOT Real life adjustments based on what they know to be true. I like you understand how people look at my plumbing and thing its WRONG because its not what they are used to seeing.


Again thank you very much ..
 

Brew12

Electrical Gru
View Badges
Joined
Aug 14, 2016
Messages
22,488
Reaction score
61,034
Location
Decatur, AL
Rating - 0%
0   0   0
Thank you very much..
what people who comment on my design go by what they are told by other people or told how they should design and configure there tanks.NOT Real life adjustments based on what they know to be true. I like you understand how people look at my plumbing and thing its WRONG because its not what they are used to seeing.


Again thank you very much ..
I'm glad you are willing to share this! I've recommended it to several people with basement sumps but until now I've never had a system to point to where it was done.
I understand why we like to try and replicate each others successes in this hobby. Instead of copying what we see, it would be nice to see more effort into understanding what we are seeing. But, this is difficult with as many different areas as we need knowledge in....
 
OP
OP
E

Erica-Renee

Valuable Member
View Badges
Joined
Oct 4, 2017
Messages
1,596
Reaction score
3,290
Location
lost
Rating - 0%
0   0   0
I'm glad you are willing to share this! I've recommended it to several people with basement sumps but until now I've never had a system to point to where it was done.
I understand why we like to try and replicate each others successes in this hobby. Instead of copying what we see, it would be nice to see more effort into understanding what we are seeing. But, this is difficult with as many different areas as we need knowledge in....

Yes.. and there are many things i have leaned and Replicated from others Experience and Build post. Especially including the Reef-Pi Controller. But even there i changed up how some of the Circuit was put together to better suit my needs . This is because my System is spread out in two locations . Sensors need longer wires . I have also made it so each component can be isolated . With each having there own power supply (the most likely part to fail) For me this is not a issue because I now have many Electrical outlets to plug everything in. The Reef-pi controlled outlets will not replace existing ones . that way if i did have a Complete controller failure getting back running is simple as plugging in to non controlled outlet..

As far as my Plumbing any plumber can see where it came from. Its Quite common for Home Drains . The only difference is the siphon side from the over flow box. I actually tested with two buckets and 2 inch pvc to see how short of a span i could get to syphon..
------------------------------- RAMBLINGS BELOW ----------------------------------------------------------
I Filled a bucket sitting on top step at my side door. I set another bucket on the next step down. Created a length of pipe with two elbows at the top that one side would reach to the bottom of the top bucket with the other length just a bit longer to reach into the bottom of the lower bucket and a ball valve at the bottom. . Turned the pipe upside down and filled it with water and closed the valve and caped the other end. putting it inside the buckets. Top bucket full of water . Removed the cap from the top bucket while it was under water. Then turned the valve open in the bottom bucket . The water flowed from top bucket to bottom bucket until they water became level in both buckets. approx mid point. the length of pipe difference was about 7 inches. This tells me you can get a full siphon with 2 inch pipe at only 7 inch length .
This is what told me there are some myths about how the full siphon over flow has to be plumbed as i suspected . As i stated in my post above to synergy reef . I still believe my only draw back or issue at this time is the Weir is NOT Large enough and the Teeth are causing a Undercurrent because I am running the water to high up on them. I have decided to get the new Sump installed and running , Living room walls back together then deal with the weir . By that time i will have a Work project out of my Garage . I cant use my Router out there now because of stain work im doing .
 

laverda

2500 Club Member
View Badges
Joined
Jun 6, 2008
Messages
2,893
Reaction score
2,165
Location
Anaheim
Rating - 0%
0   0   0
First of all the Amount of water running thru the sump it to keep the tank and Sand bed cleaner and it Makes the TANK Itself more hands off . Less algae on the glass and so on .
The 3 Drains from the box are 1-1/2 inch dropping into 2-1/2 inch drain that goes down into the sump/ Refugium tanks.
The whole system is ran by 1 PUMP Its a reeflow Hammer head that is about 5 years old had has ran everyday. This pump never needs cleaning or servicing other then once every few years when they start dripping from there seal the only part that ever needs servicing ,
There is ABSOLUTELY NO Possible way the 2-1/2 inch pipe can get stopped up that would require something large enough to get into it. NOT Going to happen.
My opinion is the 2.5 tank volume turn over is NO WHERE Near enough .. If you think about even the average canister filter designed for a 70 gallon tank has 500-700 gph turn over ..Keeping things suspended in the tank Volume longer until it gets removed into the sump is NOT Better then higher turn over rate and getting debris , Algae from scrapping and non eaten food out and gone.. I also run mostly filter media free , But use a VERY Large settling area in the sump for detritus to collect , I vacuum it out of that area . Much easier then messing with your tanks sand bed .

The plumbing behind this tank is NOT NEW . This has been in use for 5 years .

Only 3 things have changed with this Build

1. Tank of course
2. Over flow box (from my custom built one ) I am expecting i will go back to the design of my last over flow
3. NEW Sump Which is not installed as of yet
4.Reef-pi Aquarium controller Project thanks to @Ranjib His project thread is in my signature .
5. Completely Rebuilding the Tank surround to better match the interior of our home and function we need

Anyway this is how I have been doing it for years . Tweaking things along the way to make the tank work better for my Life and Marine inhabitants .Just because it might be different then other people does make it less accurate ..
I personally like a bit over 5 times tank volume flow through my sump but even at 10-15 times it did not keep things from settling in the sand bed. Flow pumps do a better job of that, at least on bigger tanks and are more efficient. Electric rates in Ca are 3 times what they are in most of the country, so I do what I can to keep my bill as low as possible. That way I have more money for other aquarium related stuff. If your happy with it that is what matters the most.
I could not tell your plumbing was that large. I was guessing it was 1.25” which I had a large turbo snail go down one and get stuck at a 90 degree elbow. Luckily I had a second 1.25” drain so it was not a big deal.
 
OP
OP
E

Erica-Renee

Valuable Member
View Badges
Joined
Oct 4, 2017
Messages
1,596
Reaction score
3,290
Location
lost
Rating - 0%
0   0   0
I personally like a bit over 5 times tank volume flow through my sump but even at 10-15 times it did not keep things from settling in the sand bed. Flow pumps do a better job of that, at least on bigger tanks and are more efficient. Electric rates in Ca are 3 times what they are in most of the country, so I do what I can to keep my bill as low as possible. That way I have more money for other aquarium related stuff. If your happy with it that is what matters the most.
I could not tell your plumbing was that large. I was guessing it was 1.25” which I had a large turbo snail go down one and get stuck at a 90 degree elbow. Luckily I had a second 1.25” drain so it was not a big deal.
I have actually had a turbo snail get stuck in a drain hole between the inside weir box and the exterior box..
As far as flow.. Combining both.. Large turn over inside the tank,keeping debris uneaten food Suspended for a Large (properly designed weir) To pull it over into the sump is the best way to keep the sand bed clear.I do not find blowing stuff around inside the tank and now getting it out helps support a clear tank in the long run. You end up having to vacuum and clean the sand bed often and still risk super high nutrients.. Just moving the water alone does not clear up the tank. Larger turn over will clear a tank much faster then a slower rate. ..
Conclusion Based on my experience with my tanks. Sump turn over at a higher volume, Supplemented with of course high volume in tank circulation is the best combination .You will spend more money on materials and chemicals keeping nutrients in check with lower turn over then a higher wattage pump.and if you consider the wattage of each of the In tank circulation pumps.Cost of them and Life expectancy I believe the Higher volume high wattage pump will fair better or equal ..
MY Reeflow pump never needs to be turned off to clean. and its been running 4-5 years NON STOP. I have a second that i use for a different project that i had to put seals in once. 23.00 and 30 minutes of work...
OF Course the way i do things may not be best for others. So many people seem to be trying to change "what is best" Based on there Financial situation and how they feel instead of sound evidence based on experience .
 

High pressure shells: Do you look for signs of stress in the invertebrates in your reef tank?

  • I regularly look for signs of invertebrate stress in my reef tank.

    Votes: 39 32.5%
  • I occasionally look for signs of invertebrate stress in my reef tank.

    Votes: 28 23.3%
  • I rarely look for signs of invertebrate stress in my reef tank.

    Votes: 23 19.2%
  • I never look for signs of invertebrate stress in my reef tank.

    Votes: 30 25.0%
  • Other.

    Votes: 0 0.0%
Back
Top