oceans garden aquaculture

Oceans garden aquaculture
View Badges
Joined
Mar 9, 2020
Messages
567
Reaction score
613
Rating - 0%
0   0   0
Background: I have been fascinated with zero edge systems since the mid 2000s. I was working for ORA as a technician in their coral greenhouses. The 1st time I saw the display system they had designed for trade shows, I knew I had to have one of my own one day. Fast forward 15 years later, I was invited to join the reefs4less.com team and tasked with representing the company on various social media platforms. I knew I had to build something special. After posting a few threads referencing zero edge systems, it became clear that there were many hobbyists who shared my fascination with these unique and stunning aquariums. After a few calls and multiple messages, I was able to take possession of the exact same system that left such a lasting impression on me so many years ago. This thread will follow my journey as I restore, upgrade and stock this epic piece of ornamental aquaculture history. This thread is made possible and powered by Reefs4less.com
 
OP
OP
oceans garden aquaculture

oceans garden aquaculture

Oceans garden aquaculture
View Badges
Joined
Mar 9, 2020
Messages
567
Reaction score
613
Rating - 0%
0   0   0
The ORA booth MACNA circa 2009. People would literally push each other out of the way to photograph the zero edge display.
20200403_133430.jpg

reefs4less.com
 
OP
OP
oceans garden aquaculture

oceans garden aquaculture

Oceans garden aquaculture
View Badges
Joined
Mar 9, 2020
Messages
567
Reaction score
613
Rating - 0%
0   0   0
Myself and 2 of my kiddos carefully got the incredibly solid stand out of our SUV (minimal damage to wife's interior) :/. As I sat on our couch, I paused to ponder the greatness of this precariously perched pile of proper potential posted in my parlor.. Imagination running wild!
IMG_20200407_175507_092.jpg
 
OP
OP
oceans garden aquaculture

oceans garden aquaculture

Oceans garden aquaculture
View Badges
Joined
Mar 9, 2020
Messages
567
Reaction score
613
Rating - 0%
0   0   0
I woke up today ready to get this party started! I removed everything from my office into our living room to make space for zero. Slid the stand to the door and NOPE! LOL Wasn't going in that easily. Down with the door!
20200408_130122.jpg
20200408_160210.jpg

Tight squeeze once again, I would have pulled the door frame if I had too lol. Luckily, we didn't have to go there.
 
OP
OP
oceans garden aquaculture

oceans garden aquaculture

Oceans garden aquaculture
View Badges
Joined
Mar 9, 2020
Messages
567
Reaction score
613
Rating - 0%
0   0   0
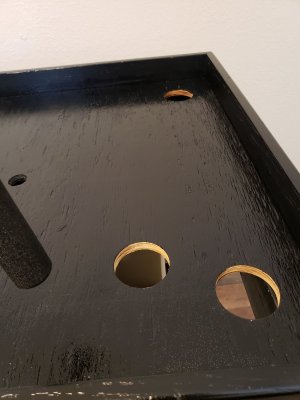
Every successful build starts with a solid foundation. So we will start this from the bottom up. The structural integrity of the stand is not in question at all. It was originally built to endure the rigors of regular shipping to and from trade shows. The finish on the other hand,definitely needed some love. A good cleaning and coating were in order.
20200408_161336.jpg

20200408_161310.jpg

20200408_161310.jpg
 

Sisterlimonpot

Effortless Perfection
View Badges
Joined
Jul 15, 2009
Messages
3,849
Reaction score
7,889
Location
Litchfield Park
Rating - 0%
0   0   0
I would be interested in this long term. I can see having it running for a few days at a time, but will be extremely curious what additional care is needed to keep it looking good over time.

Having never seen something like that running, is it possible to get a clear view of the inside via the sides? or will you have to shut down the return pump and wipe the sides to see inside?

Definitely following along.... with many more questions to come...
 
OP
OP
oceans garden aquaculture

oceans garden aquaculture

Oceans garden aquaculture
View Badges
Joined
Mar 9, 2020
Messages
567
Reaction score
613
Rating - 0%
0   0   0
I would be interested in this long term. I can see having it running for a few days at a time, but will be extremely curious what additional care is needed to keep it looking good over time.

Having never seen something like that running, is it possible to get a clear view of the inside via the sides? or will you have to shut down the return pump and wipe the sides to see inside?

Definitely following along.... with many more questions to come...
I have seen very clear side view shots of these systems. We will definitely find out. I will be trying a lot of different photography techniques and hardware to find out what works best. That will all be documented in this thread. Follow on!
 

Maxx

Active Member
View Badges
Joined
Apr 1, 2017
Messages
468
Reaction score
793
Rating - 0%
0   0   0
Any plans to mitigate evaporation?

What are you stocking plans?
 
OP
OP
oceans garden aquaculture

oceans garden aquaculture

Oceans garden aquaculture
View Badges
Joined
Mar 9, 2020
Messages
567
Reaction score
613
Rating - 0%
0   0   0
Now that we have a proper stand, let's take a closer look at the aquarium. Keep in mind, this thing had been shipped around the country multiple times before it made it's way into a remote hanger in the middle of nowhere Florida. Zero needs a shower, and maybe a hug and some tacos.
20200410_203253.jpg

Mostly just dusty, but this thing is acrylic and even dust can cause some gnarly micro scratches if not cleaned with care.
20200410_203146.jpg

It can be difficult to tell how bad damage can be with acrylic, I knew the system was always handled with care. I expected there to be some minor scratches and scuffs, and there are. Over all, not bad. Some wouldn't even notice but considering this thing has doubled wet surface area, I didn't want to take any chances leaving scratches and having to decide if they were inside or out once it is running.
20200410_203333.jpg

20200410_203409.jpg

Started with a thorough rinse.
20200410_205403.jpg
20200410_203633.jpg


Already a massive improvement. Now to dry off and head back in for a closer look at the scratches.... dun dun dun....
20200410_203643.jpg

20200410_203652.jpg


Really starting to get excited! This thing is so sick! Let's look at the damage.
20200410_203758.jpg

There were a few around the rim, inside and out.
20200410_204143.jpg

Also a couple longer scratches on the inside walls. I think from the lighting system box being stored inside. Thankfully none of them were very deep.
20200410_205520.jpg


To prep for scratch removal I added one drop of dish soap to a spray bottle filled with warm water. I gently mixed as not to create any suds. Then misted the entire tank inside and out.
20200410_204121.jpg

Then I patted it dry with paper towels, and wiped with a microfiber. I am sketched out by the thought of a rogue grain of sand getting into whatever cloth I'm cleaning with and creating a new scratch. If it seems like I'm going through a lot of steps to clean an aquarium, that's why lol.
20200410_204133.jpg

I tiny bit of soap in a water bottle works amazing for cleaning glass and acrylic by the way. I probably could have stopped here, but that wouldn't be any fun so let's embark on a wonderful trip into the magic world of removing micro-scratches! Said no person ever lol
20200410_203806.jpg


For my DIY buffing compound I used baking soda and water. I like a consistancy a little more wet than toothpaste. I don't know how much that matters, but it works for me.
20200410_204006.jpg

For fine scratches like these, a bit of the paste on the fingertip works great. I typically use a tight circular motion, wiping and inspecting every so often.
20200410_203948.jpg

20200410_204121.jpg

Cleaning areas again with water soap, paper towel and microfiber after buffing.
20200410_204621.jpg
20200410_204636.jpg
20200410_204101.jpg

No more scratches!
20200410_204133.jpg

Longer scratches on side panels also removed in the same process. Time to polish it off! I am not promoting the product I am using next. To be honest, I was given some aquarium supplies by a neighbor and this was included. It says acrylic safe so why not give it a shot.
20200410_204551.jpg
20200410_204601.jpg

20200410_204611.jpg

I highly recommend using a test area whenever using cleaning products, but this stuff smells pretty so I just went full send and applied an ample reckless amount all over the dang thing like an absolute legend. Followed up again by patting with paper and finally polishing out with a clean microfiber cloth.
20200410_204636.jpg


We started here...
20200410_224416.jpg
20200410_203146.jpg


This is what we ended up with!
20200410_204728.jpg
20200410_204747.jpg
20200410_204756.jpg
20200410_204706.jpg
20200410_204653.jpg
20200410_204645.jpg

20200410_225847.jpg


What do you guys think so far?
 

Being sticky and staying connected: Have you used any reef-safe glue?

  • I have used reef safe glue.

    Votes: 92 87.6%
  • I haven’t used reef safe glue, but plan to in the future.

    Votes: 6 5.7%
  • I have no interest in using reef safe glue.

    Votes: 4 3.8%
  • Other.

    Votes: 3 2.9%
Back
Top