Red Sea Max 250 Revival

Kron Johnson

New Member
View Badges
Joined
Oct 1, 2019
Messages
17
Reaction score
10
Rating - 0%
0   0   0
Hello All,

I've had a few tanks in the past but all were FOWLR and they were more than a decade ago. Currently I have a 24 gallon Aquatop AIO running that was supposed to be a QT tank for my 100 gallon Cadlights build I had started. I started the stand and started getting equipment and then corona virus occurred. So my financial situation is a little different, but my 24 has too much in it so I needed something bigger faster than I knew I'd be able to get the Cadlights up.

Enter the used Red Sea Max 250 (The Original Max 250). I found this tank locally and was able to negotiate with the owner on pricing so I picked it up (with help, this thing weighs a ton). I did research AFTER buying of course and found that people encounter heat issues and run chillers often with this tank. I did not want to buy a chiller so I thought about what to do.

First I figured, let me leak test this beast:
60717700868--713B46D9-A856-4143-99D2-3E184852200F.JPG


The good news is she holds water. The bad news is after a couple of days running without a heater in it, the water did start to get pretty warm on its own. I also found that the return pump on the left side needed a new impeller as did the skimmer pump.

I decided to tackle the lighting first so I will cover that portion in this initial thread post. I had kessils on hand so I decided to use them. My amazing LFS had kessil mounting arms in stock so I picked them up and decided to remove the lid and mount them.

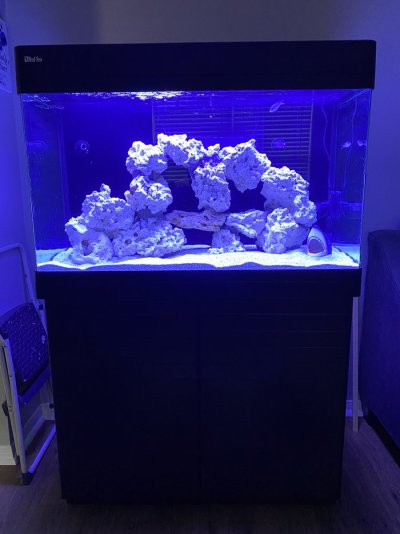
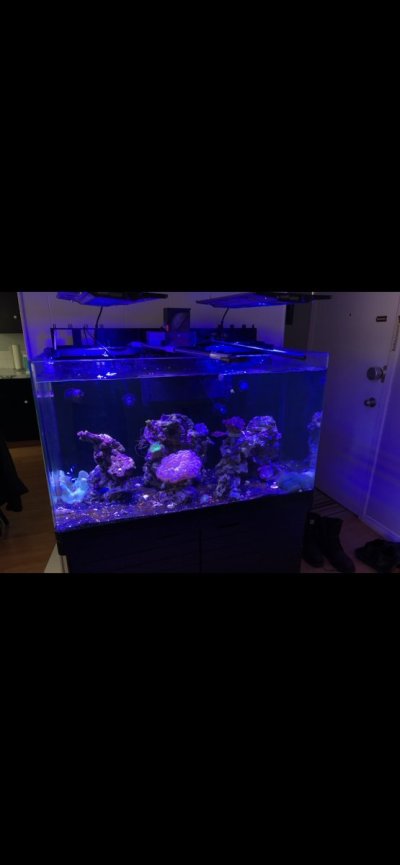
Here are some basic pictures of the tank with two kessil 360we mounted and being controlled by the spectral controller:
IMG-2086.JPG


60738414953--593E83CD-F946-4FEC-A428-B4C6B0CFFA52.JPG


No this is not my intended aquascape pictured.

The kessils have to be mounted on the rear which has a large plastic piece that holds the standard t5 lid in place. I didnt like the way the mounts sat on that plastic and wanted some more options for where to space the lights out. The plastic in the back appears to provide no structural bracing to the tank and I found others who had removed it so i decided to do the same.

60746390457--0C684040-F6F6-4531-9CF1-2906DAC37ED1.JPG


IMG-2098.JPG


IMG-2100.JPG


If you want to do this to one of these tanks get a 10" hacksaw with an ergonomic handle. I used a dremel with a sander on it to do some finishing and then hand sanded with 220 grit to get everything even and smooth. Pretty happy with the results so far.

Still to come in this build:

DC pumps being added, Skimmer, rock cutting, aquascaping, media rack, ato, and probably some things I havent even thought of. Another update soon! Thanks for browsing.
 
OP
OP
K

Kron Johnson

New Member
View Badges
Joined
Oct 1, 2019
Messages
17
Reaction score
10
Rating - 0%
0   0   0
Its looking good any updates?

Thanks for the encouragement!

Things are happening a little out of order but I will provide an update on what I've been doing:

My return pumps have arrived and have been test fitted. I am awaiting a barbed adapter for the right side pump as the proprietary bulkhead for the return on that side is 1/2". The barbed adapter should arrive tomorrow. I am also waiting on one replacement o-ring for the right side bulkhead, but the tank will be filled without it as it will not be here for another week.

Pumps are both Jebao, please no hate on Jebao in this thread, they were inexpensive and attainable which right now during covid crisis is hard to come by. Left side return pump is a DCQ-3500 and the right side return is a DCP-2500. Options were really limited when I did my purchasing and this is intended to be a somewhat budget build. The DCQ supports wave/pulse control and the DCP does not. That is about the only notable difference between the two other than size and flow rate. These should provide the same flow as the original pumps but pull less power and be quieter. If needed they can also be adjusted up or down in flow which I consider a huge plus.

IMG_2128.JPG


IMG_2127.JPG


In my testing they both fit with room to spare in their respective homes and both run very quiet unless in pulse mode. The DCQ-3500 will NOT fit the right side return.

The Skimmer I've selected was also based on availability and price. I got an Eshopps PSK-100H locally for $100 very lightly used. It looks almost new and has a Sicce pump. I like this skimmer much more than my aquamaxx 1.5HOB which I really struggle with tuning so it will be used for this build and is rated for a tank up to 100 Gallons so we should be good with this.

IMG_2129.JPG


It will be mounted in the back of course.

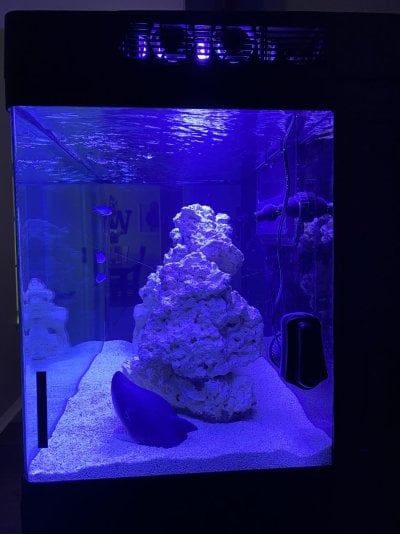
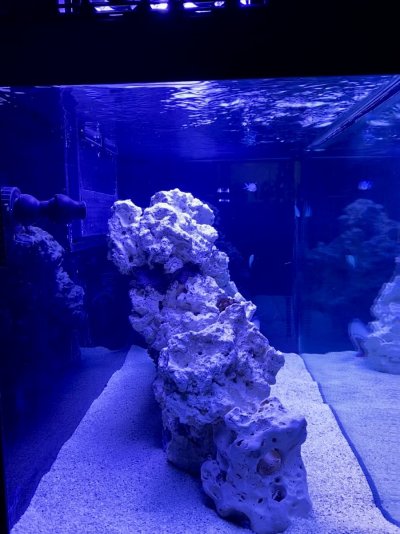
As you can see from the Skimmer image I've done some rock work. I used one large tube of two part epoxy already and have one coraline red Aqua Stik from two little fishes left for additional work.

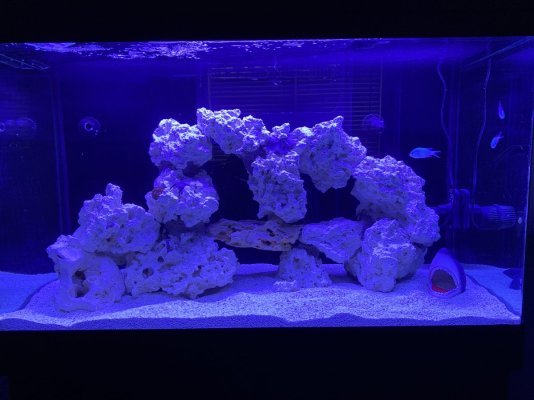
The scape is not at all what I intended or had in mind, but as I went to work this is what came out.


Please excuse the heavy breathing, I didn't realize I had the microphone right in front of my nose until i watched it. Here is a top down:

60798844081__18EBB272-1E37-4E51-BC64-1D9B6F631E2C.JPG


And here I have added exactly one 10 pound bag of Dry Florida Crushed Coral that i had in some water with microbacter7 and some light flow.

IMG_2123.JPG


The rock work is about 70% done at this point. I'd like to add a little more height to some areas. The base pieces I cut with an angle grinder to make flat using a diamond cutting wheel. All of the rock is dry rock and is the Marco rock style dry rock but was all bought locally at $1.99/LB

The really big issue and reason for things going a little out of order is what is happening with that back right portion of the tank where there is almost no rock at all. This tank is being put up so I can take down a 24 Gallon Aquatop Recife. ALL of the livestock from that tank and the majority of the rock will end up in this tank. There are two pieces of flat cut base rock in the aquatop; at least one of these will end up occupying the right side of the tank. The rest of the rock I use will be added with water already in the tank and I'll be using the two part epoxy to fix it in place. The rock from that tank has sustained all of the livestock and has some mature biodiversity so I'd like to use as much as possible.

Here is an image of the 24 Gallon:
IMG_2126.JPG


I've taken this image with a lens filter. NO, there's not always bioshperes in the bottom of my tank. These are at the bottom right now for the sole purpose of getting some bacteria on them before being added to the back of the MAX 250. The back compartment of the 24G is also full of biospheres. I have one full large box of the spheres fully cycled and mature.

IMG_2133.JPG


I dropped in this Xport Bio brick to give it a few day head start on gathering some biologics. i picked it up for $35.44 on Amazon and was able to get two day delivery even in the wake of covid. This should all be enough to keep me pretty well covered on a biological filter.

More stuff arriving tomorrow and a lot more progress so I will add another update.

Suggestions or questions?? Say Something Please!. Let me know you're here!

Thanks for popping by! Stay tuned for final setup, fill, tweak, and the treacherous tank transfer.
 

brian414899

Community Member
View Badges
Joined
Jan 29, 2021
Messages
28
Reaction score
5
Location
Temecula
Rating - 0%
0   0   0
Hey bro great job so far! I’m in the process of building the same tank. I’ve kept the hood and installed Tim’s led’s into the hood. My question is where are you going to place that bio brick? I’m using that brick in my current bio cube 32. Where do you recommend placing it in the Red Sea max 250? In the chamber with pump 2?
 

T00LFan

New Member
View Badges
Joined
Oct 9, 2020
Messages
14
Reaction score
9
Location
Charlotte, NC
Rating - 0%
0   0   0
Hello All,

I've had a few tanks in the past but all were FOWLR and they were more than a decade ago. Currently I have a 24 gallon Aquatop AIO running that was supposed to be a QT tank for my 100 gallon Cadlights build I had started. I started the stand and started getting equipment and then corona virus occurred. So my financial situation is a little different, but my 24 has too much in it so I needed something bigger faster than I knew I'd be able to get the Cadlights up.

Enter the used Red Sea Max 250 (The Original Max 250). I found this tank locally and was able to negotiate with the owner on pricing so I picked it up (with help, this thing weighs a ton). I did research AFTER buying of course and found that people encounter heat issues and run chillers often with this tank. I did not want to buy a chiller so I thought about what to do.

First I figured, let me leak test this beast:
60717700868--713B46D9-A856-4143-99D2-3E184852200F.JPG


The good news is she holds water. The bad news is after a couple of days running without a heater in it, the water did start to get pretty warm on its own. I also found that the return pump on the left side needed a new impeller as did the skimmer pump.

I decided to tackle the lighting first so I will cover that portion in this initial thread post. I had kessils on hand so I decided to use them. My amazing LFS had kessil mounting arms in stock so I picked them up and decided to remove the lid and mount them.

Here are some basic pictures of the tank with two kessil 360we mounted and being controlled by the spectral controller:
IMG-2086.JPG


60738414953--593E83CD-F946-4FEC-A428-B4C6B0CFFA52.JPG


No this is not my intended aquascape pictured.

The kessils have to be mounted on the rear which has a large plastic piece that holds the standard t5 lid in place. I didnt like the way the mounts sat on that plastic and wanted some more options for where to space the lights out. The plastic in the back appears to provide no structural bracing to the tank and I found others who had removed it so i decided to do the same.

60746390457--0C684040-F6F6-4531-9CF1-2906DAC37ED1.JPG


IMG-2098.JPG


IMG-2100.JPG


If you want to do this to one of these tanks get a 10" hacksaw with an ergonomic handle. I used a dremel with a sander on it to do some finishing and then hand sanded with 220 grit to get everything even and smooth. Pretty happy with the results so far.

Still to come in this build:

DC pumps being added, Skimmer, rock cutting, aquascaping, media rack, ato, and probably some things I havent even thought of. Another update soon! Thanks for browsing.
So how much did you end up getting the tank and stand for?
 

RSM250NBTX

Community Member
View Badges
Joined
Dec 17, 2022
Messages
34
Reaction score
26
Location
texas
Rating - 0%
0   0   0
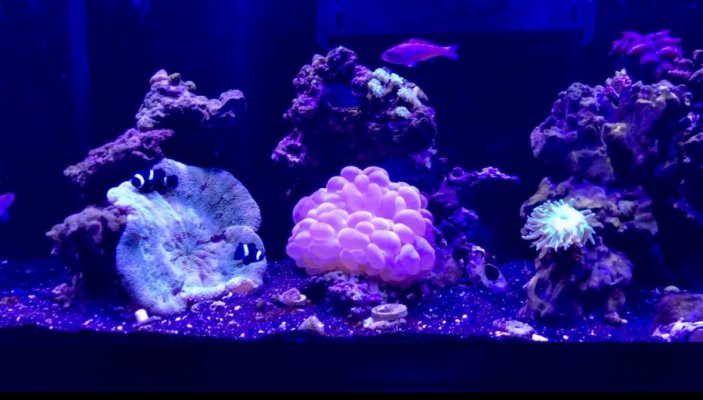
40lbs CaribSea dry rock and 10lbs Texas Holey rock. Used Hydraulic Cement to bond.
image.jpg
 

RSM250NBTX

Community Member
View Badges
Joined
Dec 17, 2022
Messages
34
Reaction score
26
Location
texas
Rating - 0%
0   0   0
I’d like to see the progress. Wish I had taken more pics along the way. Might start a build thread. Just got diatom all over the rocks yesterday. Guess I just entered the “ugly stage”.
 

Jigity_jigity_joe

Community Member
View Badges
Joined
Nov 18, 2022
Messages
35
Reaction score
81
Location
Reno
Rating - 0%
0   0   0
Good to see another RSM 250! I’m about to start a build thread for mine in the next week or so. For a while I thought I was the only one rocking one of these still but it seems like there are some others! Tank looks like it’s off to a great start can’t wait to see more.
1134D220-3678-4073-9D96-9DCBBDC4F883.jpeg
 

Jigity_jigity_joe

Community Member
View Badges
Joined
Nov 18, 2022
Messages
35
Reaction score
81
Location
Reno
Rating - 0%
0   0   0
Also really wish I would have thought to cut the back off mine before I got it all set up. Looks so much more slick
 

RSM250NBTX

Community Member
View Badges
Joined
Dec 17, 2022
Messages
34
Reaction score
26
Location
texas
Rating - 0%
0   0   0
Just got out of the diatom stage cleared pretty quick. Fish and coral are doing good so far. I’ll post some pics when I get a chance.
 

Wmacintosh

Community Member
View Badges
Joined
Nov 10, 2018
Messages
25
Reaction score
6
Rating - 0%
0   0   0
I bought one used a few years ago and cut the top off annd upgraded something and despite wishing I had a sump in the cabinet I’ve def managed to make everything work! They’re great little tanks!

IMG_0081.jpeg IMG_6866.jpeg
 
Last edited:

Creating a strong bulwark: Did you consider floor support for your reef tank?

  • I put a major focus on floor support.

    Votes: 38 44.2%
  • I put minimal focus on floor support.

    Votes: 20 23.3%
  • I put no focus on floor support.

    Votes: 26 30.2%
  • Other.

    Votes: 2 2.3%
Back
Top