Algae Scrubber Basics

OP
OP
Turbo's Aquatics

Turbo's Aquatics

Super Duper Member
View Badges
Joined
Jun 7, 2011
Messages
2,805
Reaction score
4,031
Location
West Des Moines, IA
Rating - 0%
0   0   0
I didn't mean to come off snarky, I was just passing on the info, what I have been told - that's all. I do appreciate the reply and the info you posted. It's hard to type something and have it not be interpreted the wrong way sometimes, especially when doing it quickly between work meetings, etc...

What I can tell you is that my friend is one of the more experienced 3D print people I know. He's very sharp and technically minded, I might try to point him to your thread
 

cope413

Active Member
View Badges
Joined
Apr 6, 2014
Messages
442
Reaction score
88
Location
Orange County, CA
Rating - 0%
0   0   0
Cool. No hard feelings - yes, it is very hard to properly convey tone/attitude through text alone. I re-read through this thread and can see that you are trying to be helpful.

Because of the rapid growth of the industry, and expansion into larger/mainstream businesses, there has been a great deal of overall improvement in general manufacturing standards. The cheap crap on ebay is fairly quickly disappearing, and being replaced by high quality materials from companies like Exxonmobil, Eastman, and Dow. You should be able to get the msds for most materials if they are reputable resellers, and if not, the manufacturer should have them available online. While the MSDS may or may not provide all the necessary information to determine "reef-safeness", it should have enough to make an educated guess, and provide a starting point for what would be necessary to confirm/deny the safety if it's unclear.
 
OP
OP
Turbo's Aquatics

Turbo's Aquatics

Super Duper Member
View Badges
Joined
Jun 7, 2011
Messages
2,805
Reaction score
4,031
Location
West Des Moines, IA
Rating - 0%
0   0   0
Yeah, still working on figuring out what the heck that whole sentence means. I'm thinking something like "nothing really matters"
 

cope413

Active Member
View Badges
Joined
Apr 6, 2014
Messages
442
Reaction score
88
Location
Orange County, CA
Rating - 0%
0   0   0
- the proverbial achilles heel (the weakness)

- of property monistic epiphenomenalism - tough to briefly summarize, but basically, it's the thought/belief that the world is made of just one kind of thing (physical 'stuff'). Thoughts, cognition, and consciousness are dependent 'things', and simply arise from stimulus in the physical world - having no 'causal power' by themselves. Said differently, mental properties are causally redundant/meaningless.

- Ex-nihilo materialization = spontaneous creation. ex nihilo is latin for "out of nothing". You may have heard the phrase "ex nihilo nihil fit" - "out of nothing comes nothing"

- non-structural and qualitatively new = not composed of physical "stuff" and unique/new qualitatively

Basically, it means that if the world was merely composed of physical "stuff", it's exceedingly difficult to explain things like creative thought, dreams, consciousness, desires, emotions, and other "mental events" that are seemingly new (and qualitatively so), since mental events don't have physical mass (non-structural).

Of course, I could just tell you that that sentence, albeit esoteric, is a very humorous way of justifying my philosophy degree. I spent thousands of dollars, and 4 years of my life coming up with what sounds like mad-libs for dorks to say, logically/philosophically, that I believe in God. I also just think it's hilarious to watch people's faces when I say it out loud.

If anyone other than Turbo is paying attention, sorry for the hijack
 
OP
OP
Turbo's Aquatics

Turbo's Aquatics

Super Duper Member
View Badges
Joined
Jun 7, 2011
Messages
2,805
Reaction score
4,031
Location
West Des Moines, IA
Rating - 0%
0   0   0
Ah, now I'm following you! So to bring this back to scrubbers, if I subscribe to this philosophy, does that mean if I think about algae all the time, I might actually cause it to grow faster and better? Maybe that's what I've been doing right all along :D
 

acidtablockshifty

Active Member
View Badges
Joined
Apr 3, 2015
Messages
122
Reaction score
10
Location
new hampshire
Rating - 0%
0   0   0
hey didn't read all of the thread, justed wanted to throw it out there that my local home depot started selling plastic work lights, the reflection is still alright there solid plastic with a shiny white interior, very water friendly, take em out pop the lenses and rinse in the sink. Just had to use your site again for a refresher, the oscillating saw worked the best for me was able to hold it with one hand and make the cuts pretty nicely. Overflow fed turf scubber is just a no brainer, only wish i could fit a bigger screen.
 

acidtablockshifty

Active Member
View Badges
Joined
Apr 3, 2015
Messages
122
Reaction score
10
Location
new hampshire
Rating - 0%
0   0   0
I would probably need more flow though, and its gravity fed off a 1 inch t'eed full siphon but i reduced the 1 inch to 1/2 inch so the scrubber would be 1/2, the valve is all the way open it seems to have just enough to work the small screen
 
OP
OP
Turbo's Aquatics

Turbo's Aquatics

Super Duper Member
View Badges
Joined
Jun 7, 2011
Messages
2,805
Reaction score
4,031
Location
West Des Moines, IA
Rating - 0%
0   0   0
I wanted to post an update on the Mortar Screen process. After making quite a few of these, I think I've figured out the best way to make them, and reasons why other ways don't work quite so well. It's the little things that tend to make the difference.

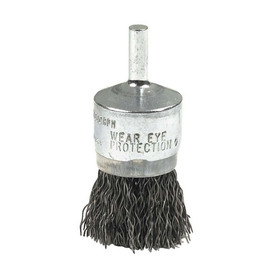
First, I scuff up the screen using a wire brush drill bit attachment like this
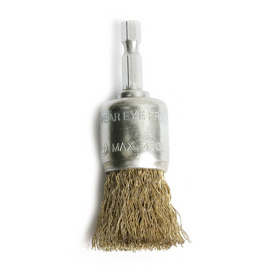
wirebrush1.jpg


or this

wirebrush2.jpg


I mark off the area that will be the "active" growth area, tape off the area that will go into the slot (+ a few extra rows), then clamp the screen down to a hard surface that I don't mind scratching up (like MDF). Then, at a relatively slow/medium speed, I run the brush over that area + some bleed around the edges in 4 directions, up/down, left/right, and both diagonals. Flip and repeat.

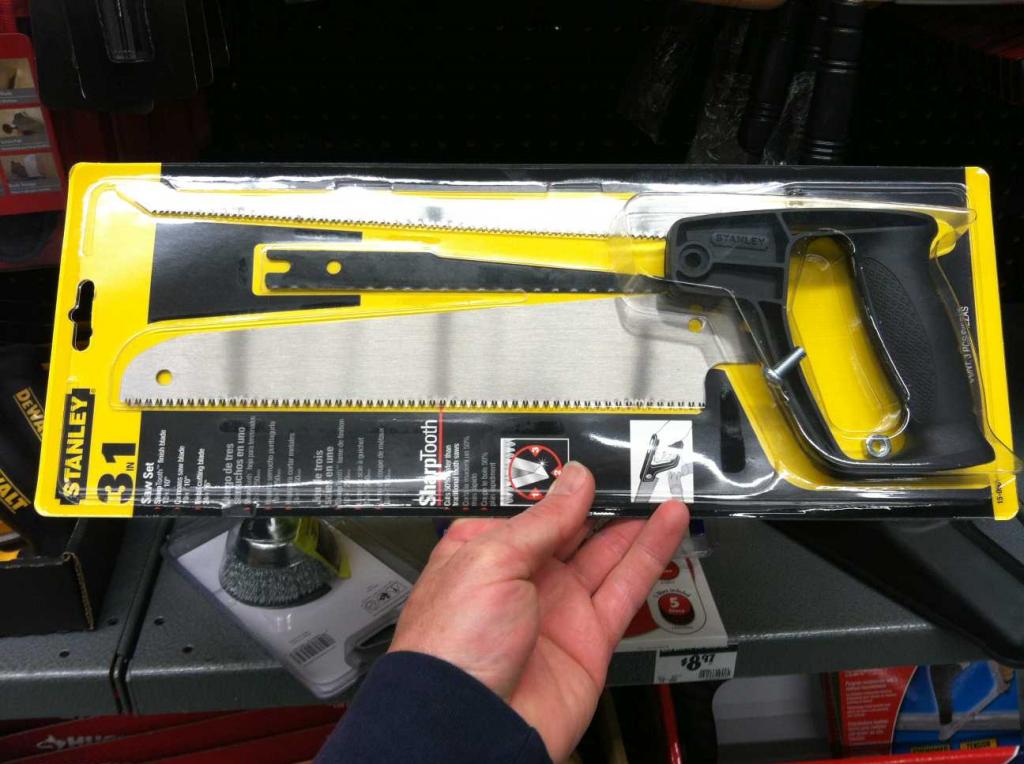
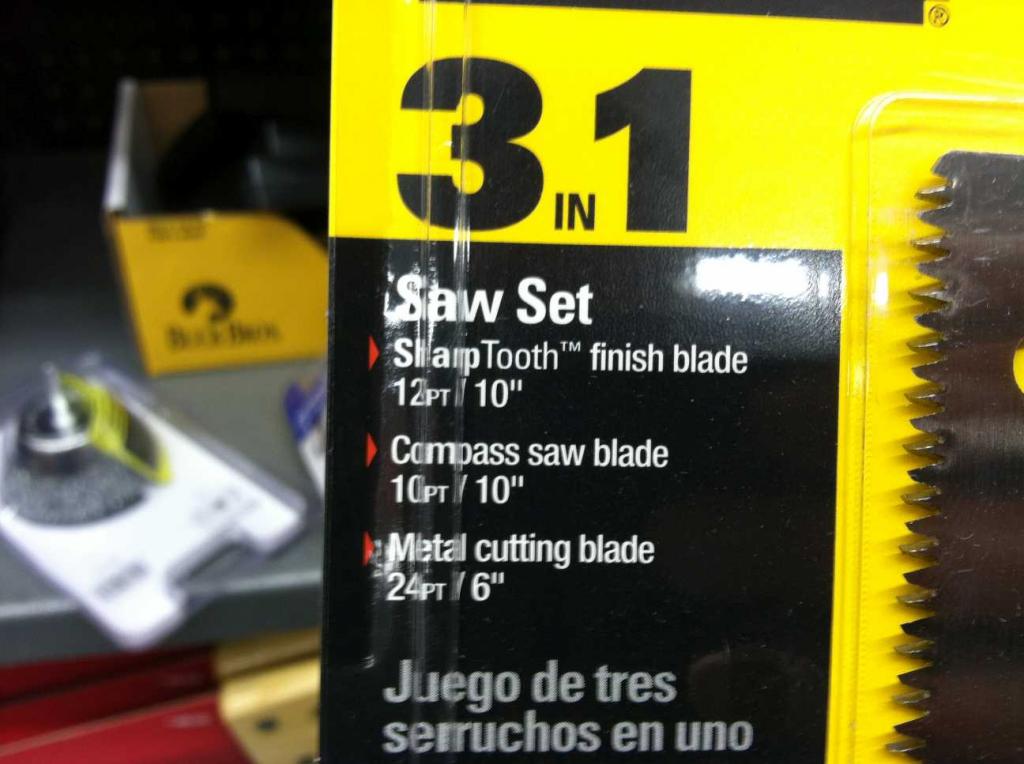
Second, I rough up the screen with a 12pt 10" saw blade, like this

037.jpg


039.jpg


But I don't spend as much time doing this as I used to - 1 to 1.5" overlapping circular motion going from one side to the other, repeat until all rough. Then I reverse the circular direction and make another pass top-bottom. Flip and repeat.

Third, I cut the screen down to it's intended final size, then add some blue painter's tape to the un-roughed area to protect it from the mortar coating.

Now, it's ready for the mortar.

Mix the mortar, glop it on to the screen, and massage it in so that the whole screen is coated with a thick layer, maybe 1/4" thick. Flip it over and add more mortar, massage it in well.

Then I hold the screen over a garbage can and tap it hard with my fingertips - this knocks the excess off rather well while leaving behind a nice coating, and with enough taps the excess basically beads up and rolls off the screen so you get all the members covered really well and none of the holes filled in with mortar.

For the curing process, you will want a semi-airtight container, like a Sterilite storage box or Rubbermaid tote. You don't want an air-tight seal. I tried ziplock bags and while it worked well, it wasn't "perfect" and I'm a bit of a perfectionist. There needs to be a bit of "breathing room", if even just the air in the container.

Lay a piece of wax paper down and place the screen on it. Don't remove the blue tape. Lay another piece of wax paper on top of that.

Next, you can either take a small wet cotton towel or a micro-fiber cloth, and lay that on top of the wax paper. The towel does not need to be sopping wet, but you want it to be mostly wet but not quite dripping. You don't even need a cotton towel, you can also use a few paper towels and get those wet and lay them down - works just as well.

Close up the container. Once a day, take the screen out and give each side a few spritzes with water and put it back in it's little wax paper and towel sandwich, and back in the tote it goes. Repeat this for 3 days.

On the end of the 3rd day in the container, take the screen out, remove the tape, and place the screen in a bucket of water. Change the water daily. After a week, you're good to go. To make it go faster, add some circulation (3 or 4 days, and you're good). I use a utility sink and a small pump I had laying around. As long as the screen isn't banging around, you're good (you don't want the mortar to get knocked off)

I had a video made up of this process, but I have to trash that due to it's lack of perfection. But I'll post one as soon as I shoot a new one.
 

zemuss

Valuable Member
View Badges
Joined
Jun 1, 2010
Messages
1,254
Reaction score
137
Location
Florida
Rating - 0%
0   0   0
When we place the screen in a bucket of water is that Salt Water or tap water?
 
OP
OP
Turbo's Aquatics

Turbo's Aquatics

Super Duper Member
View Badges
Joined
Jun 7, 2011
Messages
2,805
Reaction score
4,031
Location
West Des Moines, IA
Rating - 0%
0   0   0
I use tap water for the first few days (for me, that's where it's in a utility sink) and then after that I put in a bucket of RODI. I don't see any benefit to placing the screen in saltwater
 

SantaMonica

Valuable Member
View Badges
Joined
Sep 16, 2008
Messages
2,260
Reaction score
750
Location
Salt Lake City, Utah, USA
Rating - 0%
0   0   0
People interested in 3D printing their screens can go to MakeXYZ.com and find a local person with a printer who can make a screen in a day. Any size or thickness, and it won't slowly lose texture or particles over time. Show them these pics for modelling ideas:

Screen-1mm.jpg


Screen-2mm.jpg


ScreenSizing.jpg


ScreenThickness.jpg
 

MaccaPopEye

Well-Known Member
View Badges
Joined
Jan 5, 2016
Messages
697
Reaction score
1,232
Rating - 0%
0   0   0
I posted this on "the other forum" too as it has more traffic but I like this one better so here it is again:

Just did cleaning #11 today so figured I'd do a quick growth pic like I did for cleaning #6 (can't be bothered waiting another 2 weeks to make it an even 12 haha).

Growth took off fast and was going ok until I stopped cleaning weekly and went to fortnightly and then the next couple of cleans were massive!

The amount of growth slowed down a bit but my tank is really well on the way to algae free now. Any algae left is in small clumps and still reducing. Compared to the whole tank being an algae carpet haha.

The last 4 cleanings have had very consistent growth (approx 35g after most of the water is squeezed out) and although the algae is really looking quite dark, thin and spread out the growth is consistent which is awesome.

I think it's really on the way to being properly mature. Now I'd really like to try and get the growth to be more green and longer. Any suggestions? Lights are the grey multichip ebay flood lights, 18on 6off flow is about the recommended goal (maybe a tiny bit under or over). Only thing I can think of its it is a 2 cube/day screen but I only feed half to 1 cube/day as I'm still coming back from the massive algae bloom.

(dates are day/month as they should be :p)
First%2011%20harvests%20-%20low%20res_zps7wzxnfym.jpg


Bottom photo was a day or two after the scrubber went online and the top photo is about 2 weeks ago (I'm slowly moving most of the rocks down to the sump for a re-scape in new rock). In case anyone is interested the tank is approx 430L inc the sump. Was running algae free for about 8 months (I think around Aug 2015) then gha took over very fast. Added heaps of snails, increased gfo, upped water changes, new skimmer, manual removal nothing seemed to help over the next few months. I used to do a 15% water change every week but after putting the scrubber on in Feb 2016 I got busy and now do one every 3-4 weeks. I also have a skimmer (sc1350) and now run seachem seagel (changed way less often than I should :p)
PhotoGrid_1465370791080_zpsjdobmkuj.jpg
 

Drauka99

Active Member
View Badges
Joined
Nov 19, 2015
Messages
364
Reaction score
156
Location
Northwest Florida
Rating - 0%
0   0   0
Floyd,

slowly planning a second tank, a 60 cube. with sump space being so tight I am thinking about running a turf scrubber off of the drain. Is this still a "approved"/ "recommended" practice?
 
OP
OP
Turbo's Aquatics

Turbo's Aquatics

Super Duper Member
View Badges
Joined
Jun 7, 2011
Messages
2,805
Reaction score
4,031
Location
West Des Moines, IA
Rating - 0%
0   0   0
You absolutely can run a scrubber directly off the drain. What I recommend is that you have some kind of backup plan for overflow protection - the overflow root cause being something that goes down the drain pipe (like an anemone) that could cause a blockage. This can be done many ways:

The best way IMO is to use a multiple-pipe overflow like a Herbie or BeanAnimal (ideal) but that is not always possible.

The next best way is to create a secondary standpipe before the scrubber that allows a bypass but not a back-siphon, which is what i tried to show here (last pic in that post)

Another way is to 1) make sure your screen doesn't extend into the interior of the slot pipe (requires at least 2 zip ties/holders) and then leave the other end of the slot pipe open so that flow dumps out and anything going down the drain has an open exit. The downfall of that is that if you have algae growing up into the slot/screen junction, it's easy for that to get blocked because there is no pressure to prevent algae from growing. Light blockers can help prevent this but not 100% so it just becomes a maintenance item.
 

High pressure shells: Do you look for signs of stress in the invertebrates in your reef tank?

  • I regularly look for signs of invertebrate stress in my reef tank.

    Votes: 31 31.0%
  • I occasionally look for signs of invertebrate stress in my reef tank.

    Votes: 25 25.0%
  • I rarely look for signs of invertebrate stress in my reef tank.

    Votes: 19 19.0%
  • I never look for signs of invertebrate stress in my reef tank.

    Votes: 25 25.0%
  • Other.

    Votes: 0 0.0%
Back
Top