That tank is amazing, but didn't understand that one part of the video, it sounds like they had a power head they couldn't remove to clean it? Regardless, I've considered it in the past, but the hassle of doing so sounds like it will rarely get done. Also if you have anemones that sounds like a bad idea to hide power heads in places they are likely to come in contact.
Navigation
Install the app
How to install the app on iOS
Follow along with the video below to see how to install our site as a web app on your home screen.
Note: This feature may not be available in some browsers.
More options
You are using an out of date browser. It may not display this or other websites correctly.
You should upgrade or use an alternative browser.
You should upgrade or use an alternative browser.
ReefDudes 6' Shallow Reef 2.0
- Build Thread
- Thread starter shiftline
- Start date
- Tagged users None


- Joined
- Oct 26, 2018
- Messages
- 452
- Reaction score
- 195
love the topless tanks, looks great
OP
OP
- Joined
- Feb 14, 2015
- Messages
- 463
- Reaction score
- 404
I'm with you! rimless justs looks so sleek!love the topless tanks, looks great
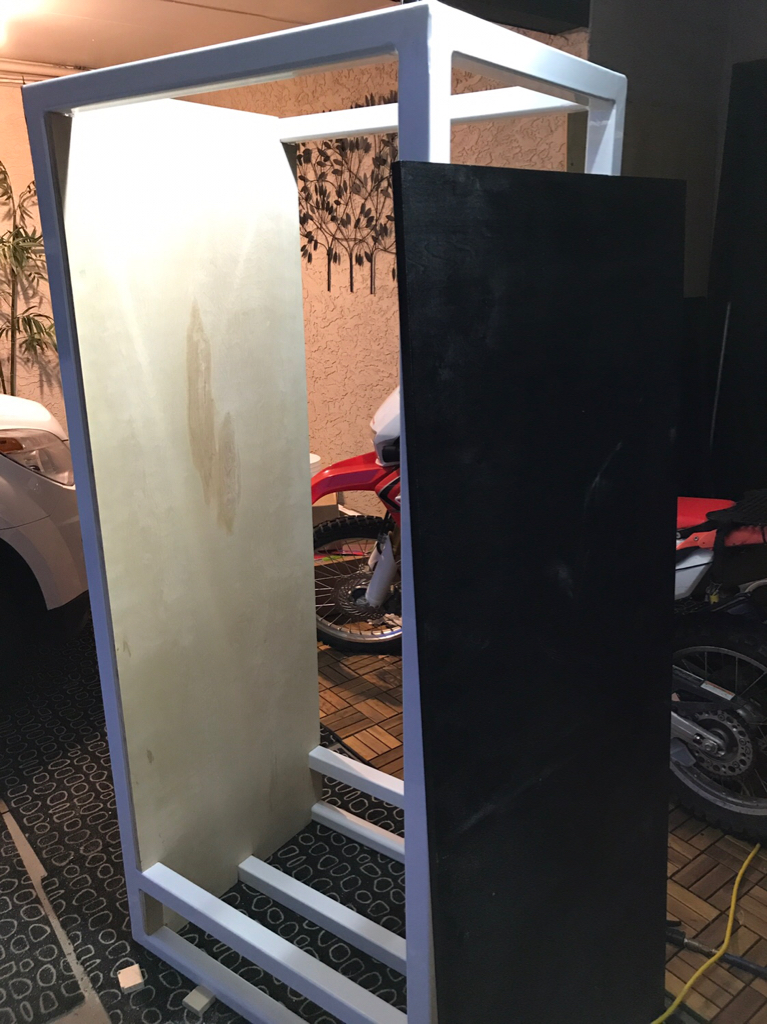
Last night was a late night of jenga and cutting wood to prep the stand. I have 3/4 plywood for the top to go under the tank. This will ensure a flat even surface for the glass to sit on.
I also have 3/4 play for the bottom of the stand which gives me a nice platform for the sump and other equipment
https://www.instagram.com/p/BpgLW_XlQW4/?utm_source=ig_web_copy_link

OP
OP
- Joined
- Feb 14, 2015
- Messages
- 463
- Reaction score
- 404
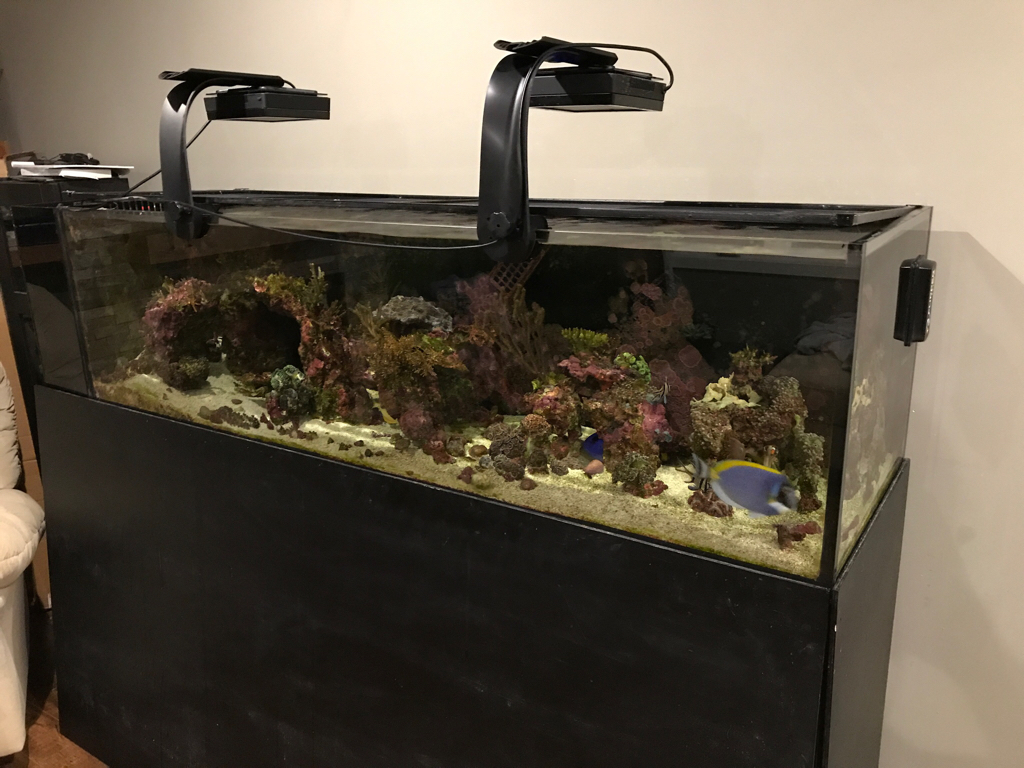
Got the wood for the tank and sump area painted. Removed the light bar from the old tank and attached it to the new stand! Hopefully it works well! Tried to simplify my mounting and only used a single bolt
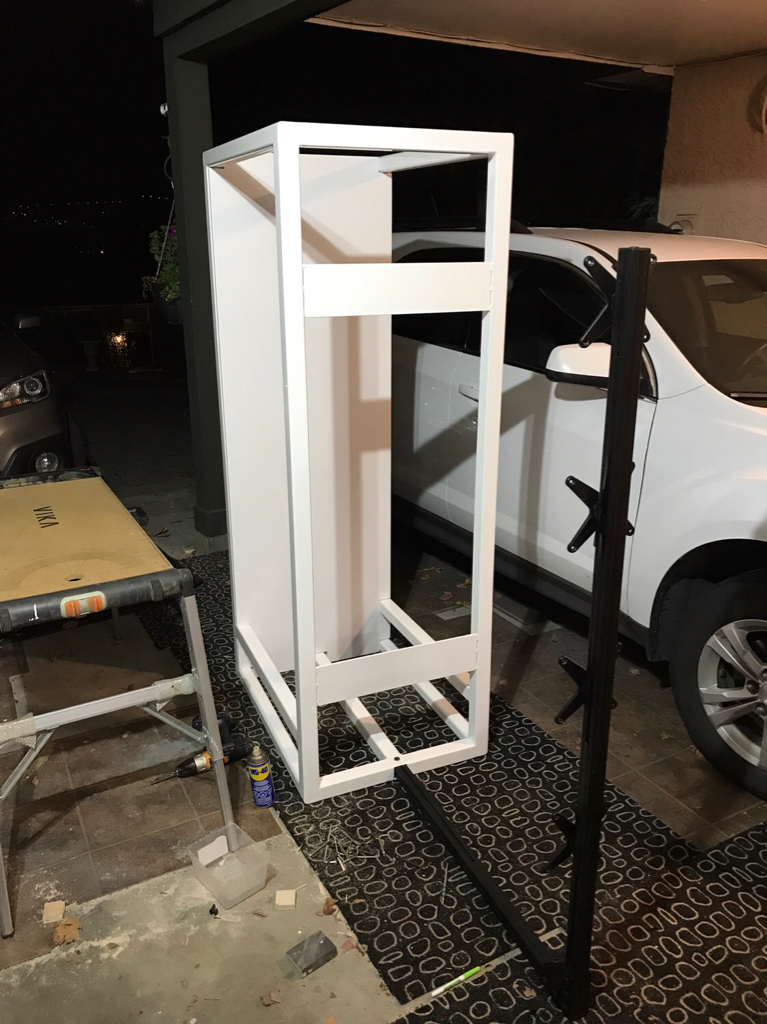
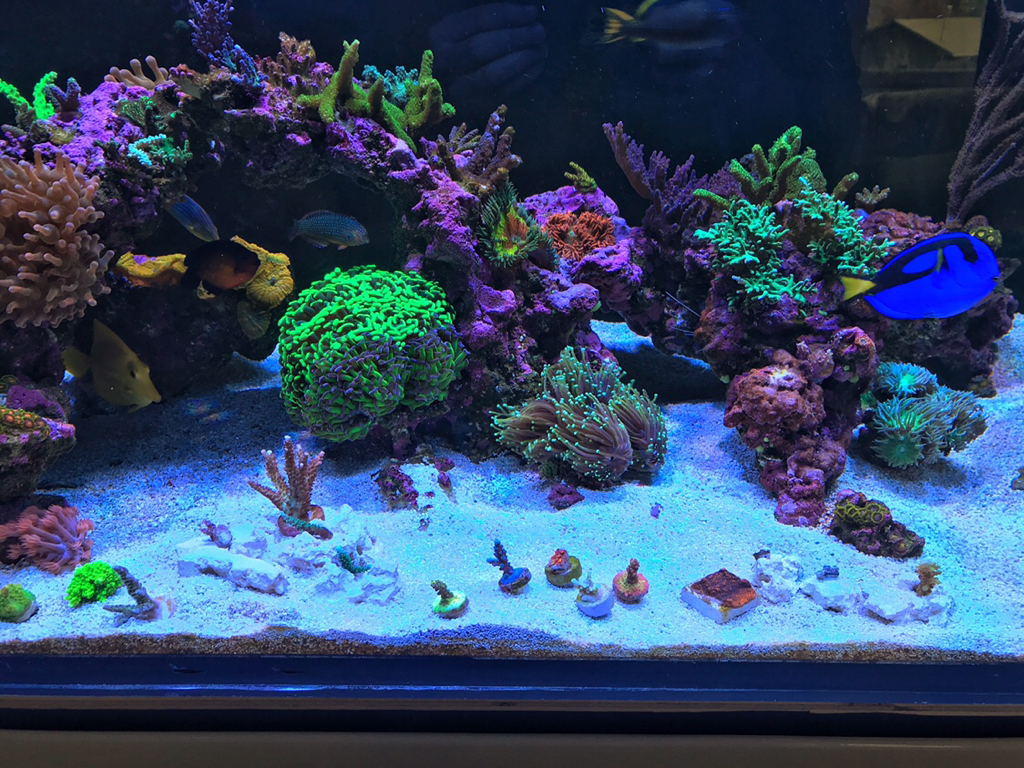
Old tank is slowly getting let’s stolen and doesn’t quite look the same
Now is it worth putting black vinyl on the back of the new glass again or leave it transparent?
I’m also debating to mount the power bars u get the tank or on the back of the control panel wall .. decisions decisions!
Old tank is slowly getting let’s stolen and doesn’t quite look the same
Now is it worth putting black vinyl on the back of the new glass again or leave it transparent?
I’m also debating to mount the power bars u get the tank or on the back of the control panel wall .. decisions decisions!


OP
OP
- Joined
- Feb 14, 2015
- Messages
- 463
- Reaction score
- 404
All plumbed and getting ready to roll
I’m digging the Canadian colour scheme
For the overflow I’m doing bean animal. I decided to try the dual 45’s. Curious to see if it’s as silent as the U shape method for the trickle drain
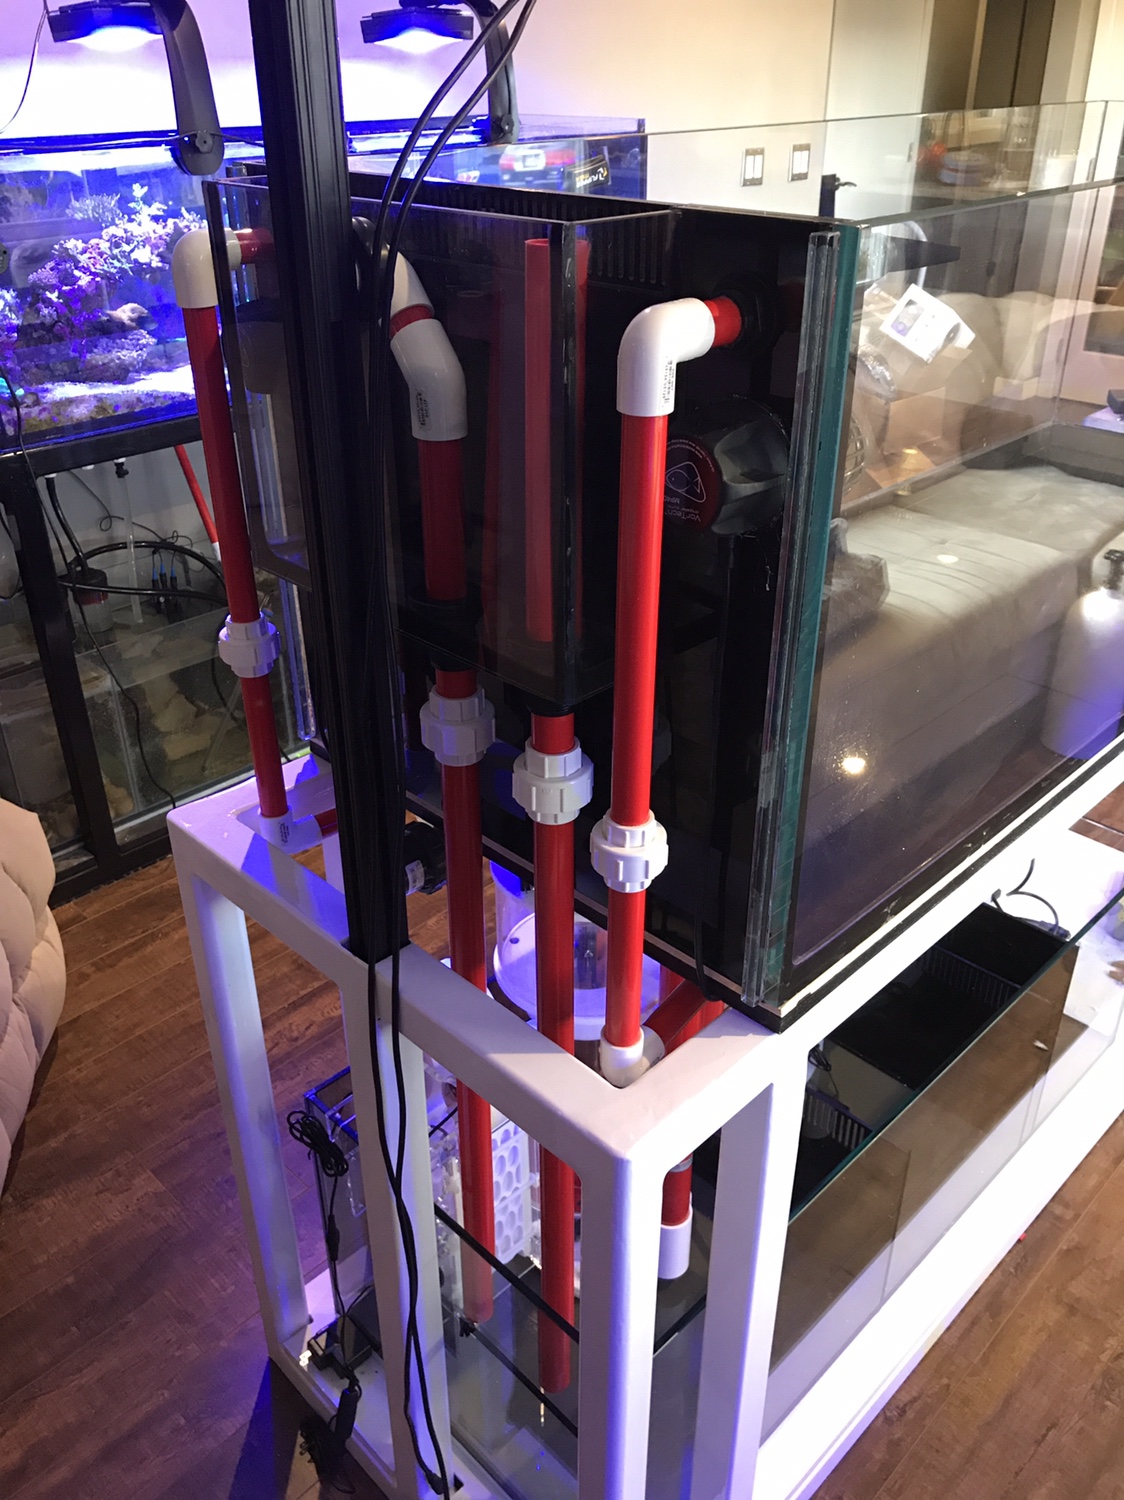
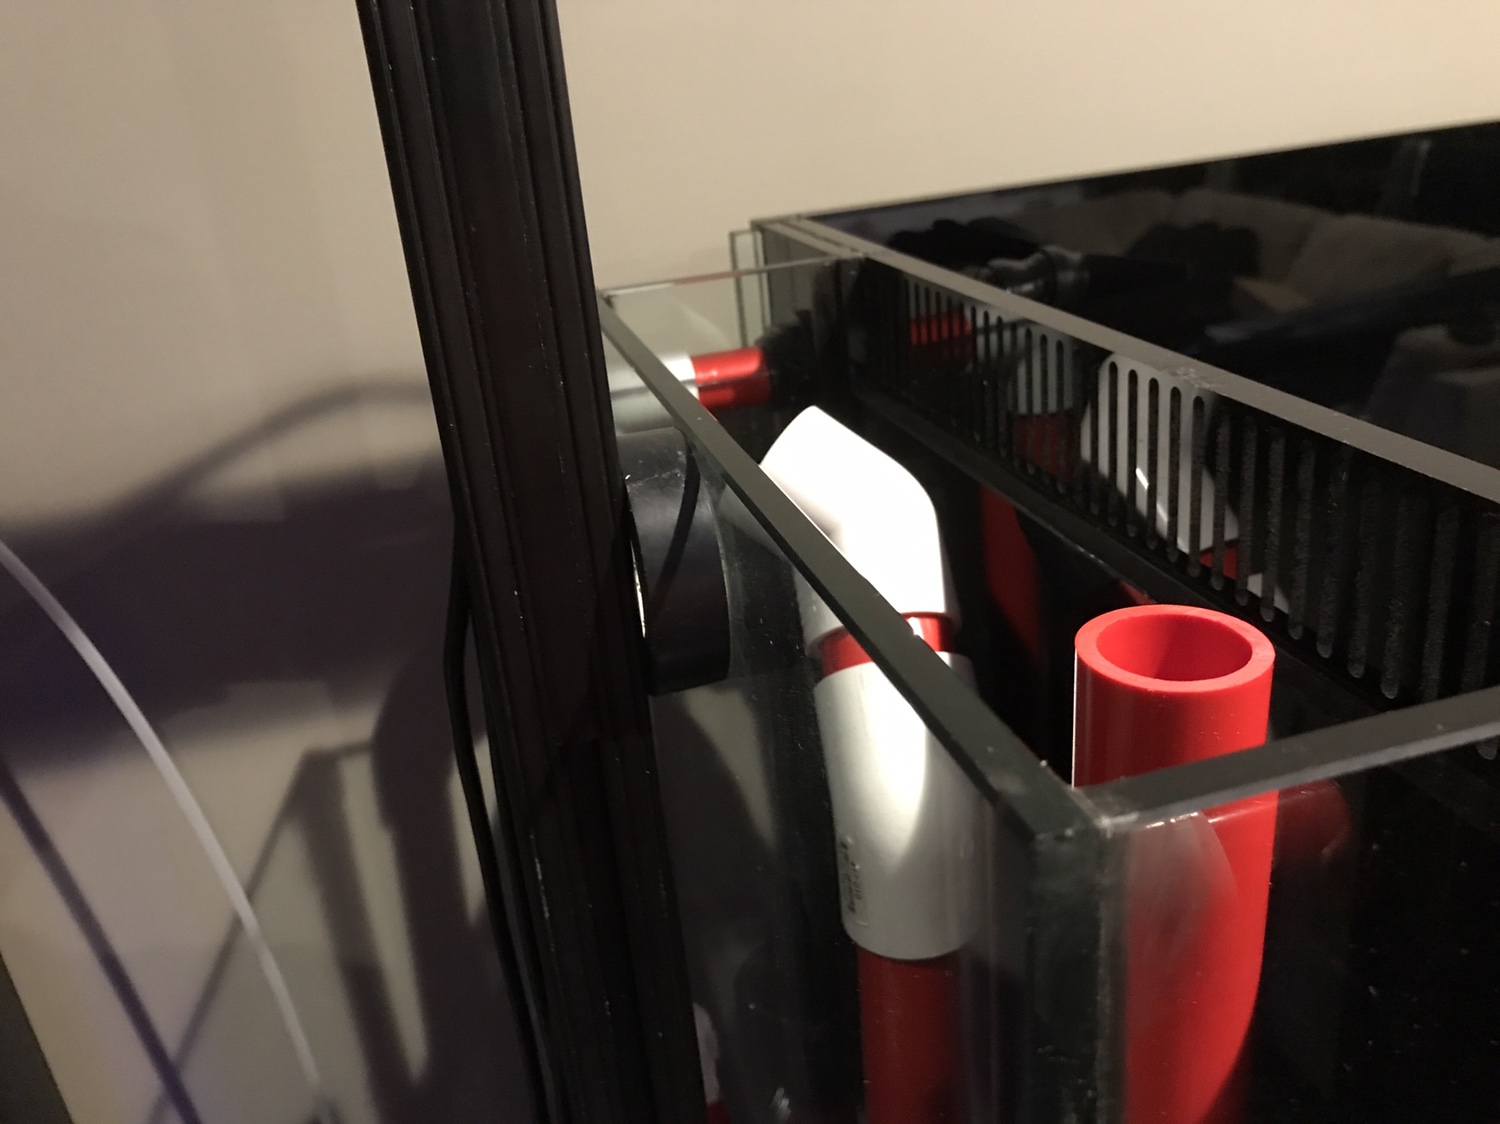
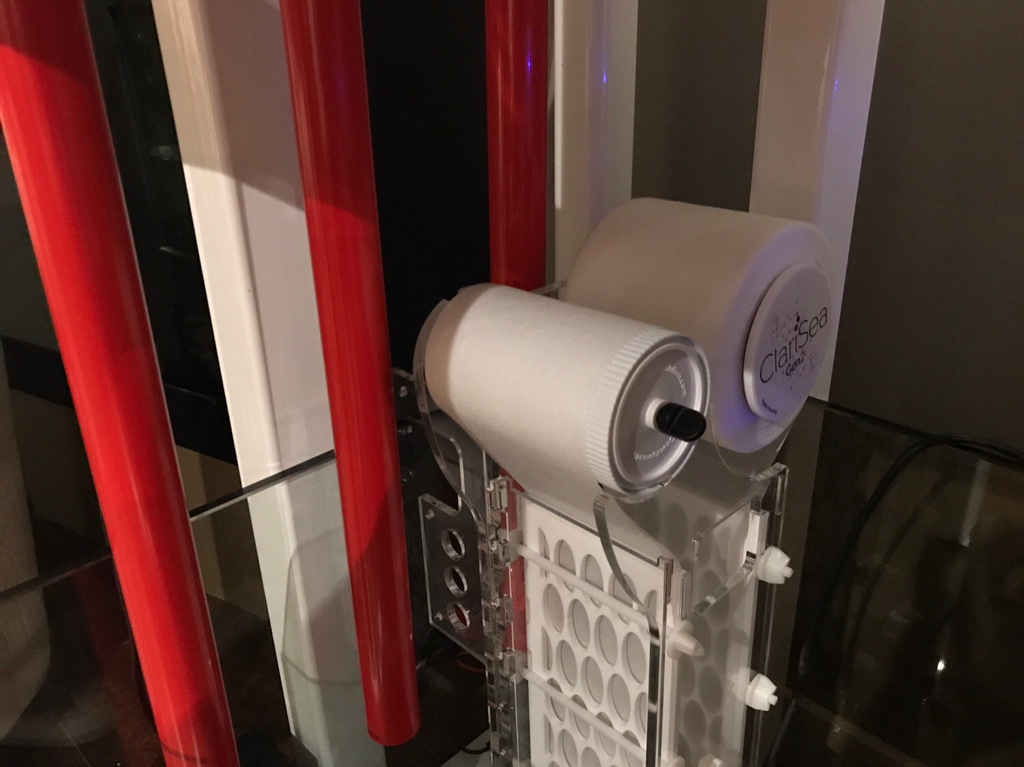
I’m also very stoked to have ditched the socks for the new sump and go with a ClariSea filter roller. I think it will go along way to keeping nutrients low and hopefully mean less glass cleaning!
I’m digging the Canadian colour scheme
For the overflow I’m doing bean animal. I decided to try the dual 45’s. Curious to see if it’s as silent as the U shape method for the trickle drain
I’m also very stoked to have ditched the socks for the new sump and go with a ClariSea filter roller. I think it will go along way to keeping nutrients low and hopefully mean less glass cleaning!

Amazing @shiftline ! The V2 looks amazing , if you don’t mind me asking what are the measurements of your new tank?

OP
OP
- Joined
- Feb 14, 2015
- Messages
- 463
- Reaction score
- 404
Amazing @shiftline ! The V2 looks amazing , if you don’t mind me asking what are the measurements of your new tank?
Thank you!
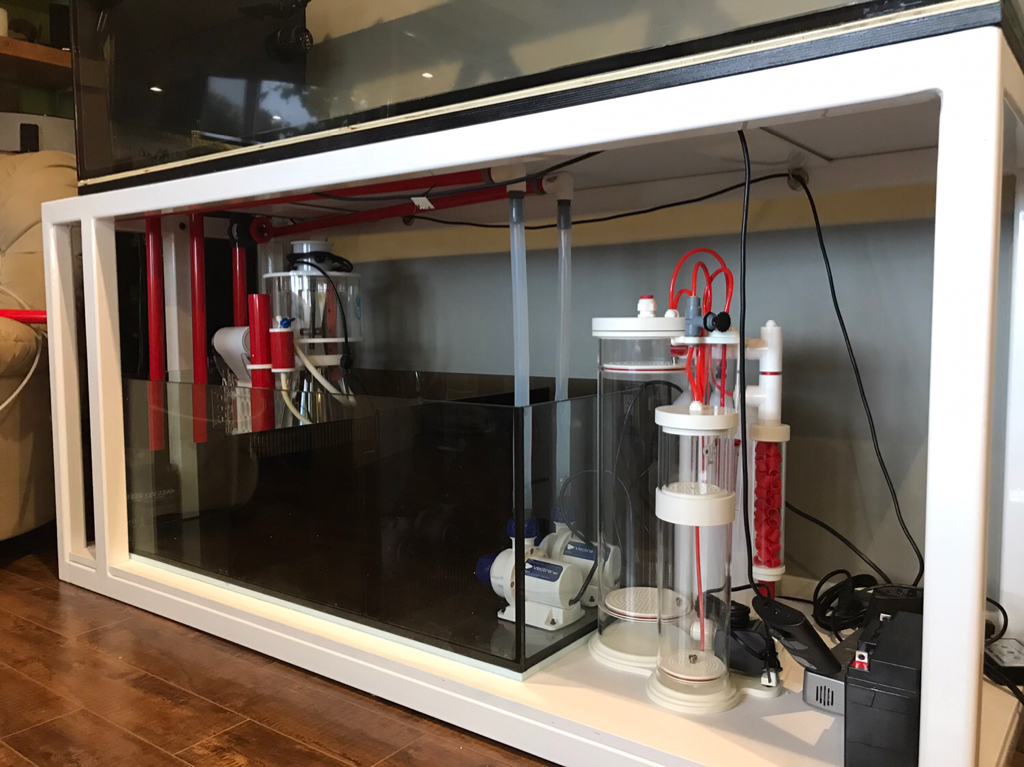
The stand is 72” long the tank is a few “ shorter to allow space for
The overflow. 25” wide and 22” tall
OP
OP
- Joined
- Feb 14, 2015
- Messages
- 463
- Reaction score
- 404
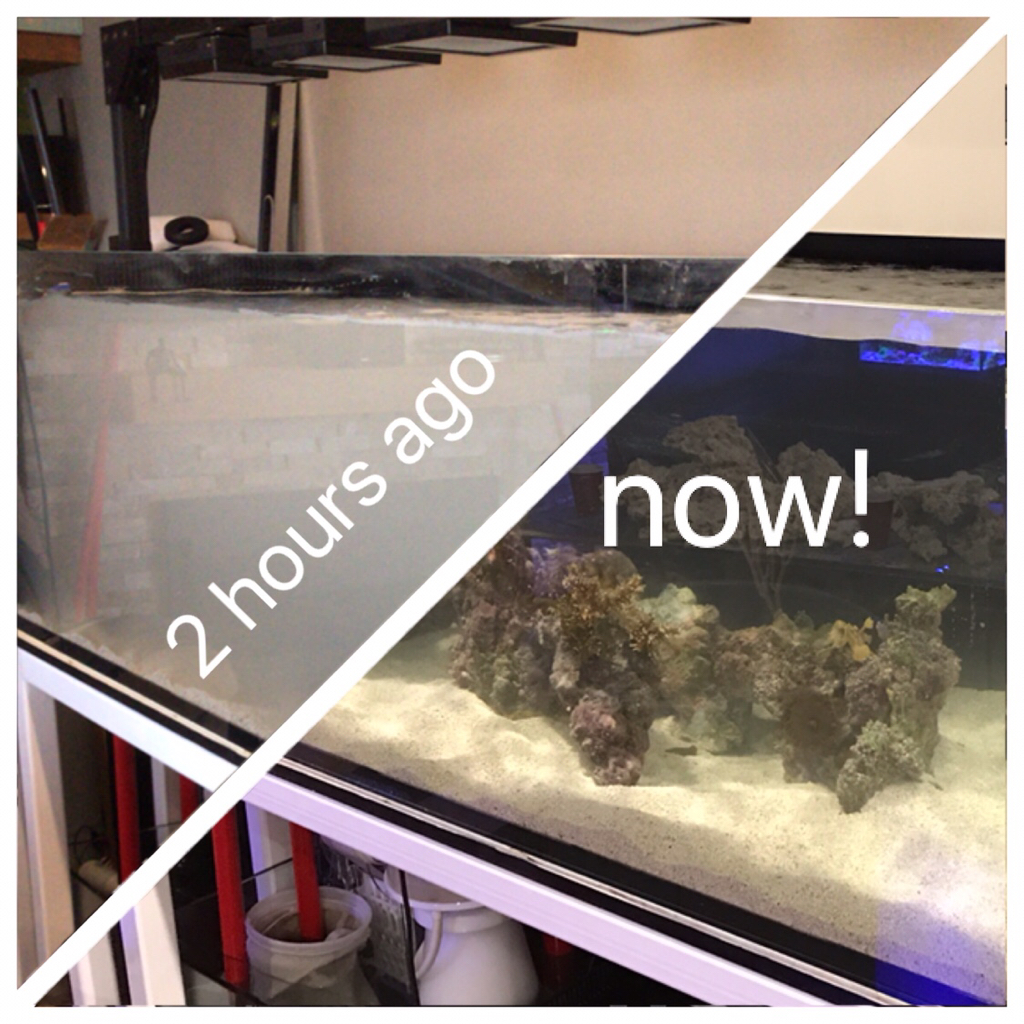
First went in water. I filed the tank directly then mixed water back and forth with the new and old tank 3-4 times to balance out the parameters.
Once it felt right I moved over some of the rock with coral on it. Added some new Rock into the mix then added 80lbs of dry sand.... dust storm? Yep!
I decided this would be a prime test for the Clarisea and was I credibly to come back 2 hours later and see the tank was almost clear! No let to shabby Clarisea!
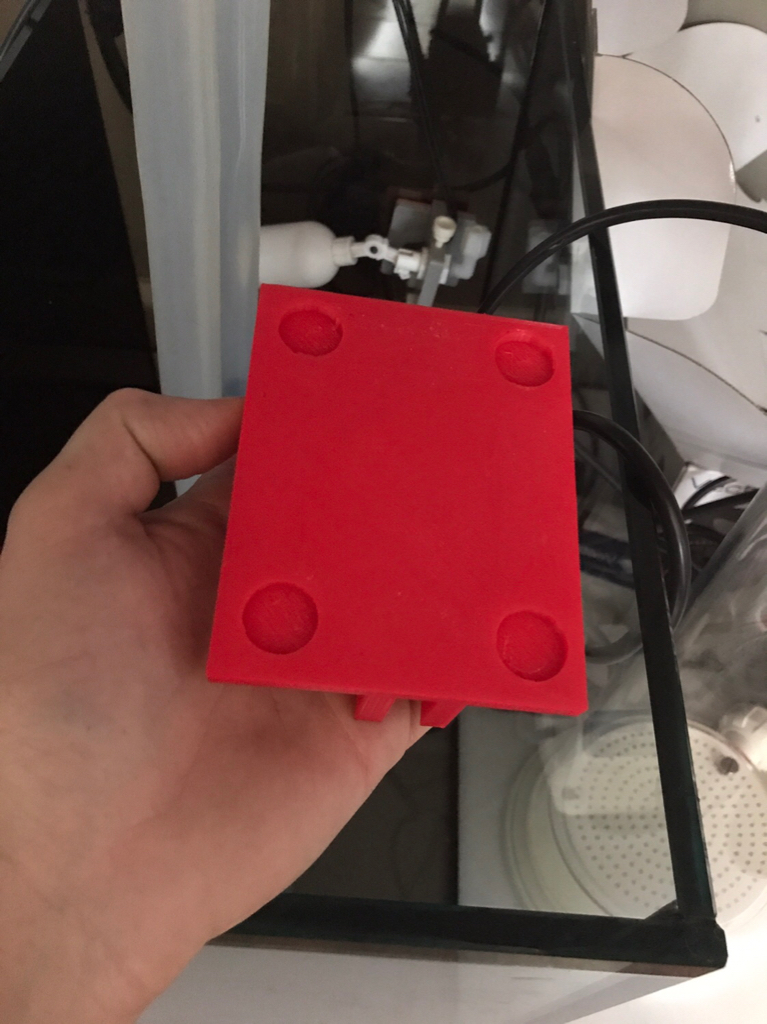
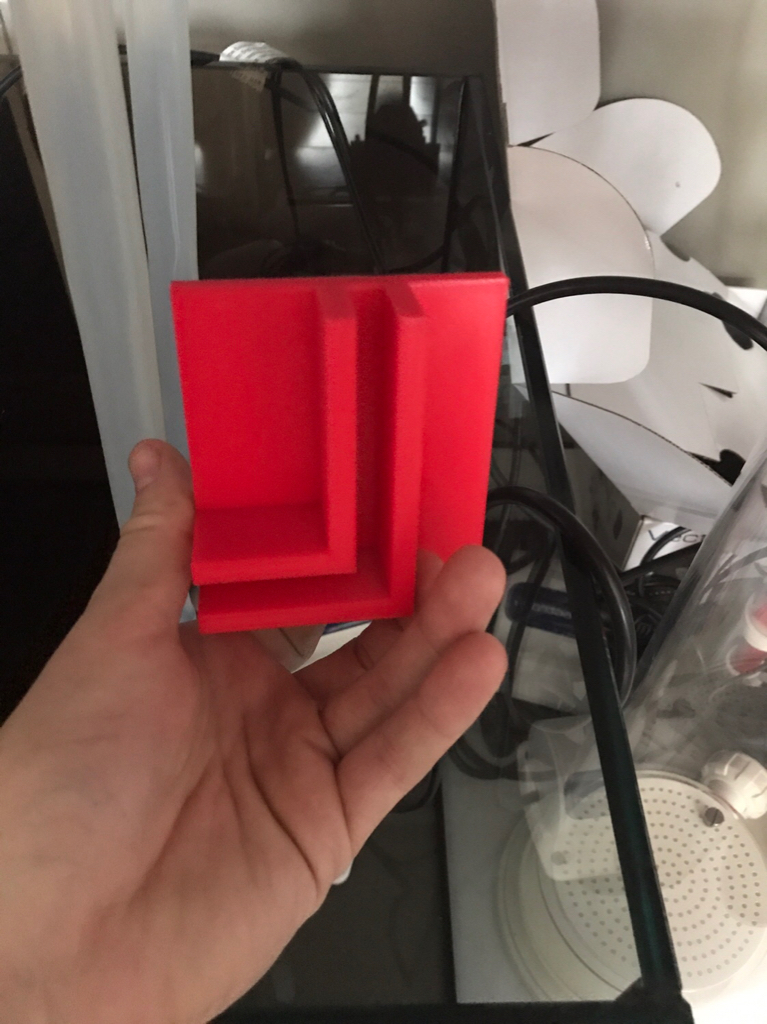
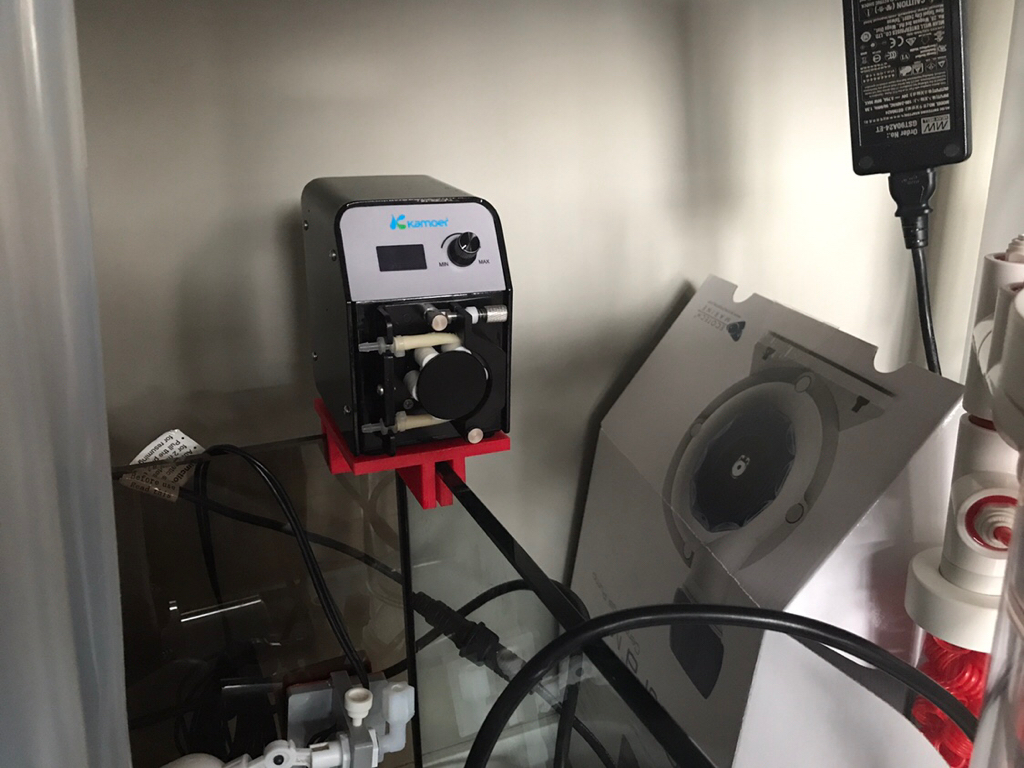
My other recent project was making a stand for the kamoer fox-stp pump to feed the calcium. Some quick 3d modelling and a few hours on the printer later I have a sweet little stand to hold it on the edge of the sump


- Joined
- Aug 19, 2018
- Messages
- 145
- Reaction score
- 143
All plumbed and getting ready to roll
I’m digging the Canadian colour scheme
For the overflow I’m doing bean animal. I decided to try the dual 45’s. Curious to see if it’s as silent as the U shape method for the trickle drain
I’m also very stoked to have ditched the socks for the new sump and go with a ClariSea filter roller. I think it will go along way to keeping nutrients low and hopefully mean less glass cleaning!
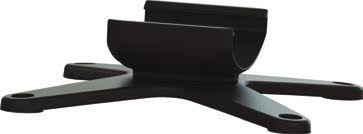
Do you have any pictures of how you connected the rms mount to the 80/20? I watched your YouTube vid but wanted more details around the modification to rms and hardware used
OP
OP
- Joined
- Feb 14, 2015
- Messages
- 463
- Reaction score
- 404
Do you have any pictures of how you connected the rms mount to the 80/20? I watched your YouTube vid but wanted more details around the modification to rms and hardware used
On the previous tank I used L brackets and bolted it to the cross bars. On this version I left a vertical steel tube to drop the rail into. I have a single screw I put in to to lock it in place
OP
OP
- Joined
- Feb 14, 2015
- Messages
- 463
- Reaction score
- 404
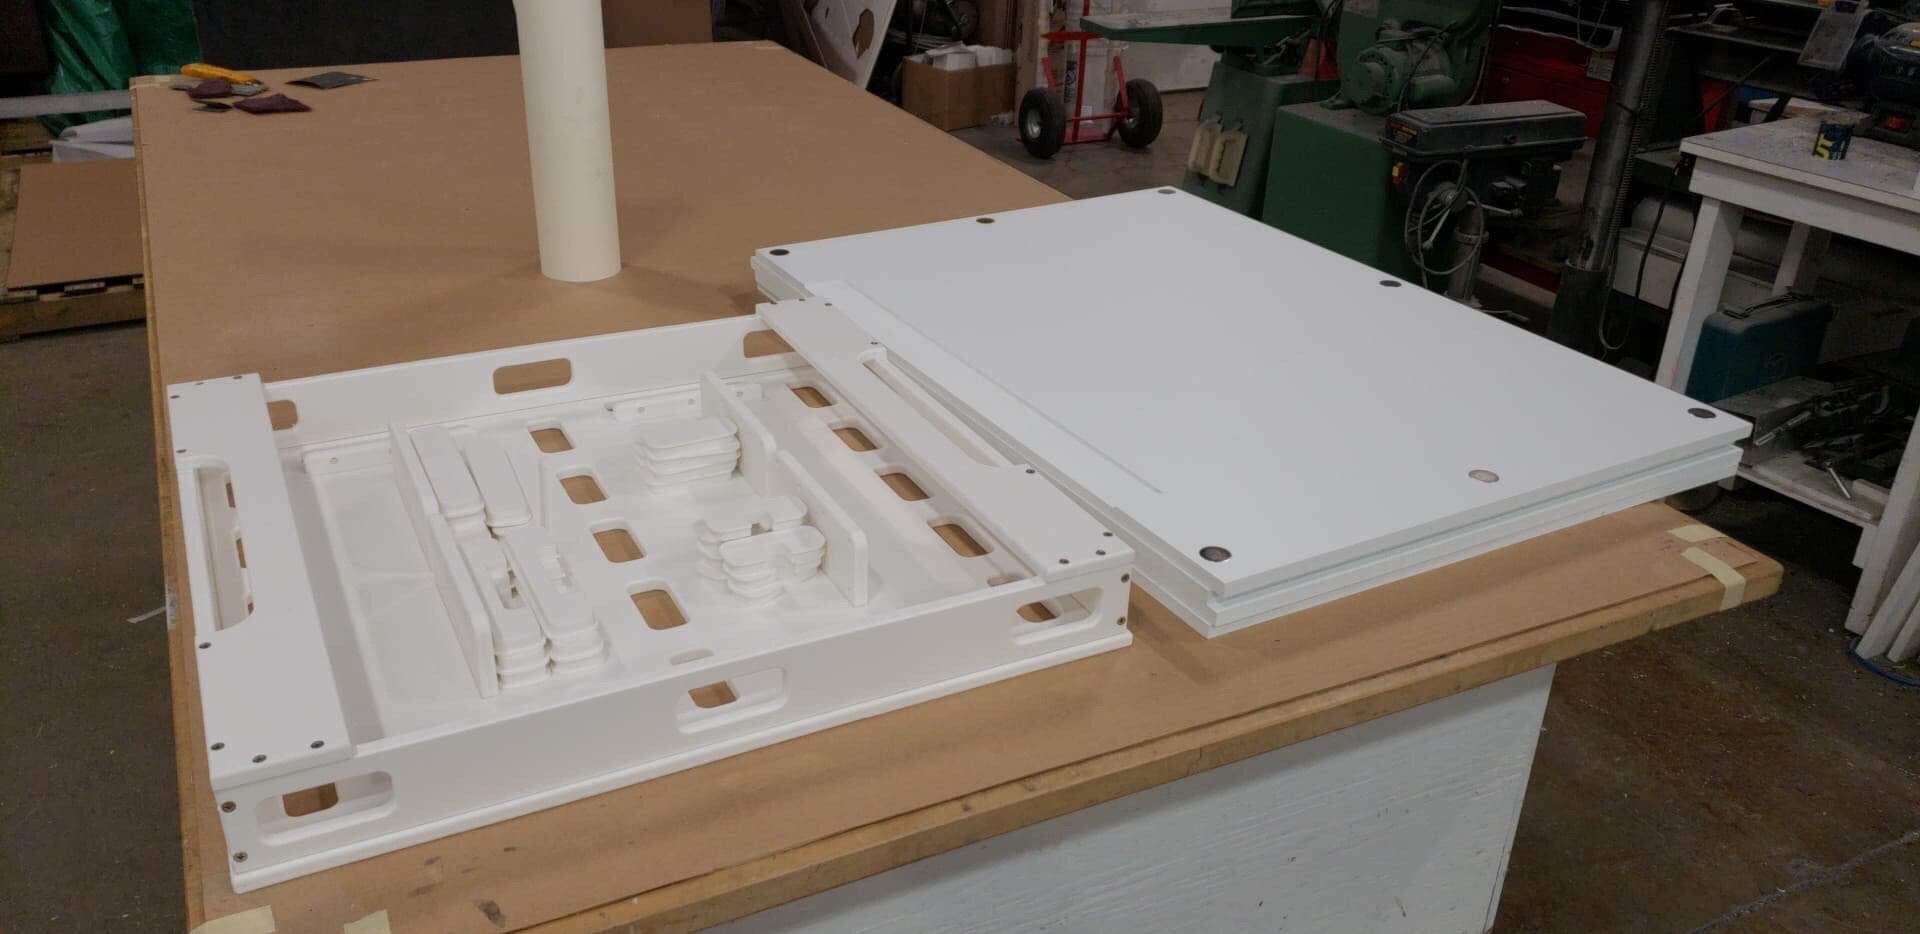
I’m extremely excited as I just got a sneak peek pic of the new custom controller board and side panels I’m getting made by @Elder1945 from Adaptive Reef! If you haven’t seen his threads check it it as his work is amazing!
I’m beyond excited to get these on the tank! [emoji7]
I’m beyond excited to get these on the tank! [emoji7]

OP
OP
- Joined
- Feb 14, 2015
- Messages
- 463
- Reaction score
- 404
Exactly Pop out the U and use a washer/bolt through the hole the 2 little clips wasThanks for the reply. Did you just snap the “u” piece off of the rms mount and drill a hole to put the bolt in for the t slot?
Similar threads
- Replies
- 34
- Views
- 1,232


