Information on stand building

K-Philly

Active Member
View Badges
Joined
Mar 1, 2019
Messages
205
Reaction score
333
Rating - 0%
0   0   0
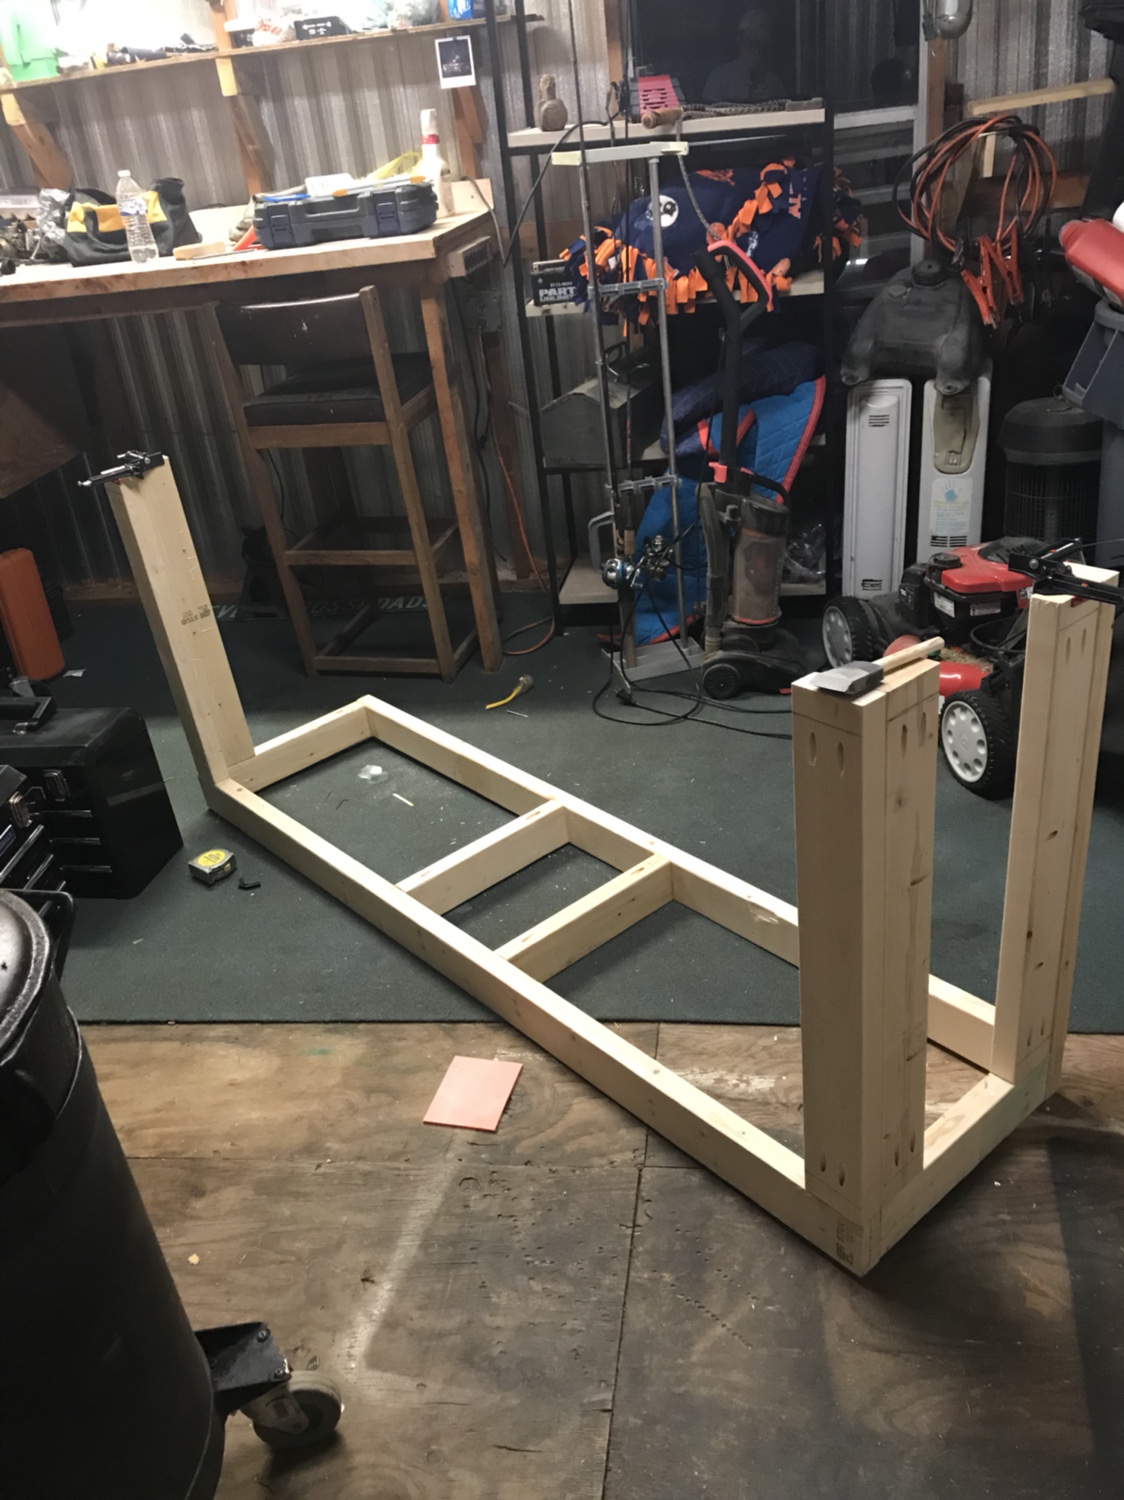
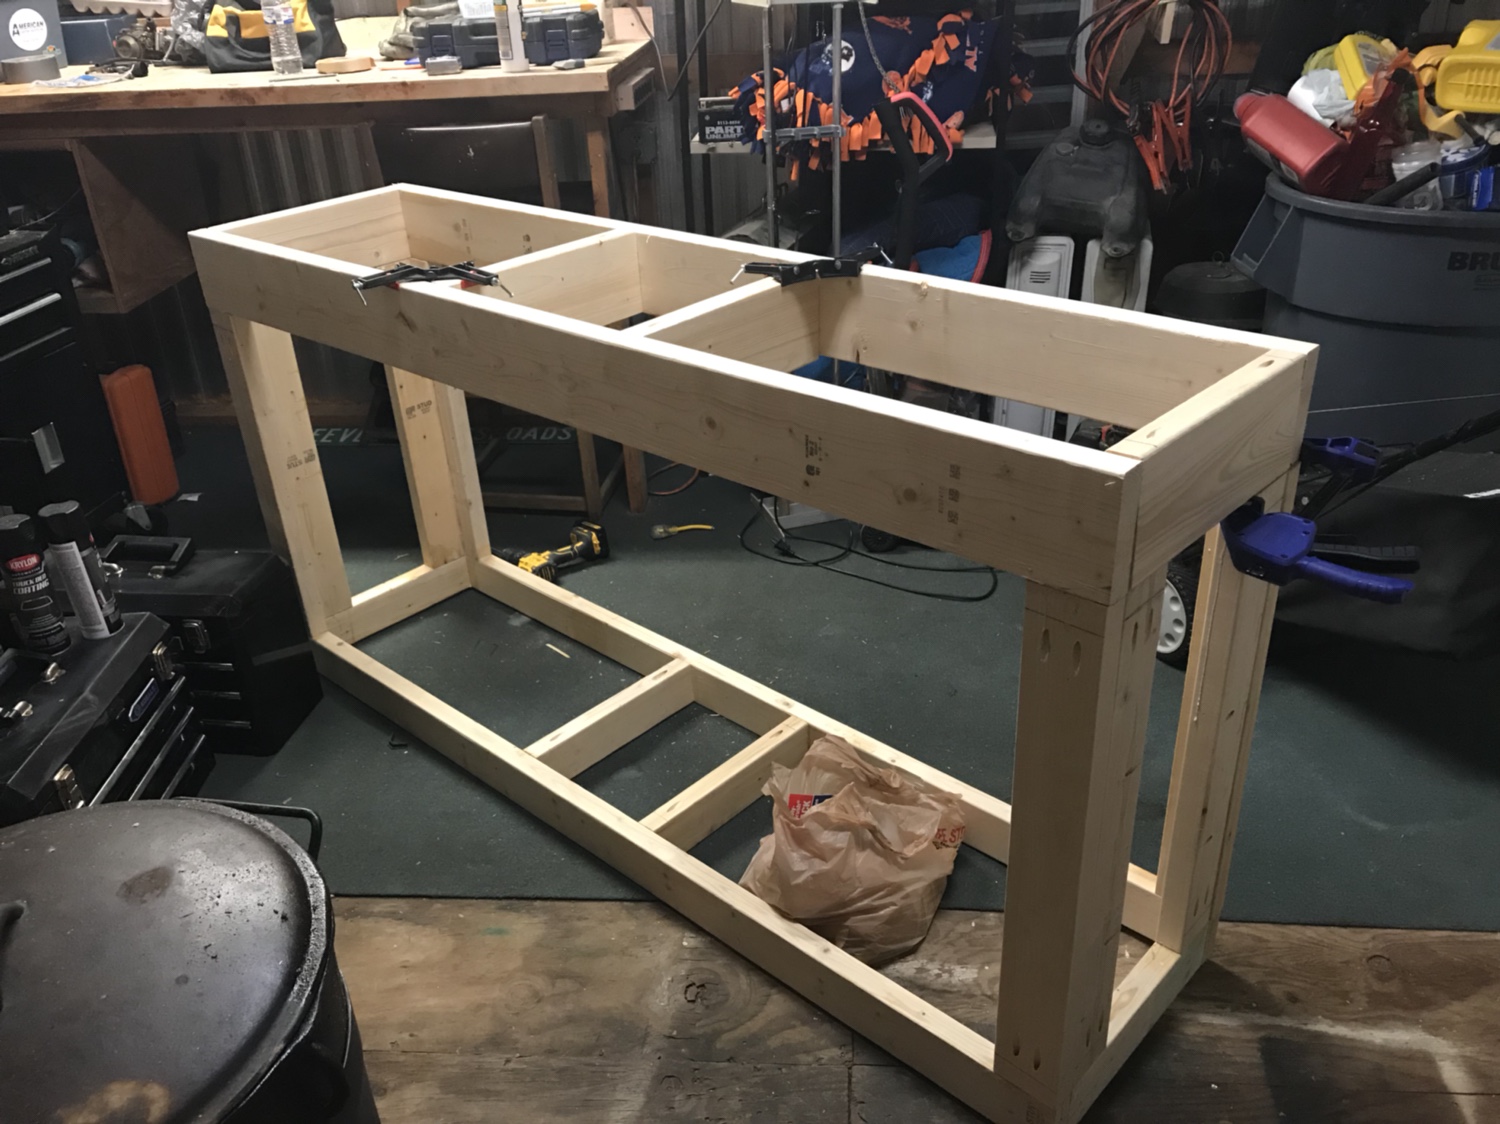
I am currently building a stand for my 100G reef-ready tank(72x18x17), for those of you who might be unaware of my thread build. I was hoping that some of you gracious carpenters and woodworkers might be able to chime in on some thoughts or advice.

I designed everything to be put together with Titebond III Ultimate Wood Glue, along with pocket hold joinery with the use of 2 1/2” coarse thread Kreg screws.
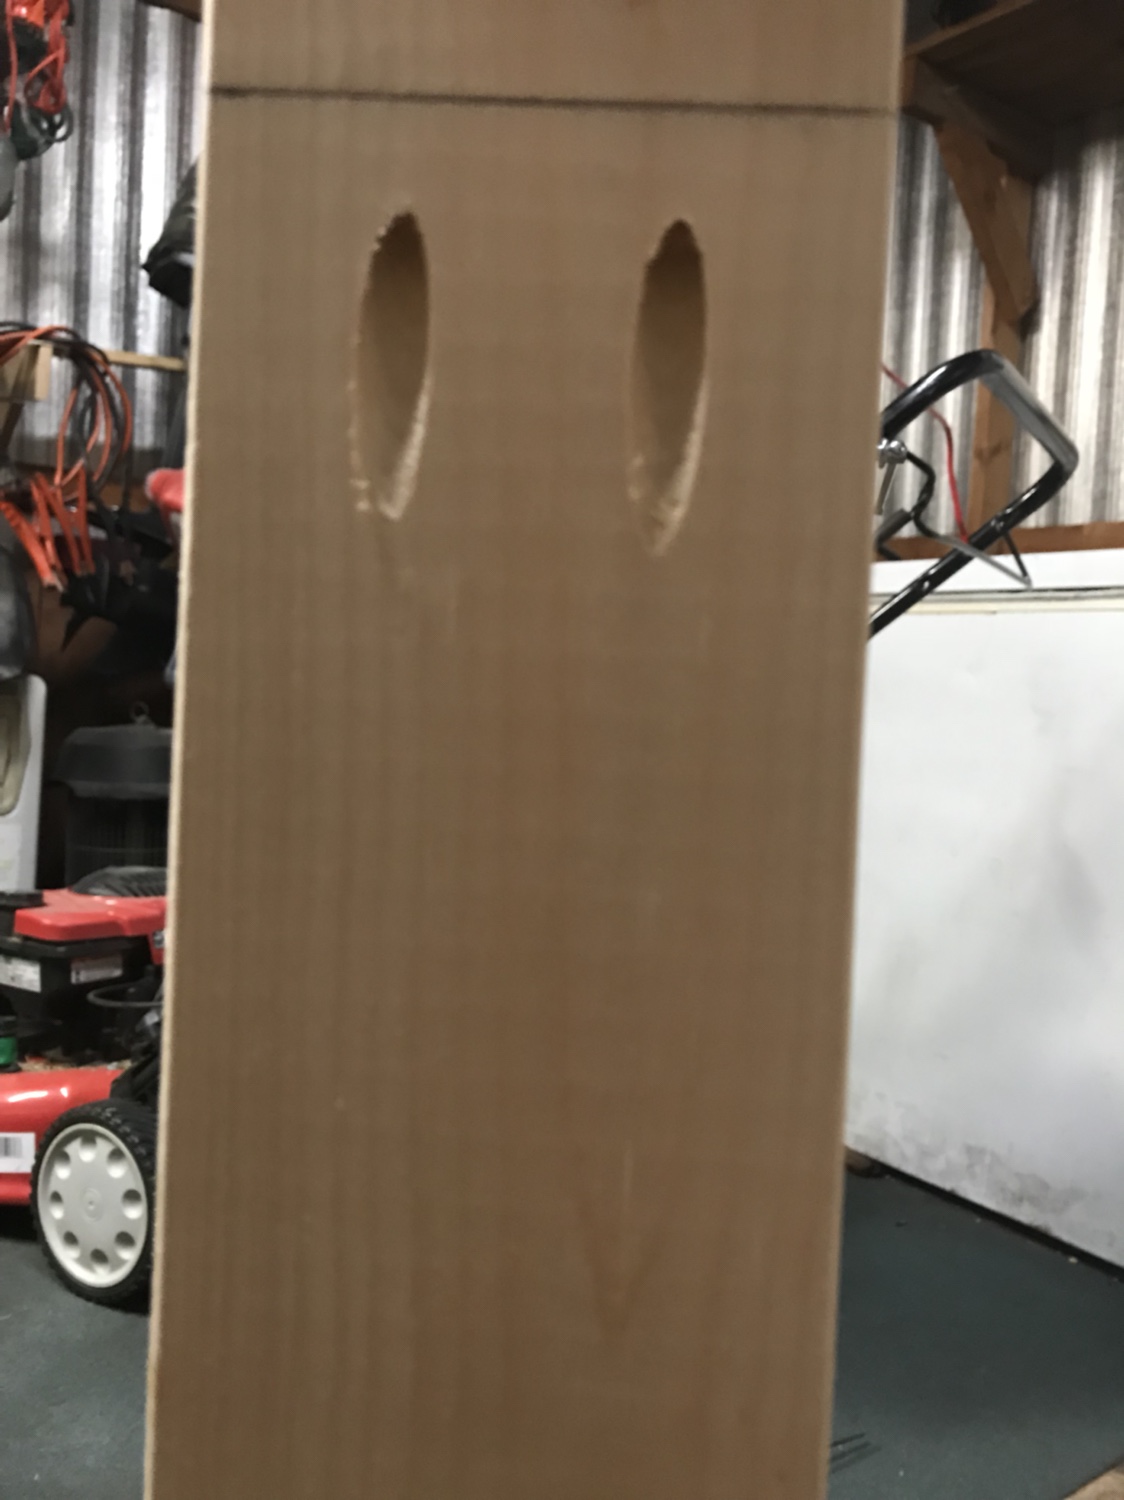
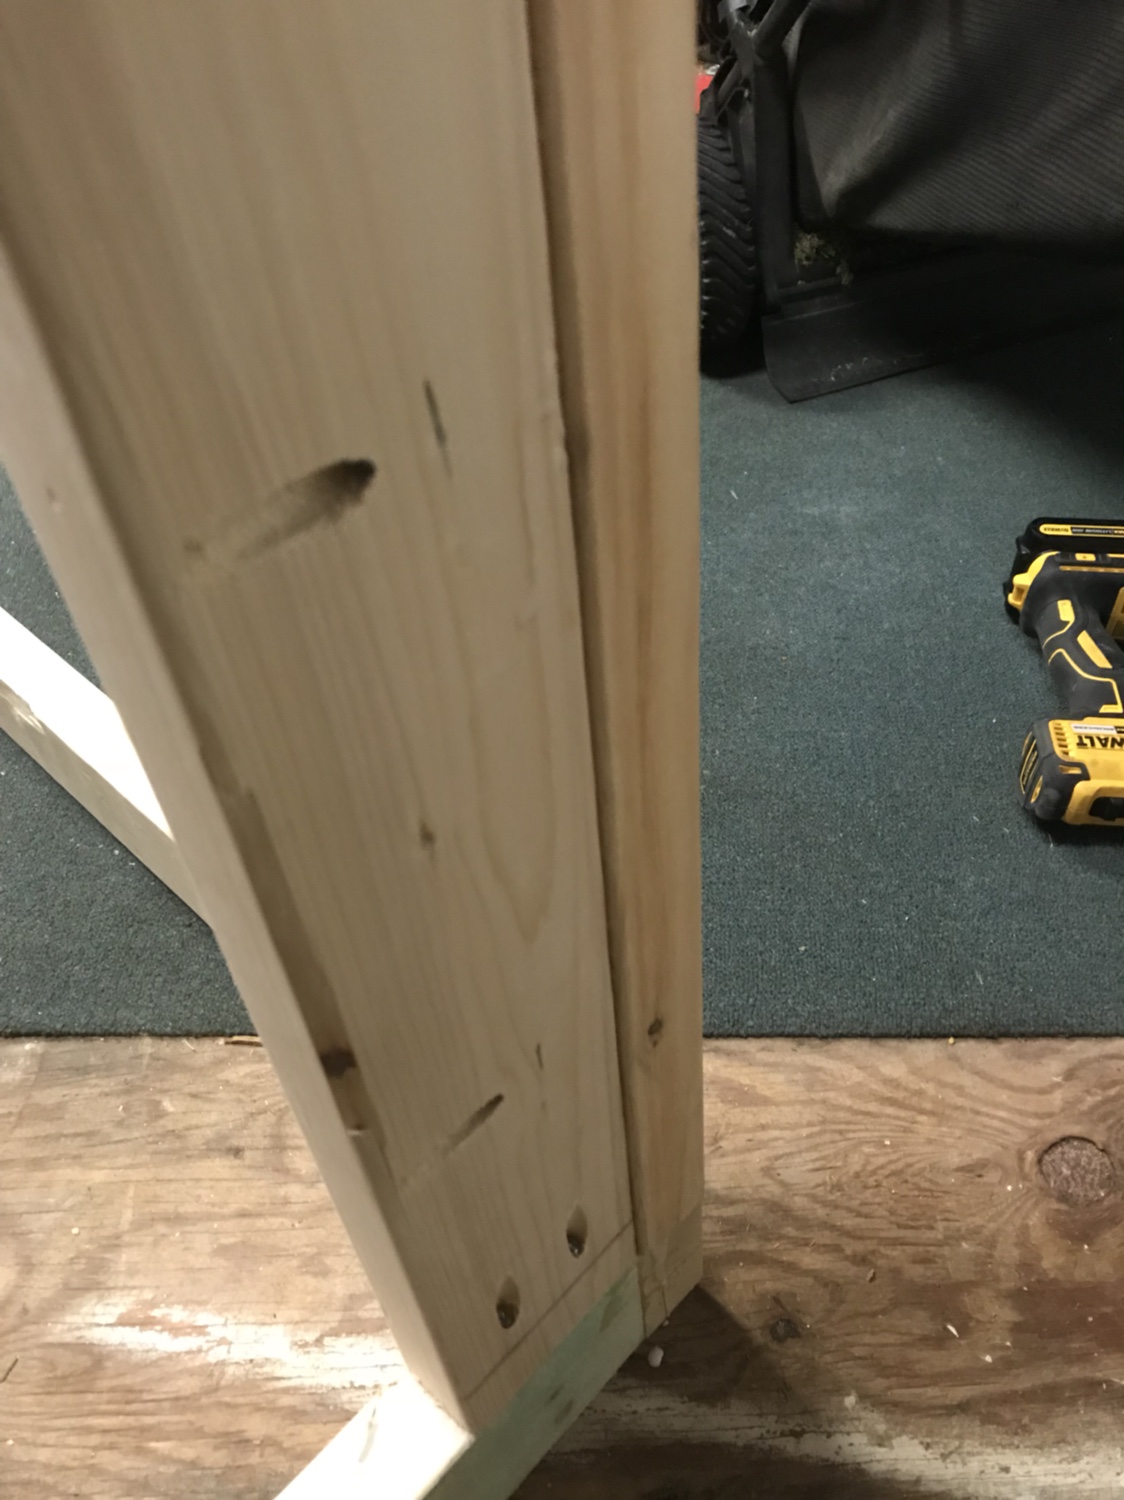
0fba391c6d61945543a8a25ab6fb68c7.jpg

d76cf2991cb0ed1d8176334451ad276d.jpg

2bc61cbc131420b752635d0699c5b2f7.jpg

27c32ef3c734a910760a692730477314.jpg


I plan to put 3/4” plywood on top. I will use 1/4” plywood for the flooring and to wrap it in. I appreciate any advice or help!
 

kschweer

Moderator
View Badges
Joined
Mar 25, 2011
Messages
12,225
Reaction score
31,520
Location
New Jersey
Rating - 0%
0   0   0
Looks great! Pocket screws are awesome! 1/4” would be great for the back and sides but I would use something a bit more substantial for the floor to take the sumps weight into account and the front as doors with 1/4” would be tough. You can get around this by making pannel doors using one bys for the “frame” and 1/4” for the inside part. Let me see if I can find pictures of the ones I made for my stand.
 

Crabs McJones

I'm so shi-nay
View Badges
Joined
Jul 24, 2017
Messages
27,297
Reaction score
138,268
Location
Wisconsin
Rating - 0%
0   0   0
Awesome! Thanks! But as far as weight or functionality we think this will definitely be okay as far the load bearing goes?
On a 6 foot, i'd have some sort of center support....IMO anything over 4 foot 90 gallon should have a center support.
 
OP
OP
K-Philly

K-Philly

Active Member
View Badges
Joined
Mar 1, 2019
Messages
205
Reaction score
333
Rating - 0%
0   0   0
Understood! The plan that I went by though, which the link is on my thread build, didn’t state that a center upright support was needed, especially with the lumber being 2x6” on top and the rest being built out of 2x4”. I keep finding mixed answers on that part.
 
OP
OP
K-Philly

K-Philly

Active Member
View Badges
Joined
Mar 1, 2019
Messages
205
Reaction score
333
Rating - 0%
0   0   0
Technically, that could be solved by just adding another 2x4” because I doubt it would hurt anything. I just had trouble getting my 55G Sump in and out with a support and back on the stand last time. I just want you to understand that I’m not trying to argue an answer that I may have already found for myself, I just want to have an open discussion to limit any over engineering if possible. I definitely appreciate your opinion!
 

jsker

Reefing is all about the adventure
View Badges
Joined
Apr 11, 2015
Messages
24,974
Reaction score
79,737
Location
Saint Louis
Rating - 0%
0   0   0
Someone is have fun with the pocket hole jig:)

I would suggest warping the hole thing in 3/4 cabinet grade ply, screwing through the 2 x 4's and 2 x 6 into the pay to hide the screws and nails. By using the 3/4 the stand will be a very strong stand. You can pre cut you door opening like @Crabs Mcjones did and screw them in. Pre finish all the would facing the inside before fasting;) Touch up the screw head after you fasten the panels.

I agree with @kschweer using 3/4 for the base were the sump with side. Add 2 x 4 's on the bottom ends the support the play base on the ends. I would suggest to leave the back open for ventilation as much as possible. Another suggest would be to come down the back from top to bottom 14 to 18 inches with 3/4 for all of your electronics, such as a future controller.
 

jsker

Reefing is all about the adventure
View Badges
Joined
Apr 11, 2015
Messages
24,974
Reaction score
79,737
Location
Saint Louis
Rating - 0%
0   0   0
On a 6 foot, i'd have some sort of center support....IMO anything over 4 foot 90 gallon should have a center support.

If you are going with a rimless this is a good suggestion. If not you are good with the 2 x 6.
 
OP
OP
K-Philly

K-Philly

Active Member
View Badges
Joined
Mar 1, 2019
Messages
205
Reaction score
333
Rating - 0%
0   0   0
Thanks! Just want to be sure I got this all straight. So add 2x4s on the bottom, just out from the legs? I was going to cut the bottom to fit.

Do I need to add two more cross braces along the top as well?

I am not against leaving the back off, I just wasn’t sure how much light or noise may get out from the tank back there.
 

kschweer

Moderator
View Badges
Joined
Mar 25, 2011
Messages
12,225
Reaction score
31,520
Location
New Jersey
Rating - 0%
0   0   0
Here’s the stand I did. Skinned in 1/4 with 3/4 top and the panel doors I discussed in my last post.

817DAD14-5CD4-46FC-AB47-91D87FD67832.jpeg
56F1681F-AD6A-4749-9A44-FC5BC4A28993.jpeg
CA2F8151-FCB7-45C4-96EF-E472569A4F07.jpeg
AB9B5617-4B8E-4269-9732-D76E970C9F0B.jpeg
213D5497-5095-40C0-A15B-313F0B3A80A7.jpeg


And I agree you should be fine with no center brace with the 2x6 cross beam.
 
OP
OP
K-Philly

K-Philly

Active Member
View Badges
Joined
Mar 1, 2019
Messages
205
Reaction score
333
Rating - 0%
0   0   0
Thank you all! My tank is trimmed! I figured maybe Skin the top in 3/4” and the bottom. Then do the outside in maybe 1/4” or 3/8”. I don’t want to skimp on anything but doing the entire stand in 3/4” seems like it would be super heavy.
 
OP
OP
K-Philly

K-Philly

Active Member
View Badges
Joined
Mar 1, 2019
Messages
205
Reaction score
333
Rating - 0%
0   0   0
I also should have mentioned that the tank should sit flush on the frame. It won’t be on any of the plywood unless I was to fix it between the lumber which I had not planned on doing. From my understanding the plywood on the top was to just level the tank’s weight out to more evenly distribute it to the outer edge. My tank is trimmed. The plywood on the faces was just to help tighten the stand together in order to resist twisting. I was planning on just gluing all of the plywood together.
 
OP
OP
K-Philly

K-Philly

Active Member
View Badges
Joined
Mar 1, 2019
Messages
205
Reaction score
333
Rating - 0%
0   0   0
Here’s the stand I did. Skinned in 1/4 with 3/4 top and the panel doors I discussed in my last post.

817DAD14-5CD4-46FC-AB47-91D87FD67832.jpeg
56F1681F-AD6A-4749-9A44-FC5BC4A28993.jpeg
CA2F8151-FCB7-45C4-96EF-E472569A4F07.jpeg
AB9B5617-4B8E-4269-9732-D76E970C9F0B.jpeg
213D5497-5095-40C0-A15B-313F0B3A80A7.jpeg


And I agree you should be fine with no center brace with the 2x6 cross beam.
On your doors there, did you have to notch out a space in order for the 1/4" panel to fit in the middle? Or did you just glue directly to the surface?
 

kschweer

Moderator
View Badges
Joined
Mar 25, 2011
Messages
12,225
Reaction score
31,520
Location
New Jersey
Rating - 0%
0   0   0
On your doors there, did you have to notch out a space in order for the 1/4" panel to fit in the middle? Or did you just glue directly to the surface?
There is a groove cut that the 1/4 fits into. Not glued only pressed it. This allows it to expand and contract. But you should be able to get away with building the frame and cutting the 1/4” a little bigger than the opening and attaching it to the back with brads and glue.
 
OP
OP
K-Philly

K-Philly

Active Member
View Badges
Joined
Mar 1, 2019
Messages
205
Reaction score
333
Rating - 0%
0   0   0
I don't want to spam the DIY forum with different threads but I also had some questions relating to other DIY projects. I was going to change the title to something more generic, but I could not figure out how to. I will look more into it later!

But does anyone build their own LED lights? From the little bit that I have gathered, they are only cost efficient in the way that they usually cost around the same amount as the chinese black box LED? So the only real benefit is the use of better quality parts, ease of repairs and upgrades, and custom designs?

I am completely new to DIY LED systems. I was planning to start by studying up on Kelvin rates, colors that corals need, and how LED lights actually work when emitting lights. Anyone have any links that are more detailed such as describing parts like heat sinks, where to buy LED parts, and the different patterns to use? I have been searching through this site and others, but I have not found any basic information to get me started, so I do not understand the other threads well.

I was also curious if anyone has found a way to incorporate a QT system to their DT, without having to setup a different tank. I need to look further into it but I was thinking about setting up a 40G next to my sump, then splitting my drain to run into my sump's skimmer compartment and also the QT tank. The QT drain would have a gate valve so I could cut the drain at any point and time. The return from the QT would be hooked back up to the skimmer chamber by PVC or something. I would incorporate a UV sterilizer there to help insure nothing sessile would enter the main tank. Or do most of y'all believe a UV sterilizer running on the DT is efficient enough to not need a seperate QT tank. I want to do things the right way, while also being efficient. I understand that I can easily start putting way to much money into it. Saltwater aquariums in the south, are gaining popularity. I just haven't met to many at least in the state of Alabama, that do them. The closest marine store near me, in our state, just had to close it's doors. All of the closer stores are on the west side of Georgia. Me being a college student, I just want to help others be set up for success to keeping reef tanks. It is a responsibility, but I feel a lot of people leave the hobby because they make it to hard on themselves. There's also "more than one way to skin a buck."

I am very fortunate to have found this site, to where people actually take the time to use their knowledge from degrees, experience in trades, and just time that they have spent in the hobby to help others. Unfortunately, I have not been much of a carpenter, plumber, or electrician in my life. I have used basic tools such as wrenches, ratchets, circular saws, hand saws, drills, drivers, and etc. Basically, just enough to get me through minor projects. I would like to think that my specialty is more biology related. I attend one of the top Agriculture schools in the nation, and that's honestly not to brag or anything in that manner! I say that, meaning I am taught and trained very well in the biology and chemistry related fields. Also, if there ever arises a question that neither I nor someone on the forum can answer, I have the ability to reach out to professors at the university. I am sure many of them do not mind helping at all! Because of biology, I am also able to assist others with husbandry and reefkeeping, even if I have not kept certain species myself. You may question that method, which I totally understand. However, by understanding basic biology or behavior, I can research particular topics much more quickly and efficiently. Nothing will replace the knowledge by trial and error, but I can assist someone in maybe limiting mistakes or time lost.

That last paragraph probably seems off-topic, but I just want those that help to know I'd like to give back in return as well. I like using my knowledge to assist others. That's what it is there for, and not just me. So, if there is anyway I can help some of you please reach out! I will do the best I can, when I can! Thank you all for your help! I am almost done with my stand. I am hoping to finish it next weekend, because that is my next pay day. A 4x4x8 sheet of cabinet grade plywood is $36 dollars in this area. That's a chunk in my collegiate "salary." Haha, not to mention that I still need to paint it. Which will also cost quite a bit. I am looking to try and achieve that glass-like black look. I am going with the cabinet door plans that were listed earlier in the post as well. Basic trimming will be done, and then I will complete the process by building a cheap canopy top, that I am going to paint the inside white to possibly get the most efficiency out of my lights with. I thought about installing a computer fan, but if I am leaving the back open for ventilation, this may not be necessary. I am going to look into splitting the front panel into two parts. I was hoping to construct them in a way that they open upward instead of out.

I also need to re-paint the back of the tank. I used the wrong paint and it flakes. Since my entire stand and canopy is going to be a "glass-like," or "glossy," black, I was going to keep the back of the tank black as well. My entire goal is to make the colors inside of the tank "pop." I have read that others are using different shades of blue. So, once again I wanted to turn to the forum for help! I am open to any suggestions.

Building a stand is cost efficient and I would have less than $150 in my stand now if it weren't for the tools that I needed. The opportunity cost of purchasing the basic tools versus building my stand back in my hometown was just much more of an efficient choice. If you have or can borrow the tools, it is definitely worth doing. I also had to learn to trust the process, and not to overthink it. The person at ACE Hardware cut everything that I need to the exact measurement. So, even if I am not completely square, because I did it by eye and a level, I am sure this stand will hold just fine. The stand that I gave to my buddy, it held my tank full of rock, water, and sand for over a year. We didn't use pocket hole joinery, or glue. The boards on the inside that were meant to square the stand and not hold any weight, were actually holding the weight. The stand was built completely out of 2x4" and had 3/4" plywood on the top. The bottom and the sides were 3/8" plywood. Everything was treated wood. We actually had to cut the middle brace out of the front, in order to get the sump in. The stand was completely over-engineered and way to costly. Did not even sand it to paint. Used 2 1/2" wood screws to just screw everything in, and there were gaps between lumber. We just had no idea what we were doing, and it showed. Stand was terribly heavy!

I planned much better this time, and I used pocket hole joinery and glue on any place that two pieces of wood met that would create a joint. The only place I did not use glue was on the cross braces in the middle of the top frame. I released that these two pieces were not load bearing, and they just helped prevent twisting. I also forced glue into all end grains and gave them roughly ten minutes to soak in, then I lathered the wood in glue before connecting them. Since I had pre-drilled on my pocket holes, I just clamped the lumber as best as I could and just went ahead and drilled them together for a tight fit. I felt that this would better help the glue create a more stronger joint as it dried. There are a few things I concerned about, but they may not even be a true problem. The bottom rail has a small chip in it located at the upper right corner. The leg does not sit completely flush, but it is barely off. I released turning this upside down, would have helped. But as I was working through the project I must have mistakenly forgot. If anyone feels that it will become a problem, I can either beef it up somehow or I can replace that entire 2x4. Prefer to beef it up, only if needed. I will post a picture of it later this evening. I am also going to see if I can pick up some wheels that will fold in and out of the bottom. That way when nothing is on it, and I can fold them out so that I can roll the tank when needed. If anyone thinks that putting more wood screws in from the sides will help as well, I don't mind doing that either. Thank you all, for the help. It has been a great learning process for me!
 

Crabs McJones

I'm so shi-nay
View Badges
Joined
Jul 24, 2017
Messages
27,297
Reaction score
138,268
Location
Wisconsin
Rating - 0%
0   0   0
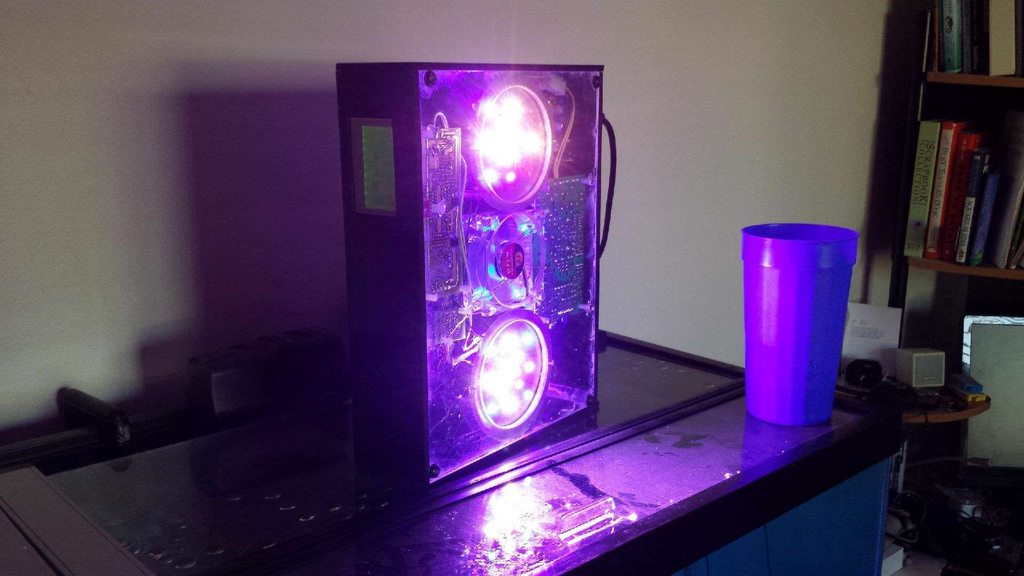
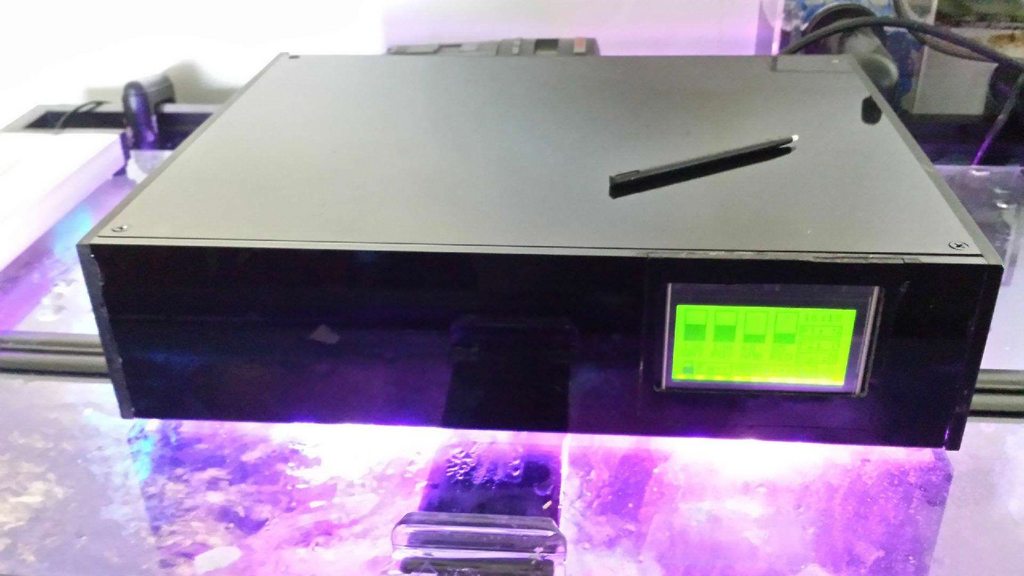
As much as i'd like to, i've never built my own LEDS. My uncle has however, and the tank looks great. I don't have a whole lot of info on it though.
rSRU8Jrh.jpg
Sk0sW1Nh.jpg
Lp3voaIh.jpg


I wouldn't plumb a qt into a dt in any way. The purpose of a qt is to free corals/fish/inverts of any parasites or diseases before they make it to your display tank, if you plumb them together a quarantine is kind of pointless. Plus you cannot run any medications as corals and inverts won't handle most medications used to treat fish.

As far as paint, Rustoleum has worked great for me and other users
 

High pressure shells: Do you look for signs of stress in the invertebrates in your reef tank?

  • I regularly look for signs of invertebrate stress in my reef tank.

    Votes: 36 31.3%
  • I occasionally look for signs of invertebrate stress in my reef tank.

    Votes: 28 24.3%
  • I rarely look for signs of invertebrate stress in my reef tank.

    Votes: 21 18.3%
  • I never look for signs of invertebrate stress in my reef tank.

    Votes: 30 26.1%
  • Other.

    Votes: 0 0.0%
Back
Top