I have had this setup in the building stages for over a year and still have not been able to complete it due to I'm constantly upgrading one thing or another before I can finish this project! I upgraded to this from a stable and happy 75g and there are days I have wished I had just kept my 75 going!
The equipment currently is as listed:
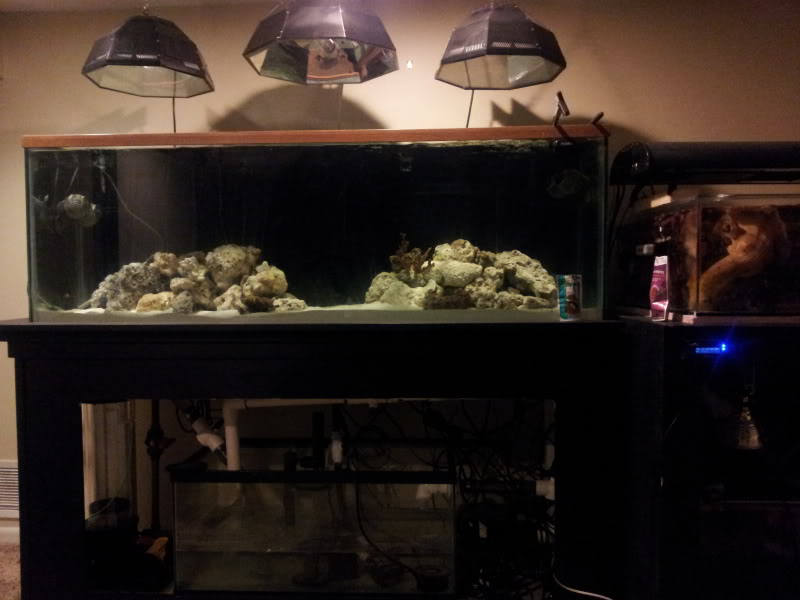
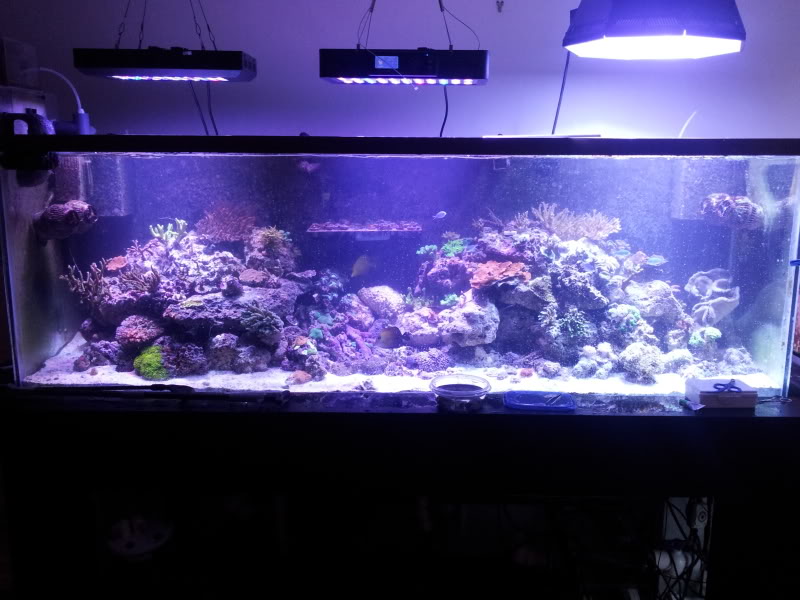
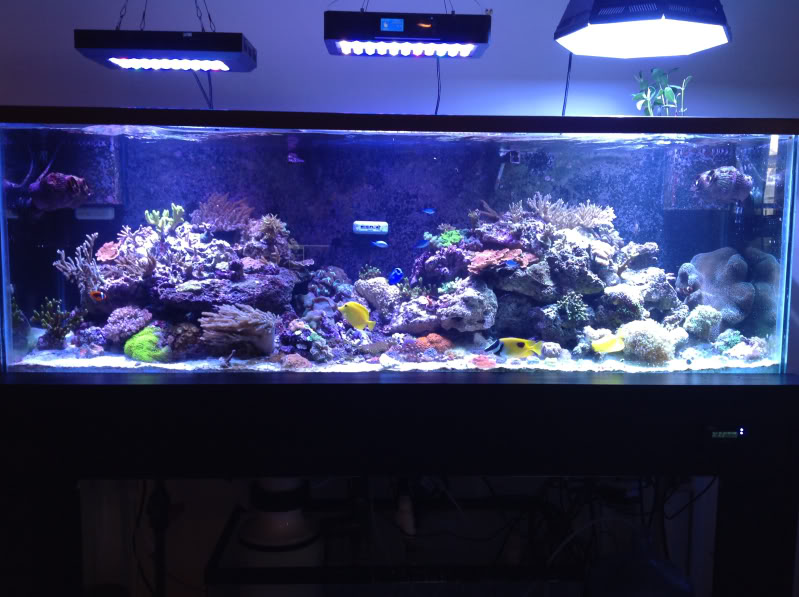
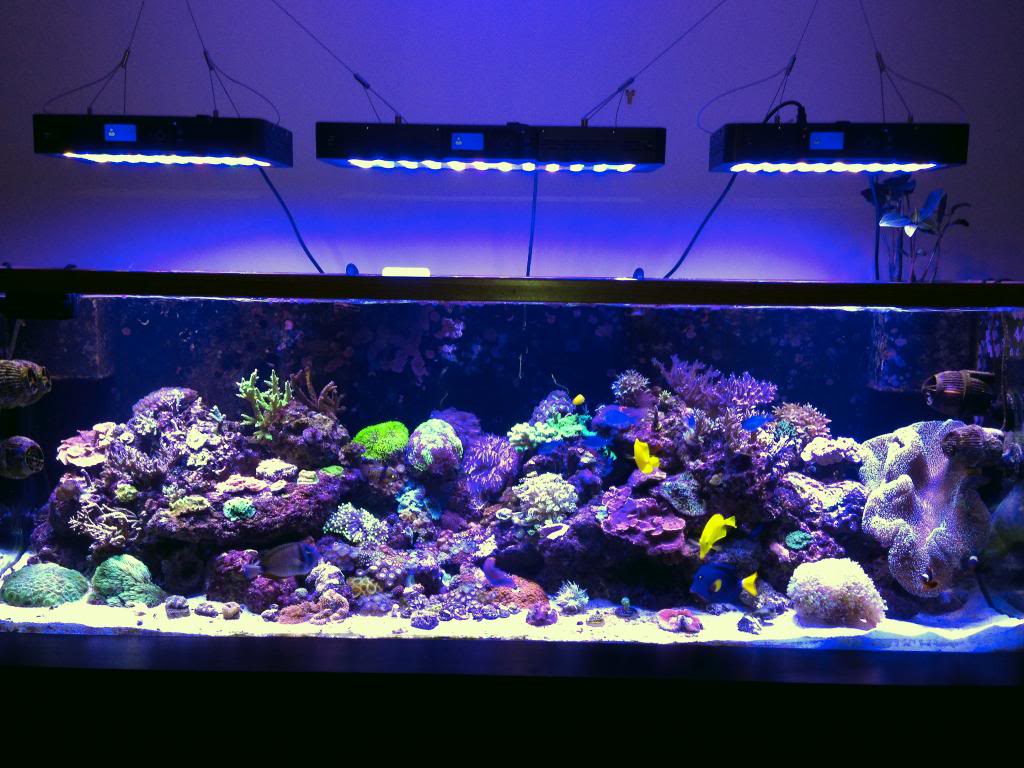
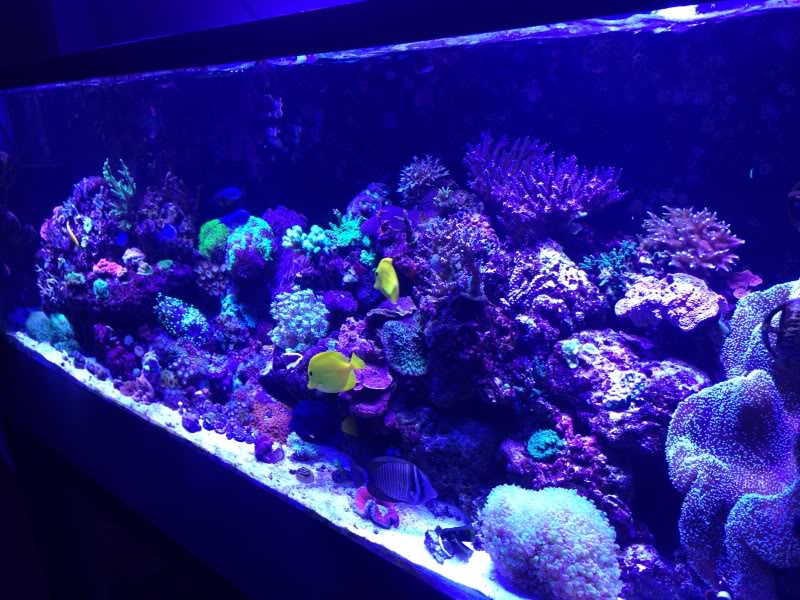
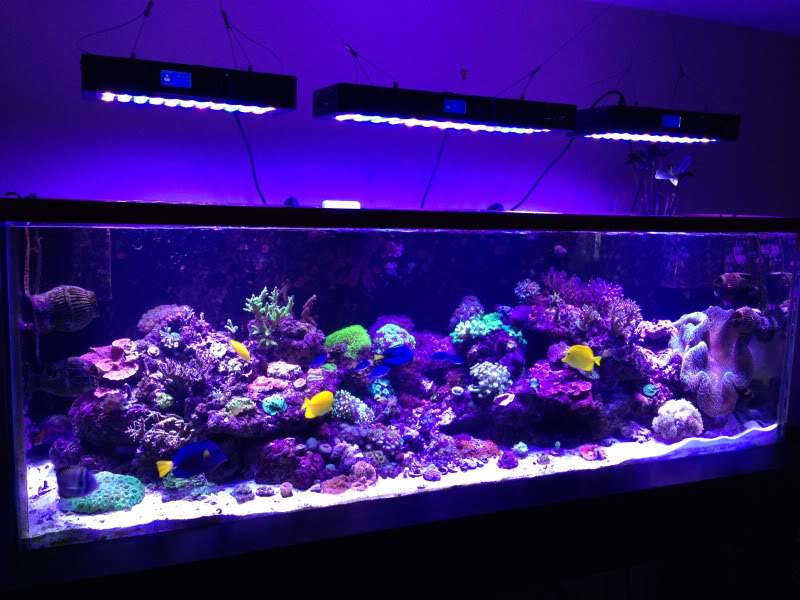
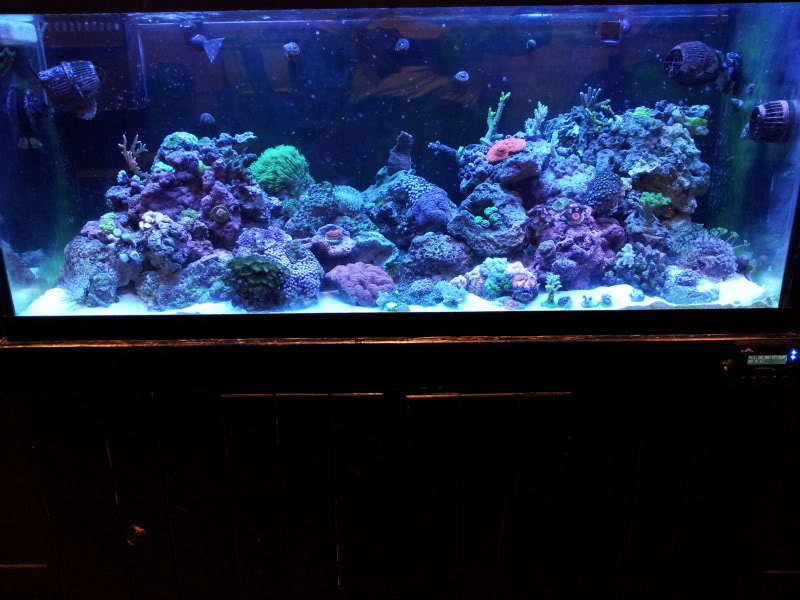
165g 72x20x27 Oceanic tank drilled for 2 - 1 1/2" bulkheads and custom overflows
Custom stand built by me!
40g sump with two sections skimmer and return
mag 9 return pump but soon to be replaced by a Speedwave DC Pump 1320 GPH
Bubble Magus NAC 77 skimmer
BRS dual reactor with GFO and Carbon
Reef Mania CR300 Calcium Reactor with a CarbonDoser Electronic Co2 Regulator and 20 pound CO2 bottle
Mag 3 for the reactors
2 300w finnex controllable heaters controlled by Aquacontroller
Neptunes Aquacontroller III with Break out box, Aquasurf, and 2 DC8's
2 Jebao WP40's with Modified controller cables controller by Aquasurf
2 Koralia 1150's
2 Reef Breeders IT2040's and 1 IT2060
DIY brackets made for ATO floats and probes out of acrylic and Koralia pump magnets
American DJ 8 switch power strip for non controller items
Fish:
2 Yellow Tangs
Purple Tang
Blue Hippo Tang
Red Sea Sailfin Tang
7 Blue/Green Chromis
2 Pajama Cardinals
Mystery Wrasse
Yellow Corris Wrasse
Chalk Basslet
Blue Spot Goby
Starry Blennie
Dragon Face Pipefish
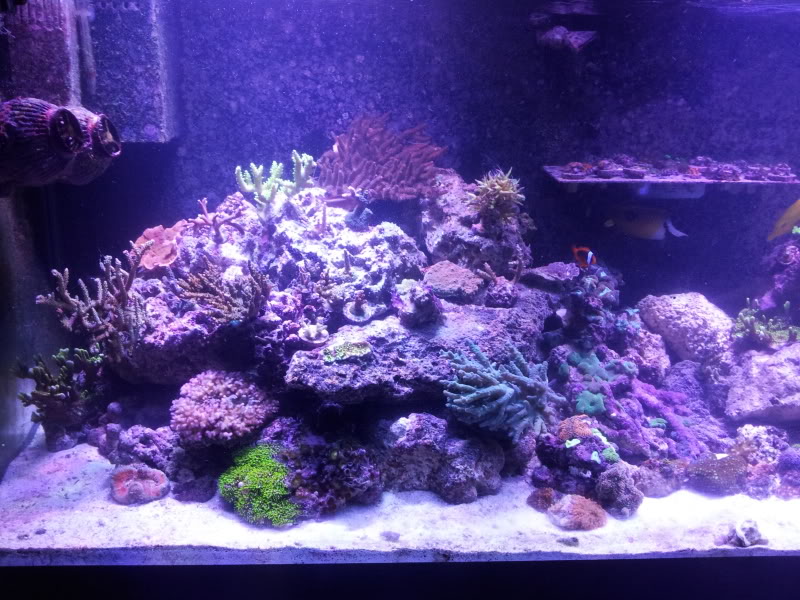
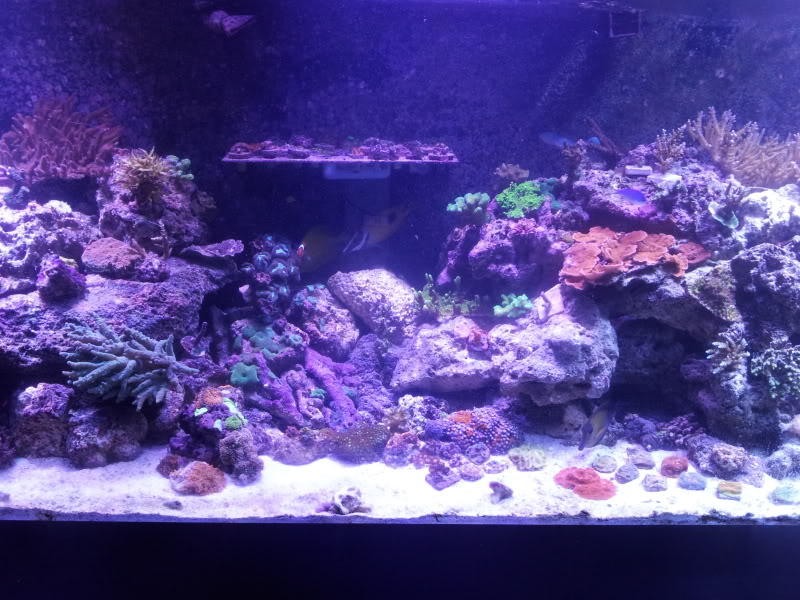
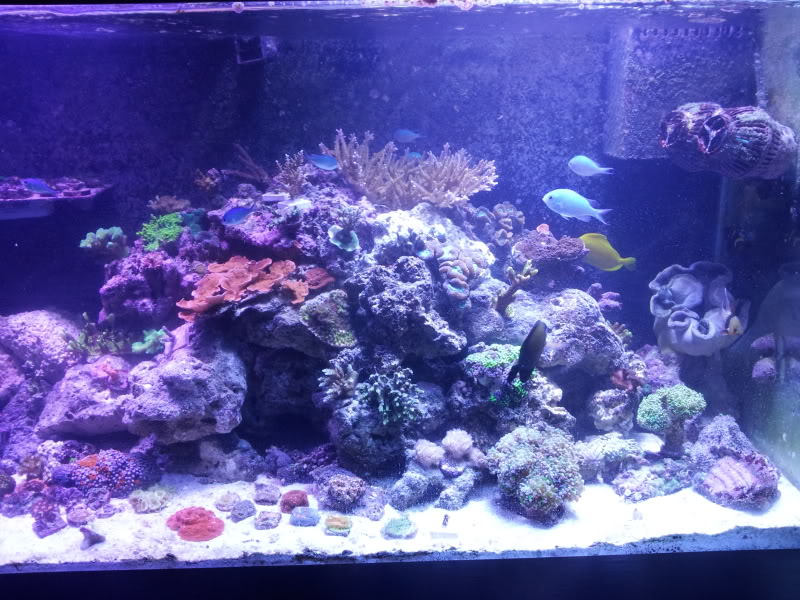
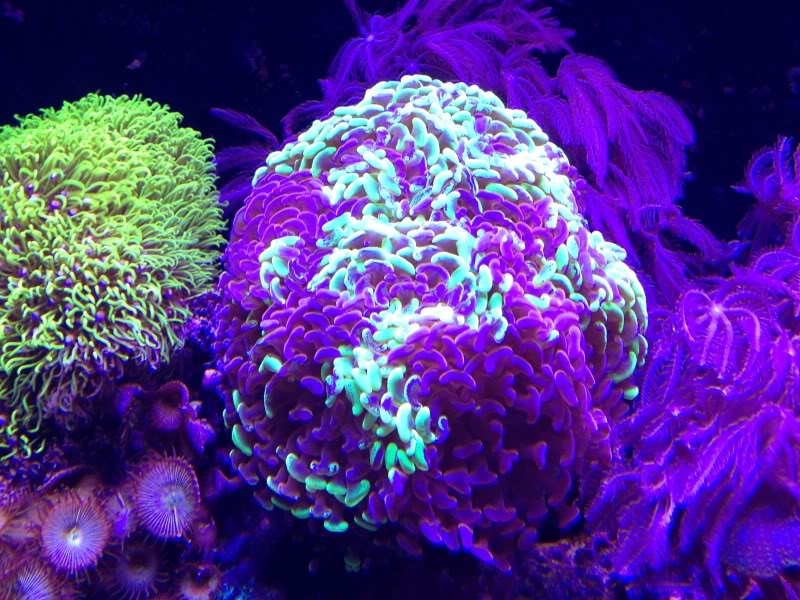
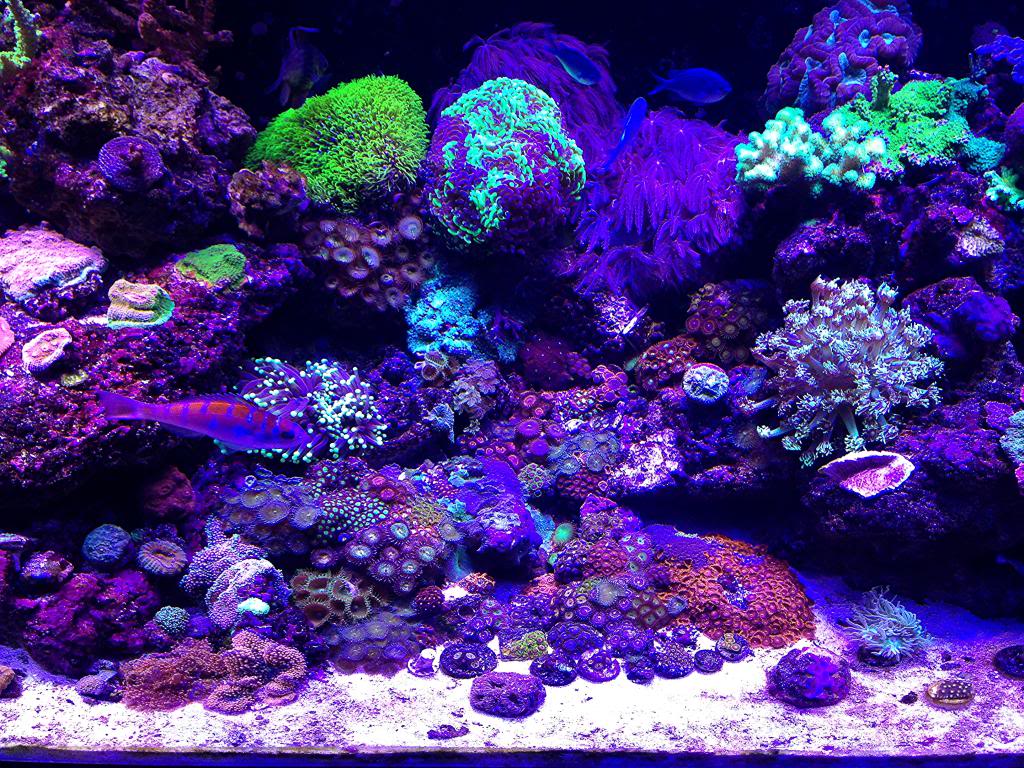
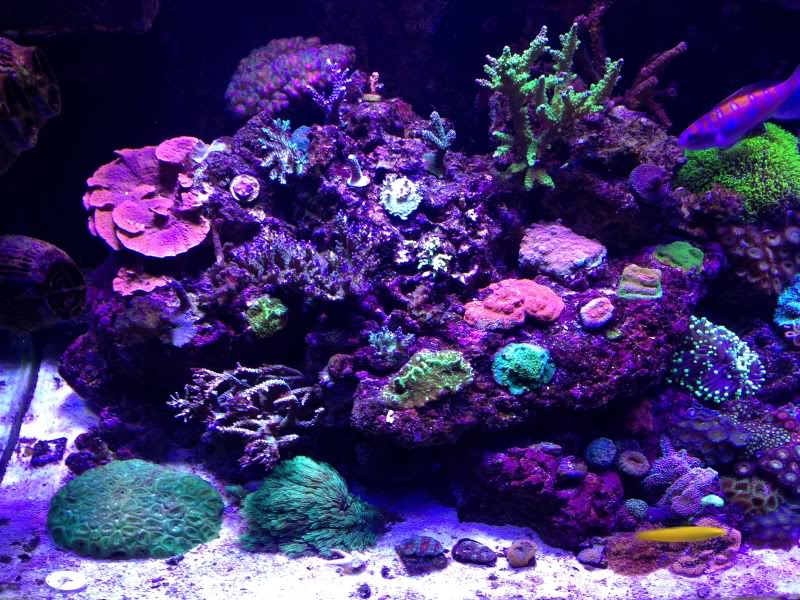
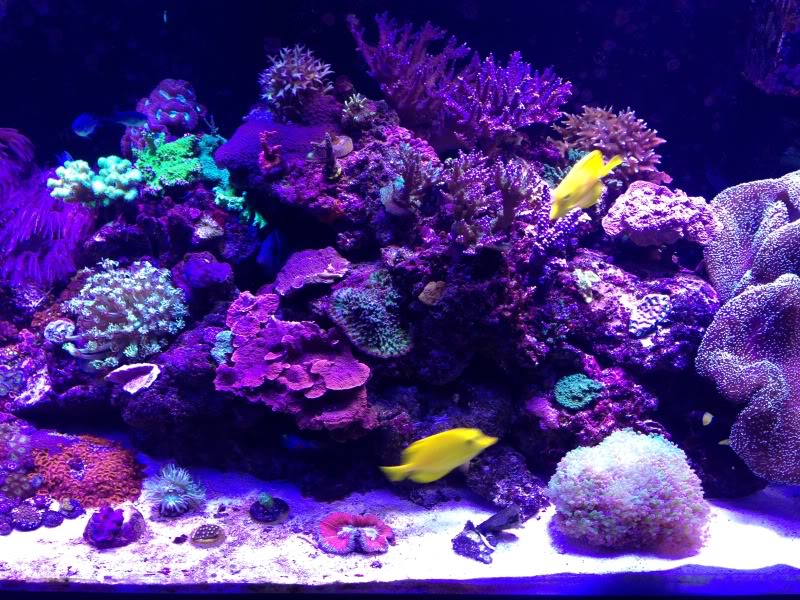
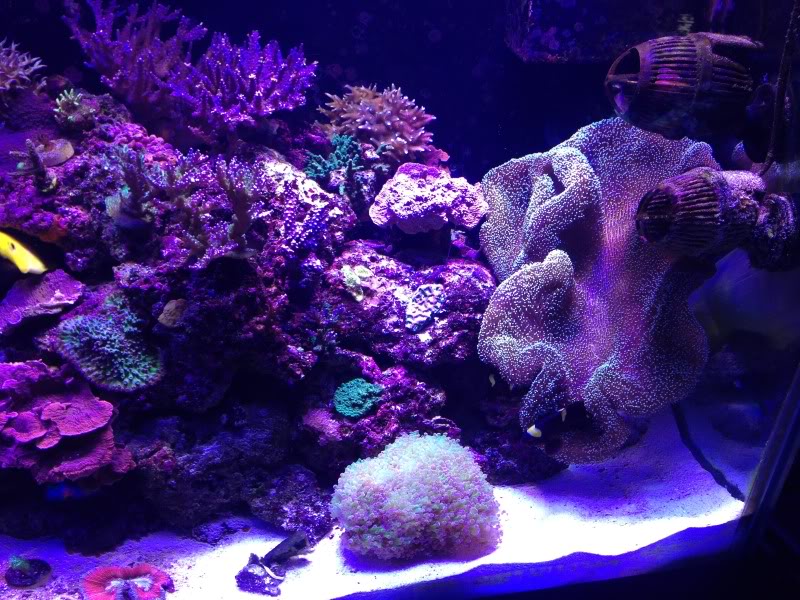
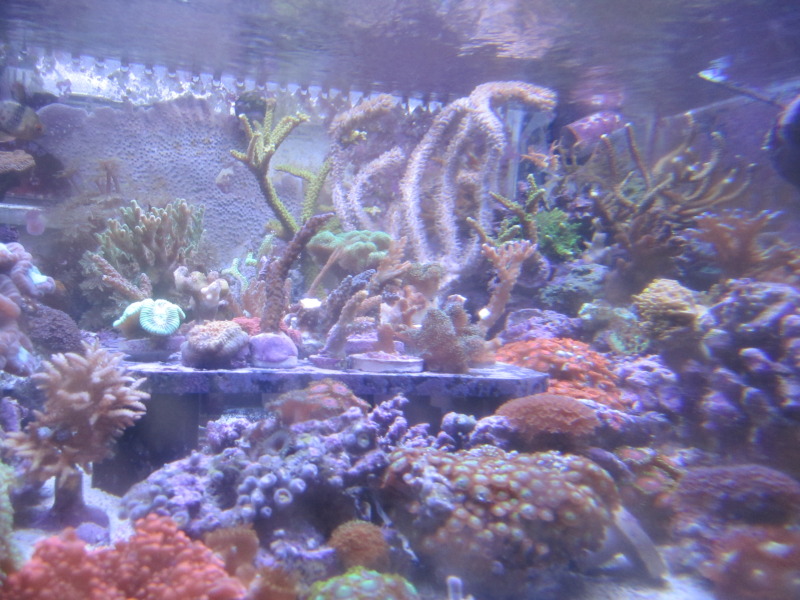
Corals:
I will post some pictures of the collection!
The tank has experienced some issues lately with ALK and I lost a few of my prized frags and one large blue milli colony. I recently switched from 250w MH to LED's and things are looking ok, I'm really on the fence with them and might eventually go back to MH but will give the LED's time to see how they work out. I just liked the look of the tank better under the radiums and Lumenbright pendants.
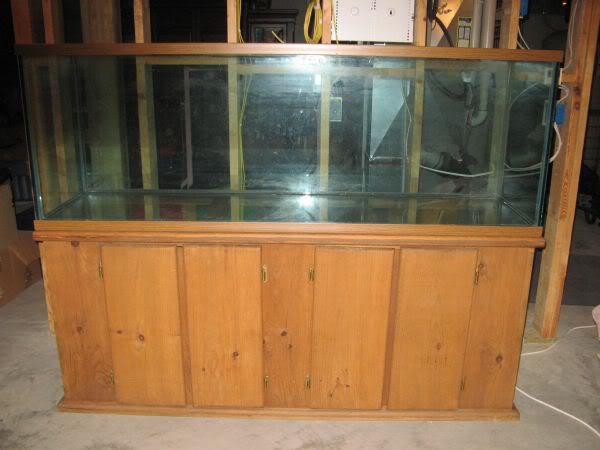
This 75g was the beginning of what is now:
This is the tank when I picked it up, I drilled and installed the overflows myself. the glass on this tank is 5/8 thick and was nerve wrecking to drill!
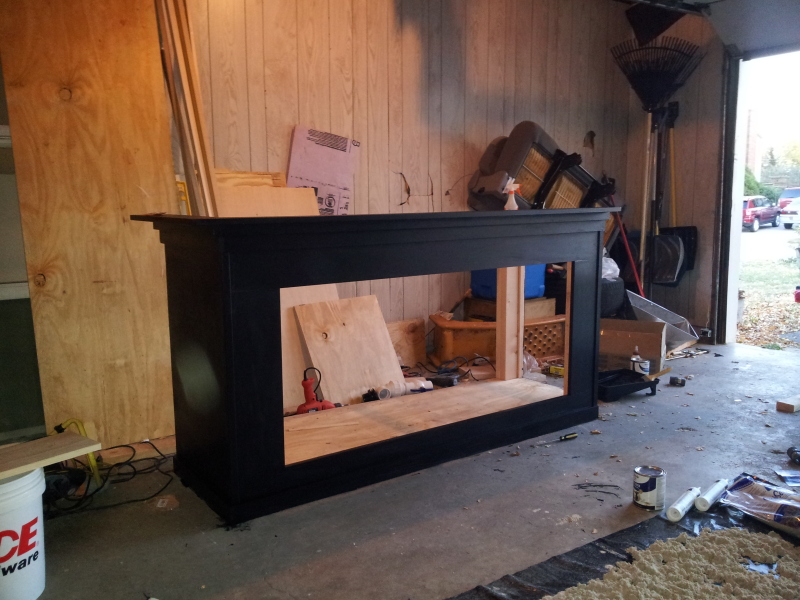
I wasn't happy with the stand it came with so I built a new one 40" high to accommodate a taller skimmer I used when it was first setup (Euro Reef RS250) This is before paint:
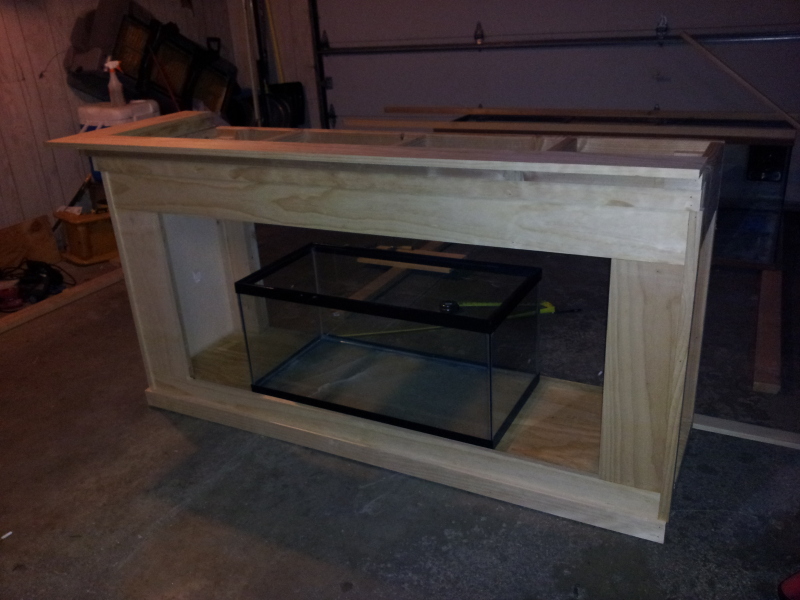
Test fitting the tank and sump:

This is after paint, the right side had a 31x31x12 frag tank stand built next to it but has since been removed due to it was just to big for the area the tank is in. I have a new 24x24x40 stand being built to match the main display stand which will be for a new 20x20x12 1/2" rimless acrylic tank I will use for a display refugium and new home for a Mantis Shrimp! It will all be connected to the samp sump and return for simplicity.
This is when I had both of those setup. It was way too much work having two sumps and that frag tank was just a eye sore in our lower livingroom. The wife wanted it gone!

And a picture of what the frag tank had in it waiting to be moved over to the main display:
The equipment currently is as listed:
165g 72x20x27 Oceanic tank drilled for 2 - 1 1/2" bulkheads and custom overflows
Custom stand built by me!
40g sump with two sections skimmer and return
mag 9 return pump but soon to be replaced by a Speedwave DC Pump 1320 GPH
Bubble Magus NAC 77 skimmer
BRS dual reactor with GFO and Carbon
Reef Mania CR300 Calcium Reactor with a CarbonDoser Electronic Co2 Regulator and 20 pound CO2 bottle
Mag 3 for the reactors
2 300w finnex controllable heaters controlled by Aquacontroller
Neptunes Aquacontroller III with Break out box, Aquasurf, and 2 DC8's
2 Jebao WP40's with Modified controller cables controller by Aquasurf
2 Koralia 1150's
2 Reef Breeders IT2040's and 1 IT2060
DIY brackets made for ATO floats and probes out of acrylic and Koralia pump magnets
American DJ 8 switch power strip for non controller items
Fish:
2 Yellow Tangs
Purple Tang
Blue Hippo Tang
Red Sea Sailfin Tang
7 Blue/Green Chromis
2 Pajama Cardinals
Mystery Wrasse
Yellow Corris Wrasse
Chalk Basslet
Blue Spot Goby
Starry Blennie
Dragon Face Pipefish
Corals:
I will post some pictures of the collection!
The tank has experienced some issues lately with ALK and I lost a few of my prized frags and one large blue milli colony. I recently switched from 250w MH to LED's and things are looking ok, I'm really on the fence with them and might eventually go back to MH but will give the LED's time to see how they work out. I just liked the look of the tank better under the radiums and Lumenbright pendants.
This 75g was the beginning of what is now:
This is the tank when I picked it up, I drilled and installed the overflows myself. the glass on this tank is 5/8 thick and was nerve wrecking to drill!
I wasn't happy with the stand it came with so I built a new one 40" high to accommodate a taller skimmer I used when it was first setup (Euro Reef RS250) This is before paint:

Test fitting the tank and sump:

This is after paint, the right side had a 31x31x12 frag tank stand built next to it but has since been removed due to it was just to big for the area the tank is in. I have a new 24x24x40 stand being built to match the main display stand which will be for a new 20x20x12 1/2" rimless acrylic tank I will use for a display refugium and new home for a Mantis Shrimp! It will all be connected to the samp sump and return for simplicity.

This is when I had both of those setup. It was way too much work having two sumps and that frag tank was just a eye sore in our lower livingroom. The wife wanted it gone!
And a picture of what the frag tank had in it waiting to be moved over to the main display: