Aussie 6x2.5x2

samparker

Well-Known Member
View Badges
Joined
Jan 6, 2014
Messages
525
Reaction score
798
Location
Australia
Rating - 0%
0   0   0
Introduction:
After playing with my first reef tank (RSM130) for about 4/5 months, the bug has bitten hard enough to plan a new large custom build. After looking around at some all-in-one setups (RSM650, CADE HL1600) I decided that nothing ticked all the boxes for what I wanted.


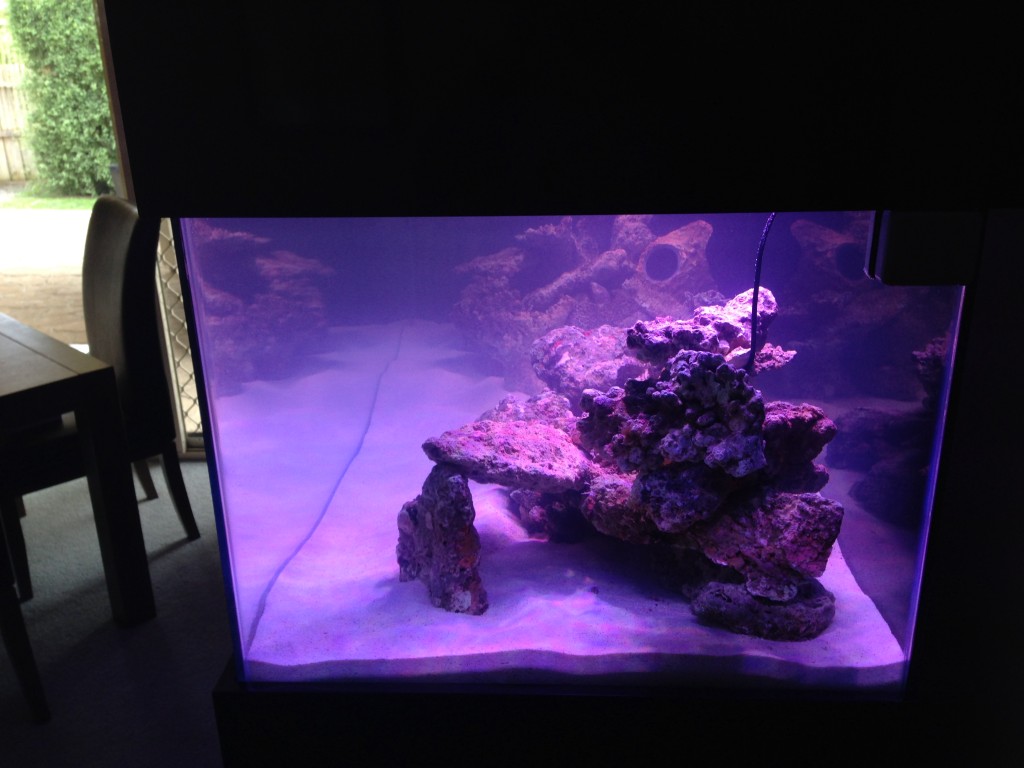
System Type: Mixed Reef

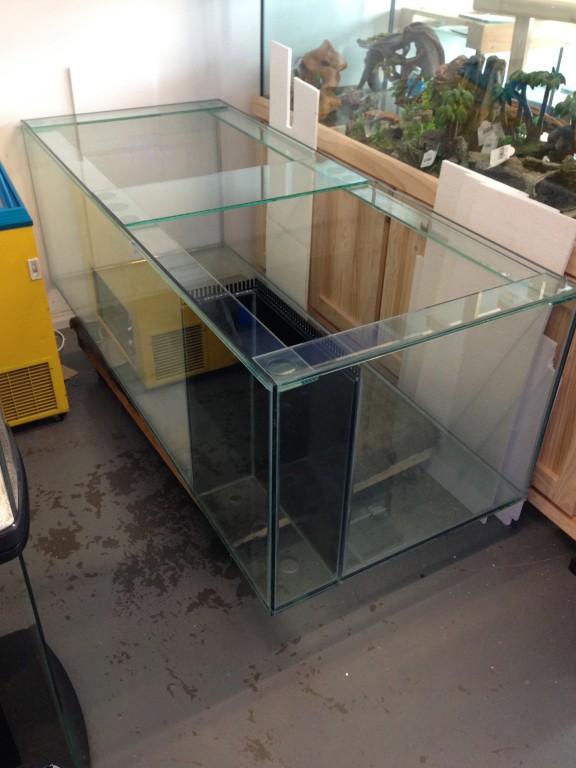
Display Tank: 6ft x 2.5ft x 2ft starfire front panel with left rear corner overflow

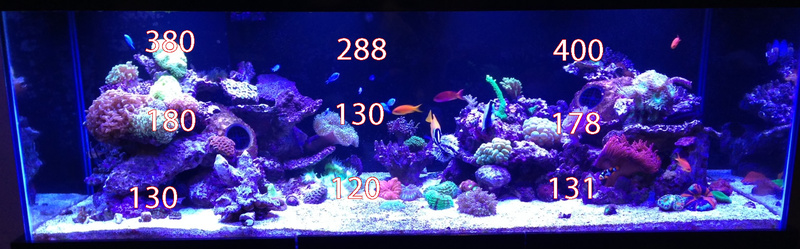
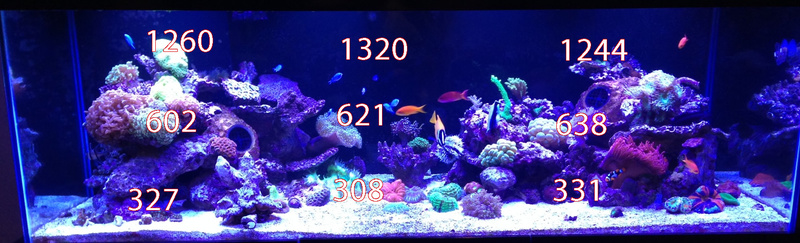
Display Lighting: 4x GHL Mitras 6100HV

Sump: 4ftx2ft

System Water: Natural salt water. Stored in 2 IBC's in rear shed

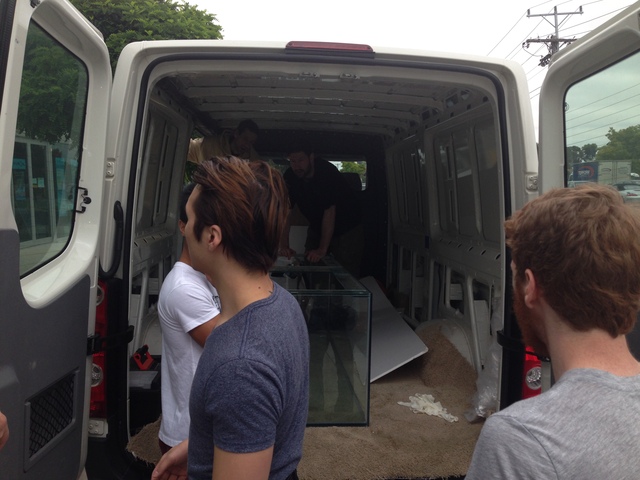
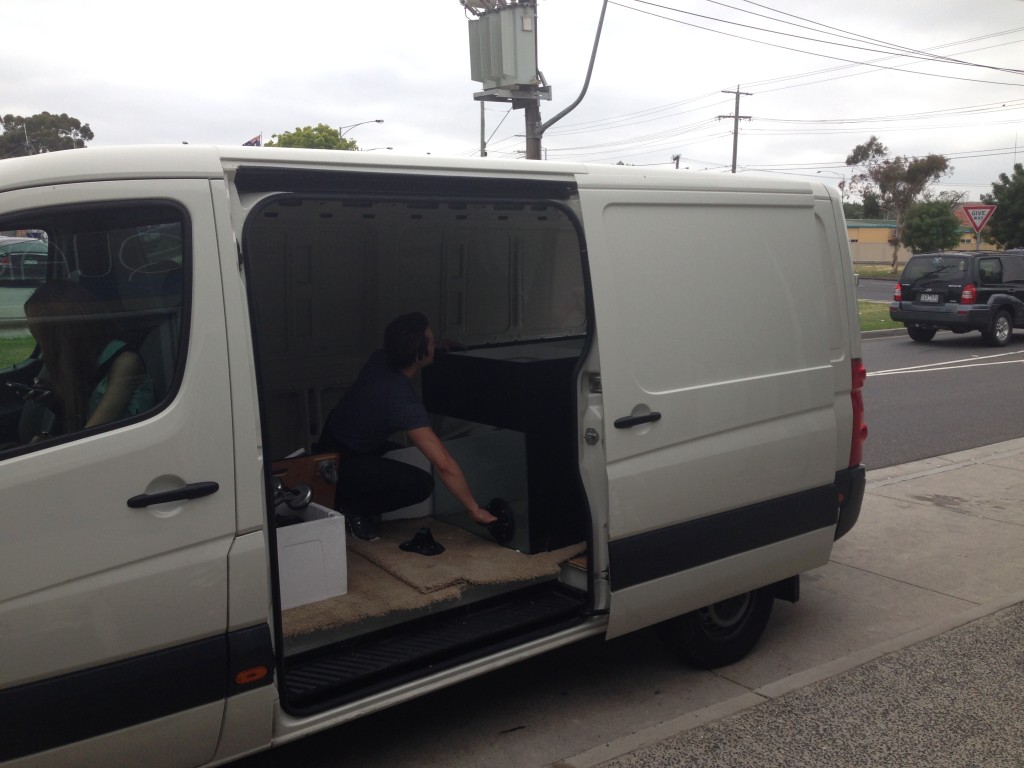
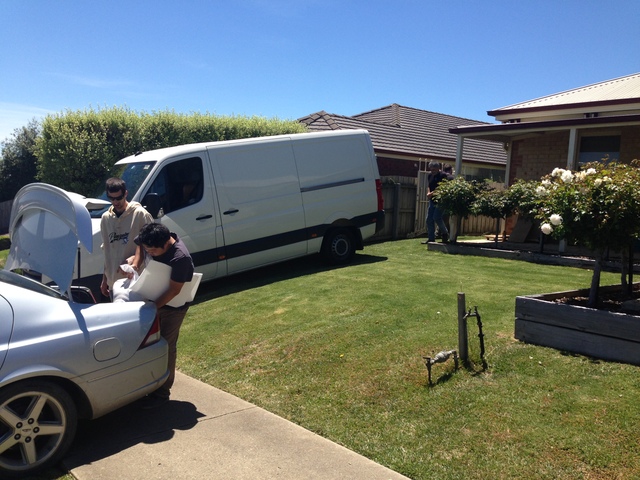
With plenty of help, the logistics for the new tank are well under way.


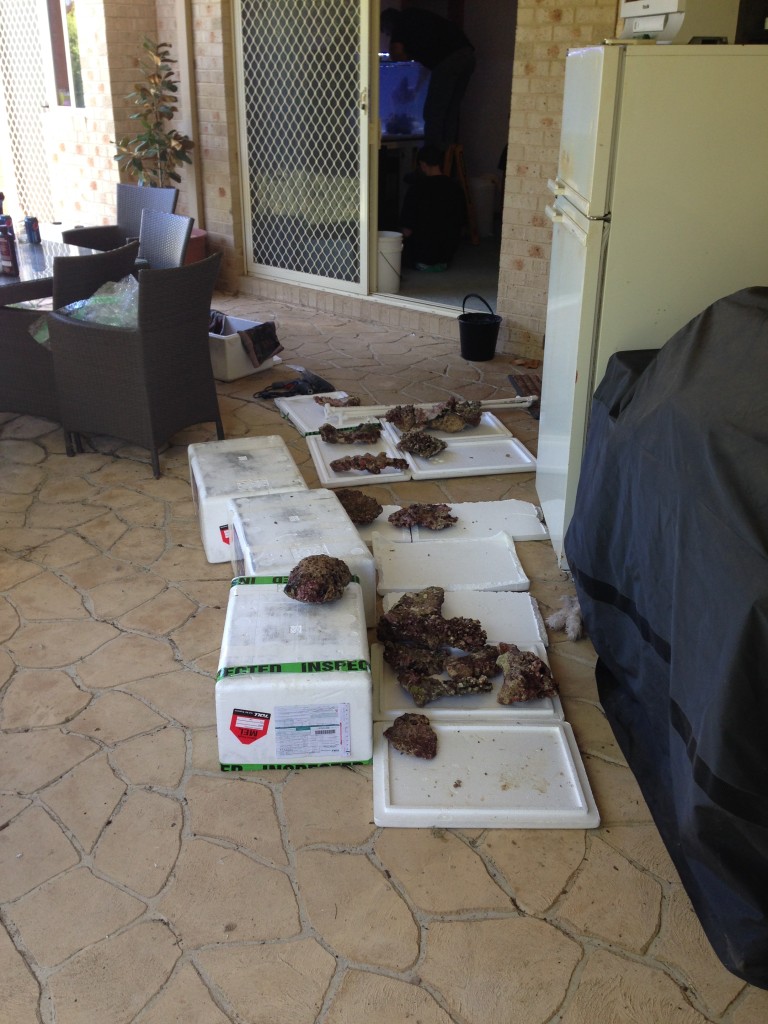
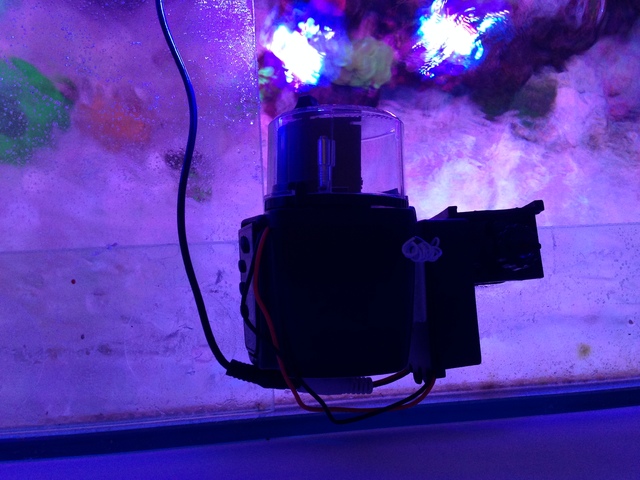
Two IBC's located in rear shed plumbed together and then to a Onga transfer pump. IBC's have a fill point at the front of the house which will make it very easy for water deliveries.
vosd.jpg


x1cd.jpg


cn7b.JPG

3o8y.jpg


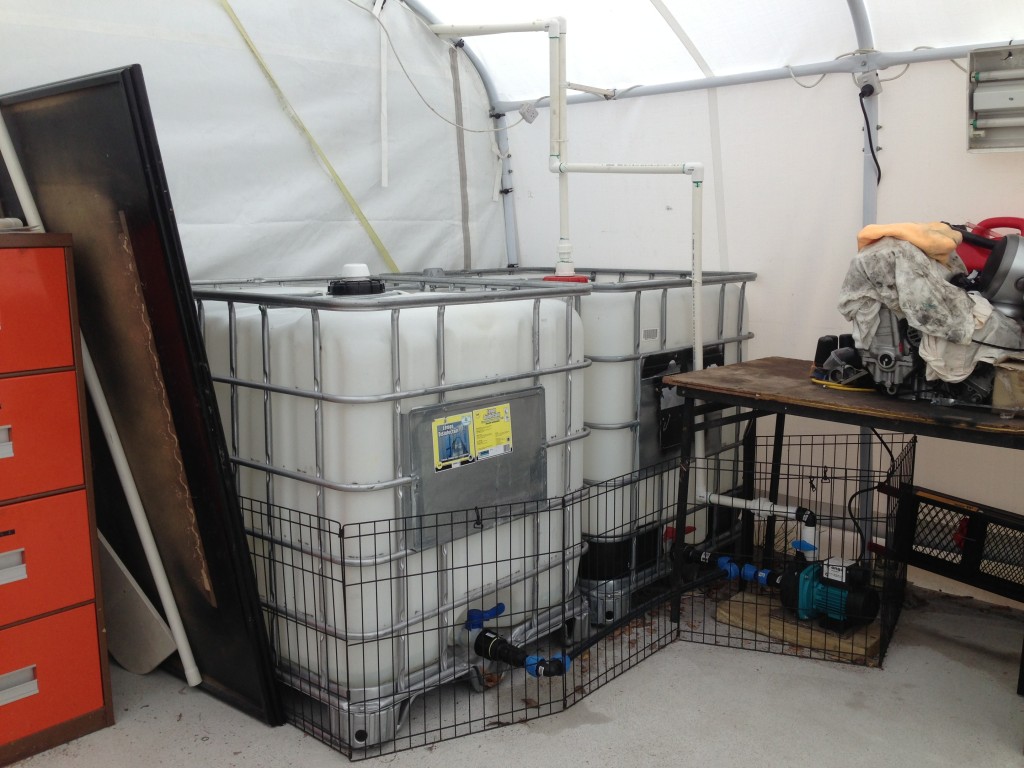
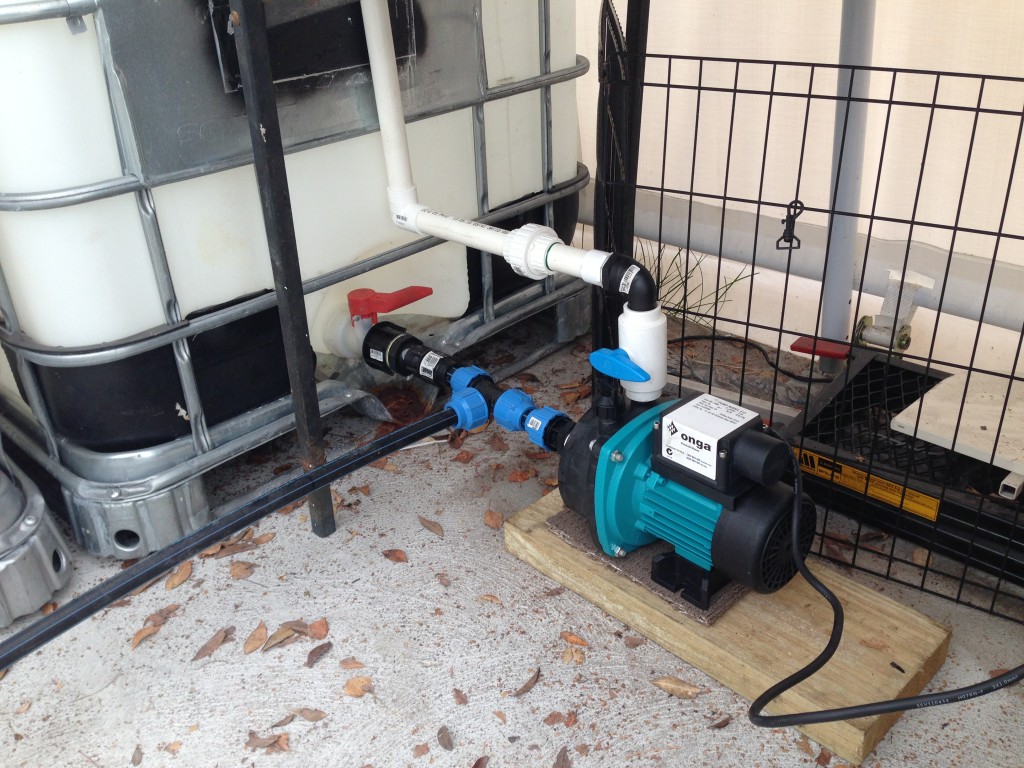
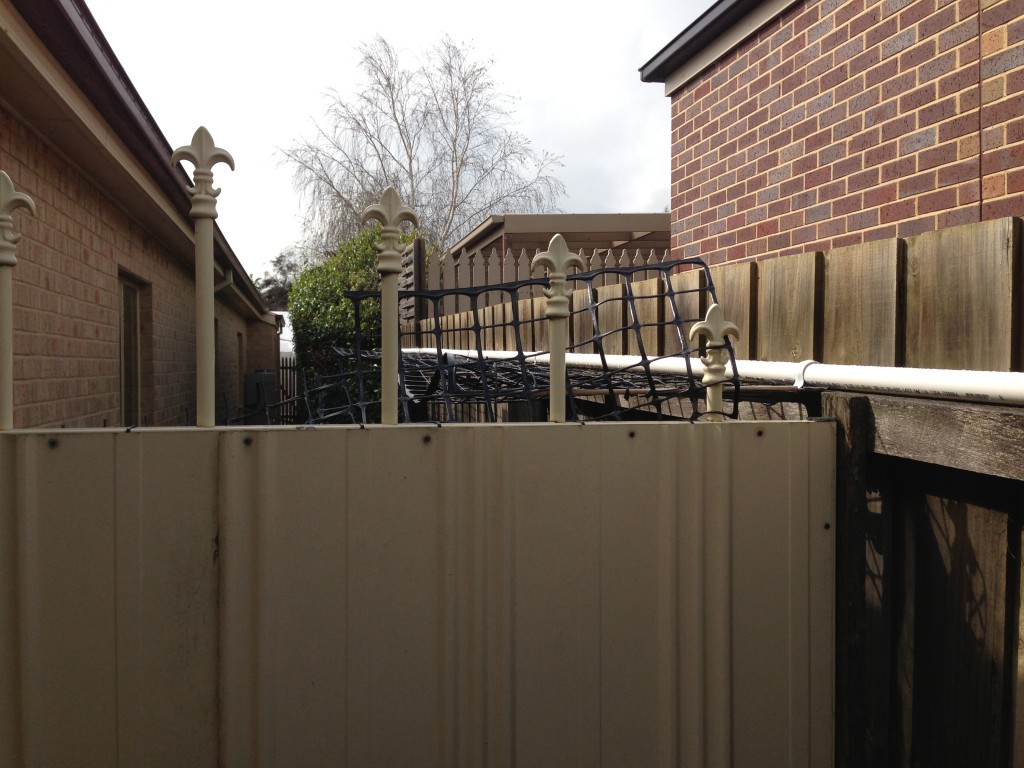
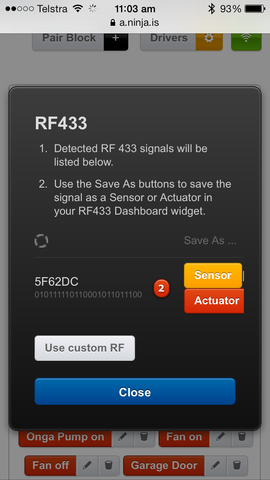
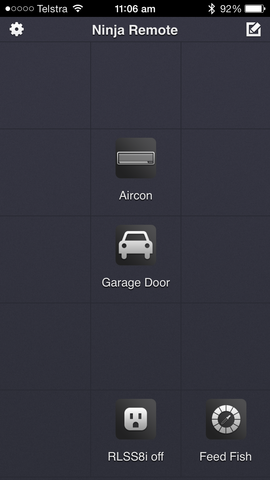
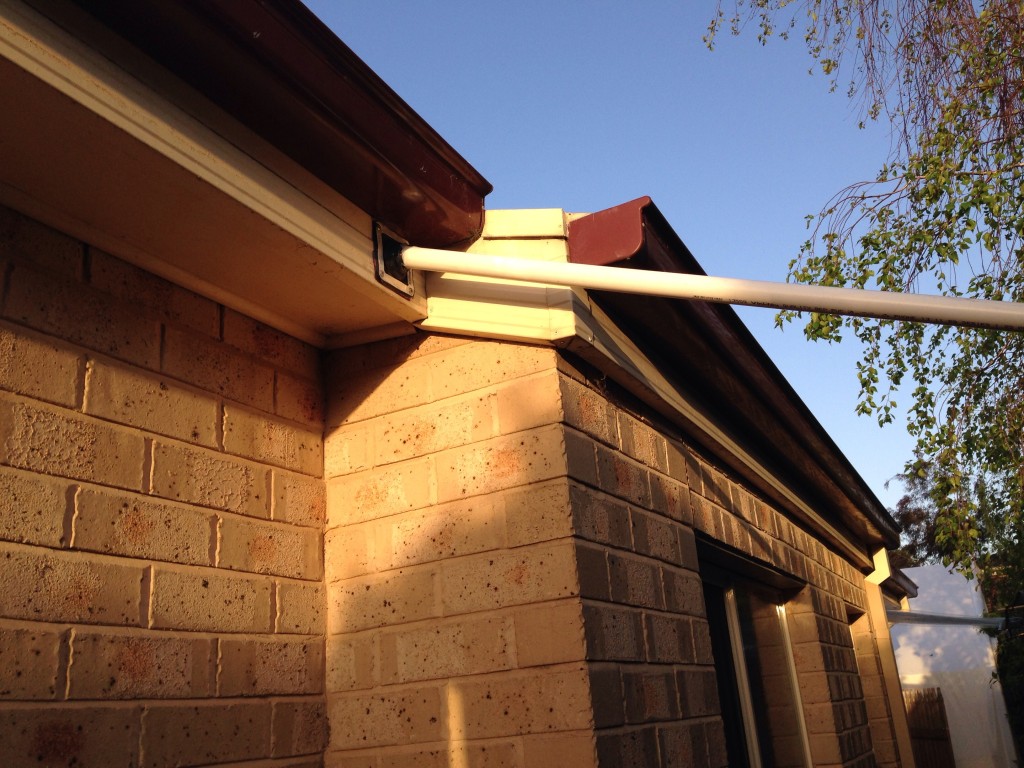
A remote control from the display tank will power up the pump to pump fresh NSW from the rear shed, up into the roof, between the walls and to the sump. A freshwater line for the inbuilt RODI unit in the cabinet will also be plumbed through the wall (laundry is on the other side of the wall) as well as a waste line so that I can empty the sump prior to pumping in fresh NSW.

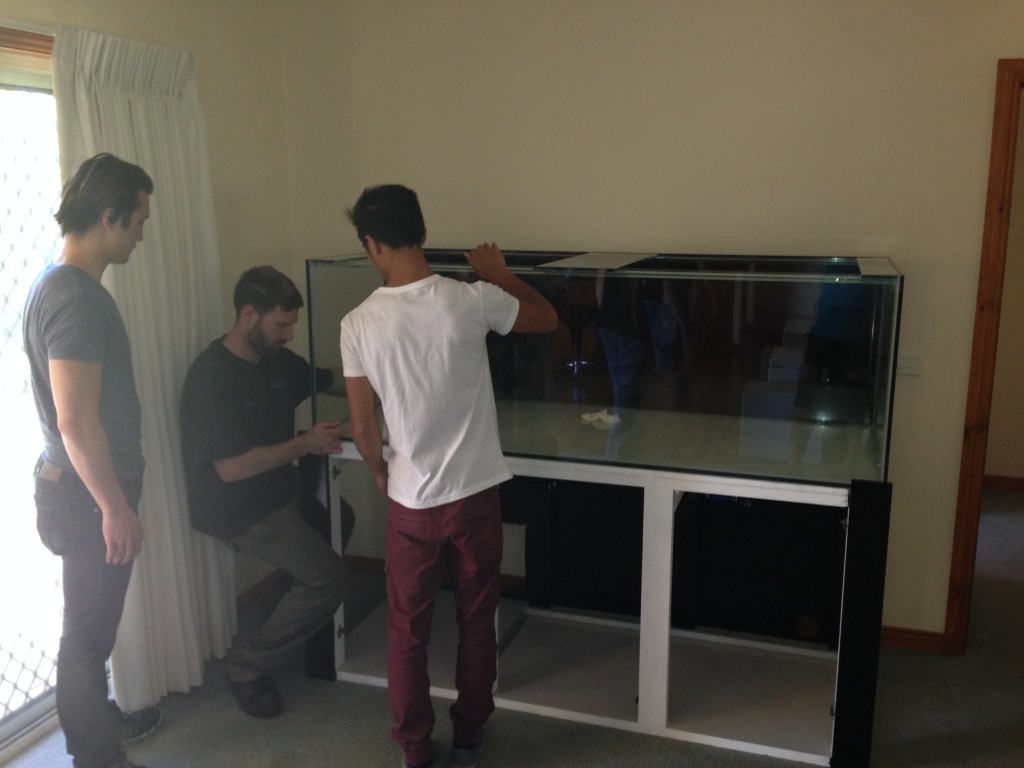
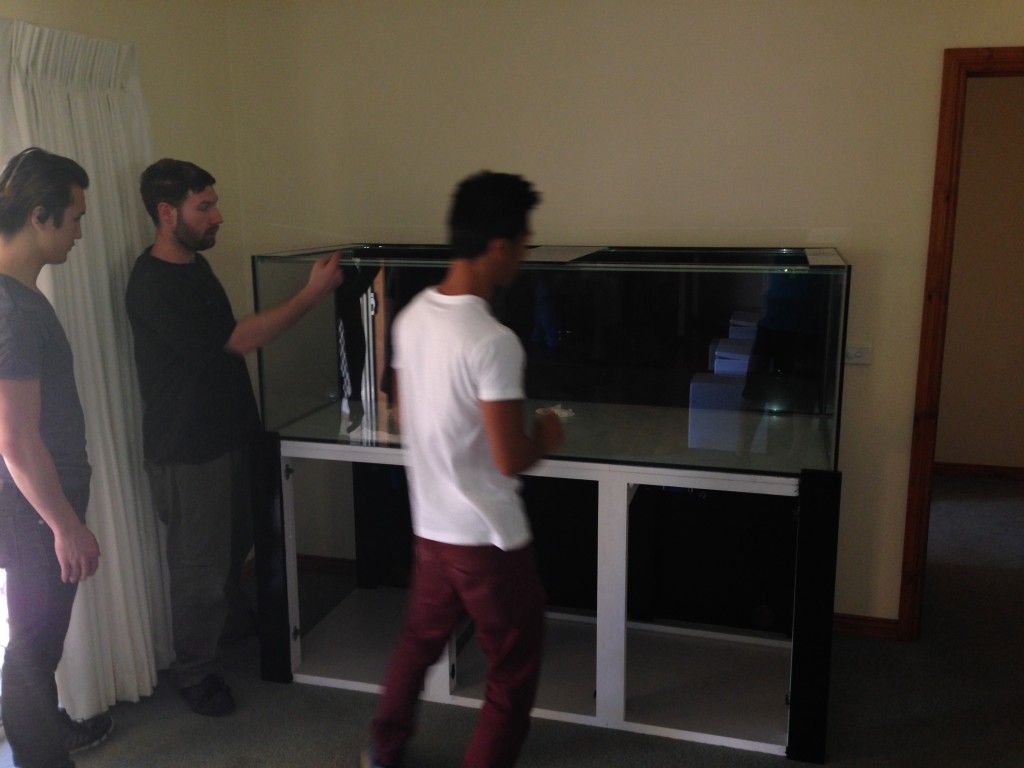
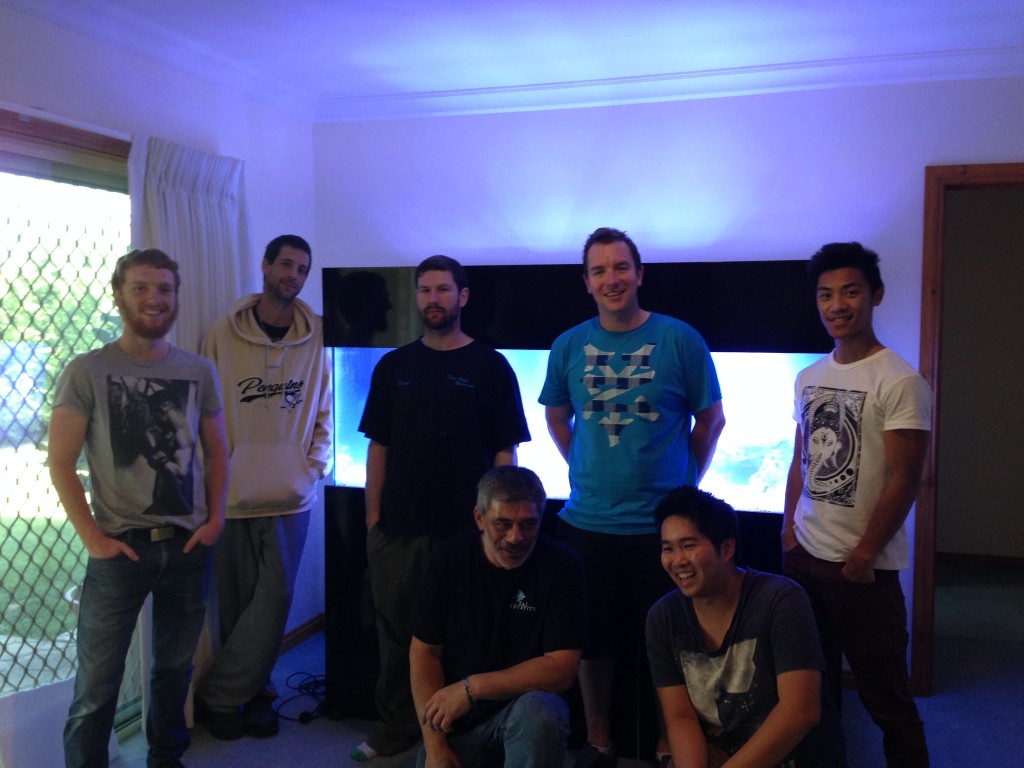
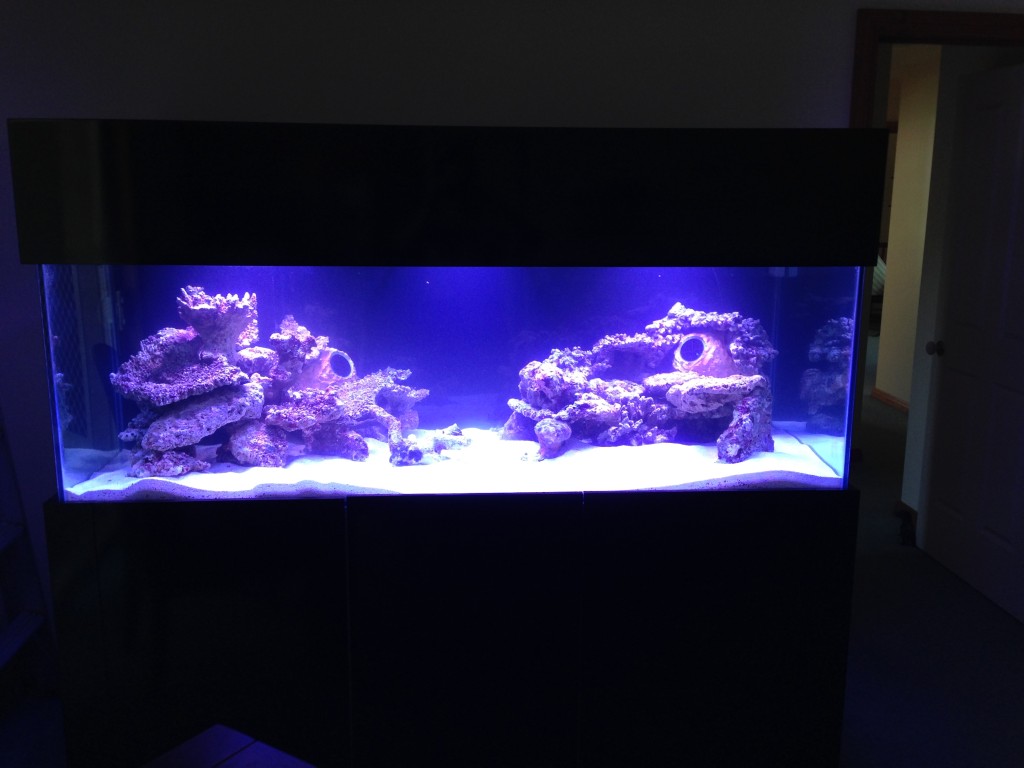
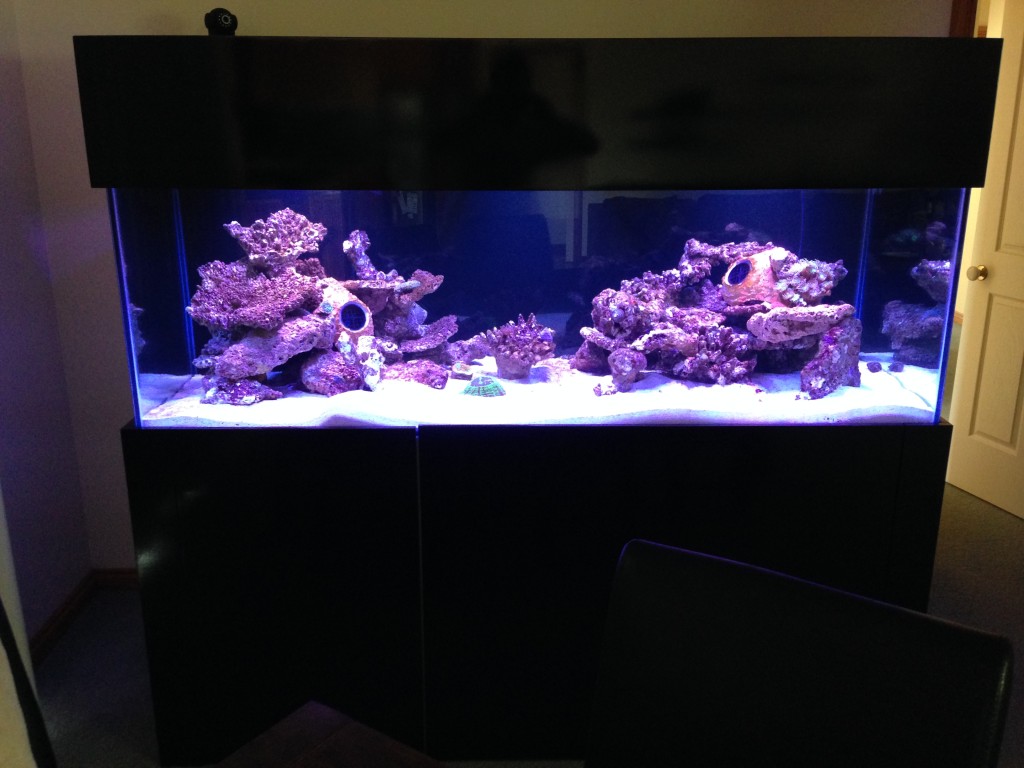
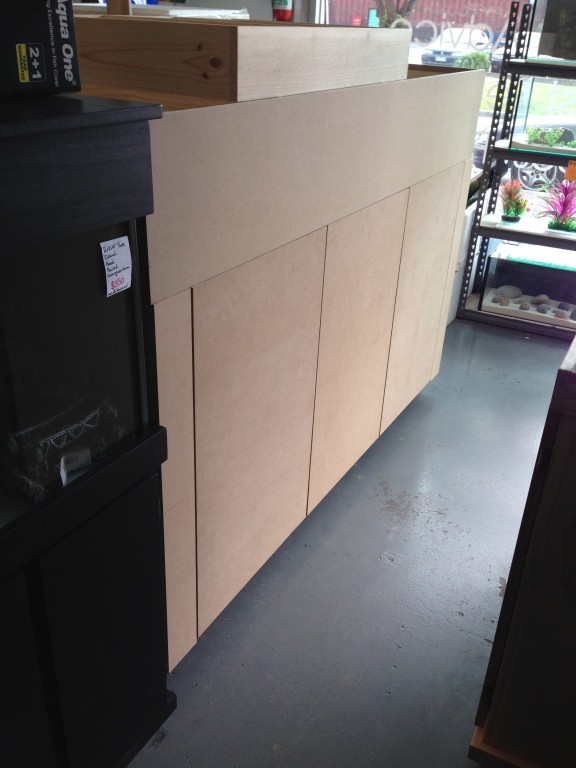
Popped in to my LFS today to help out a friend take his new tank home and my tank and cabinet were in store. Although these are early progress shots only, it is certainly shaping up to be something pretty special
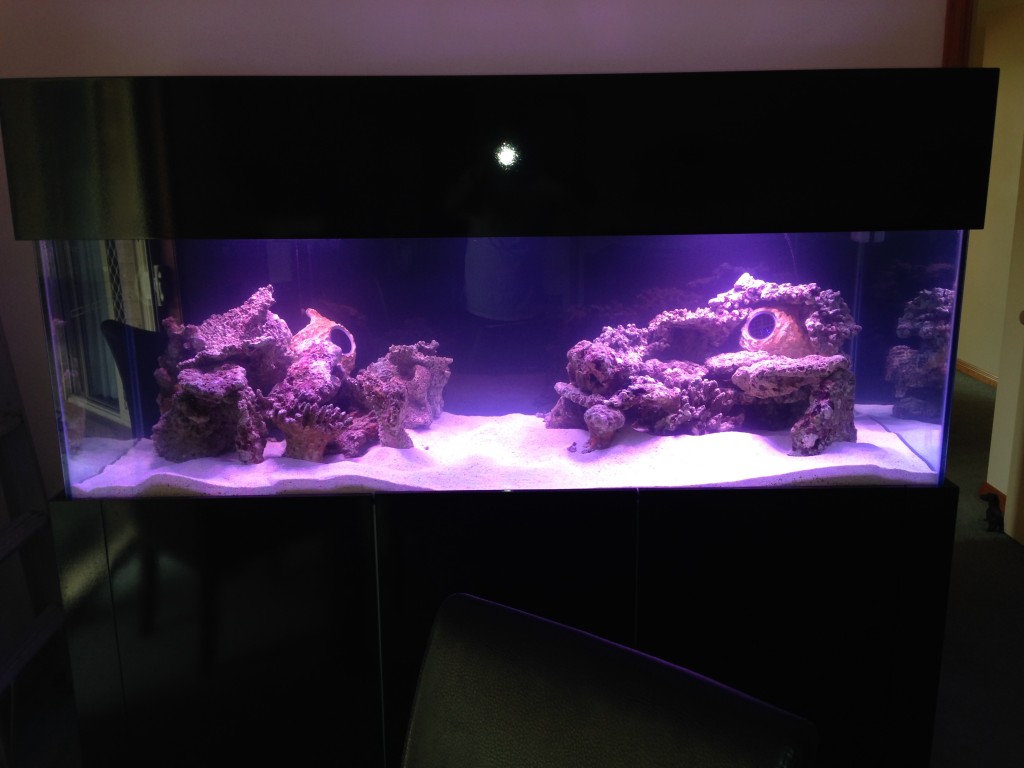
Although it is still raw and unfinished, there are many nice details already. Push to open doors, click in place removable centre door and both ends of cabinet, super smooth and clean lines, cabinet and hood have overhand to block vision of glass edges top and bottom and more. Getting very excited


ng1x.jpg


sk5t.jpg


sf4p.jpg


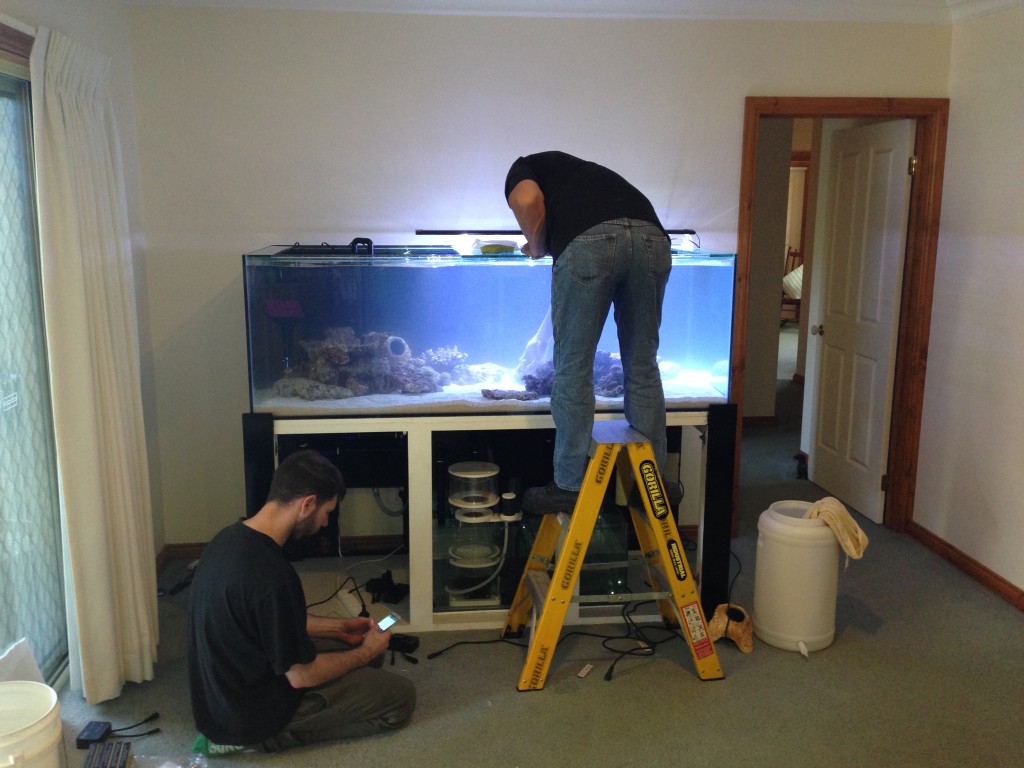
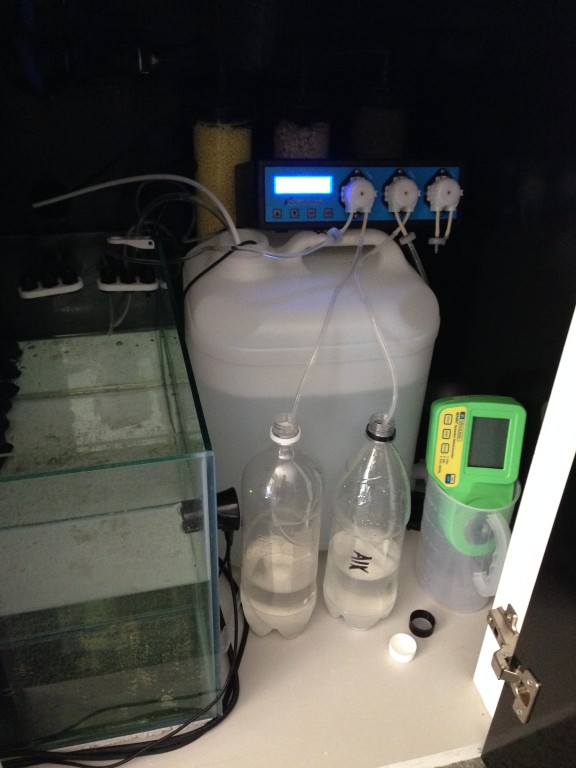
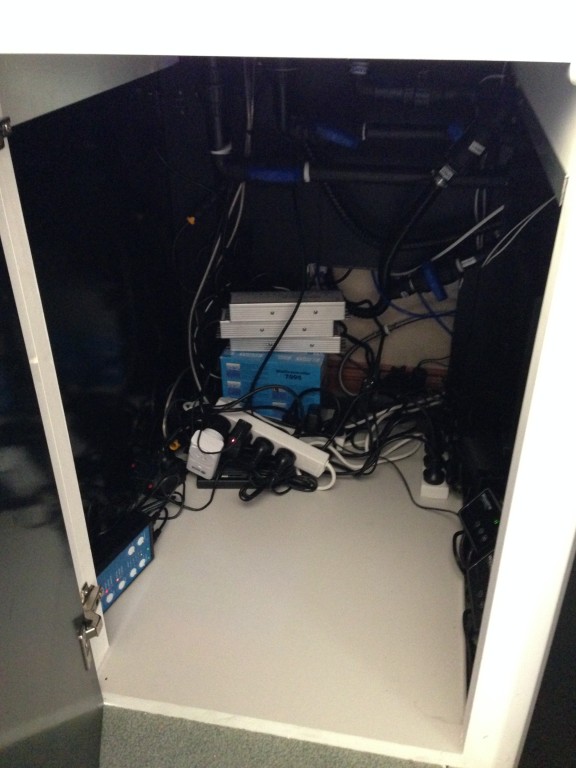
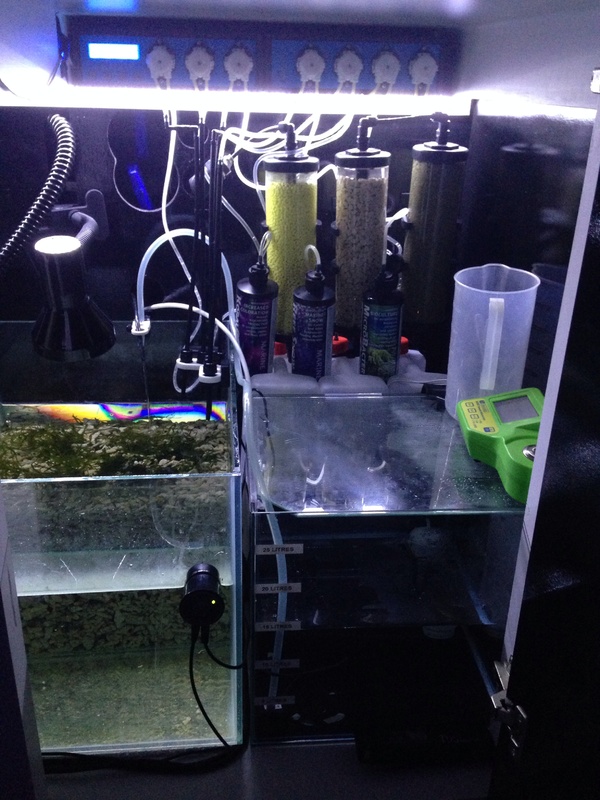
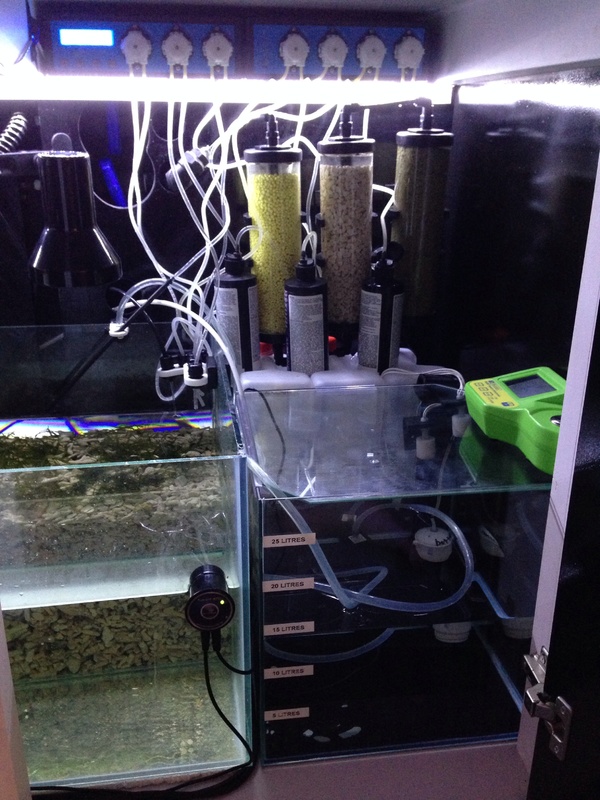
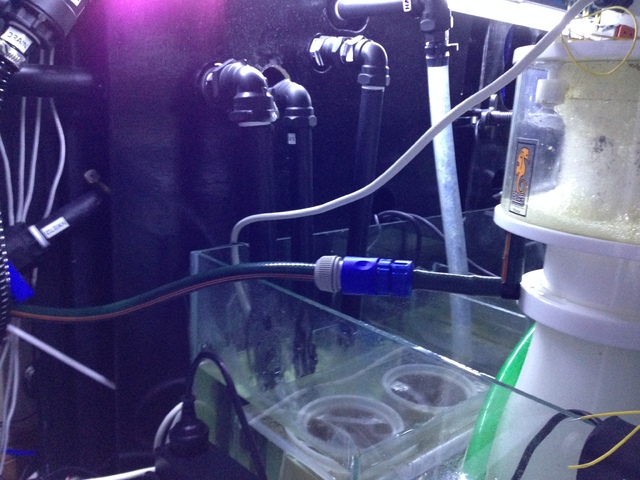
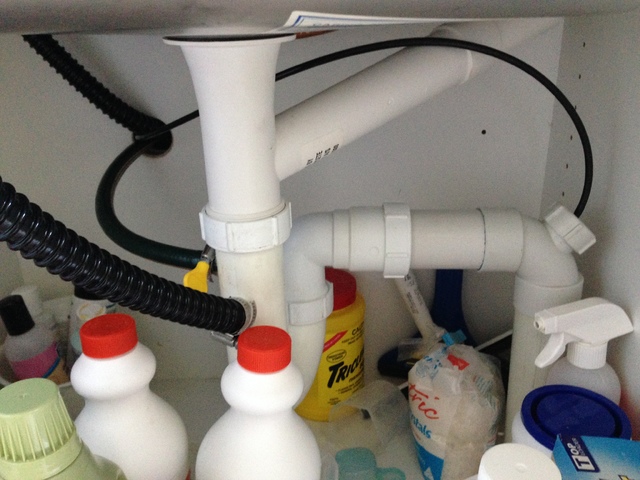
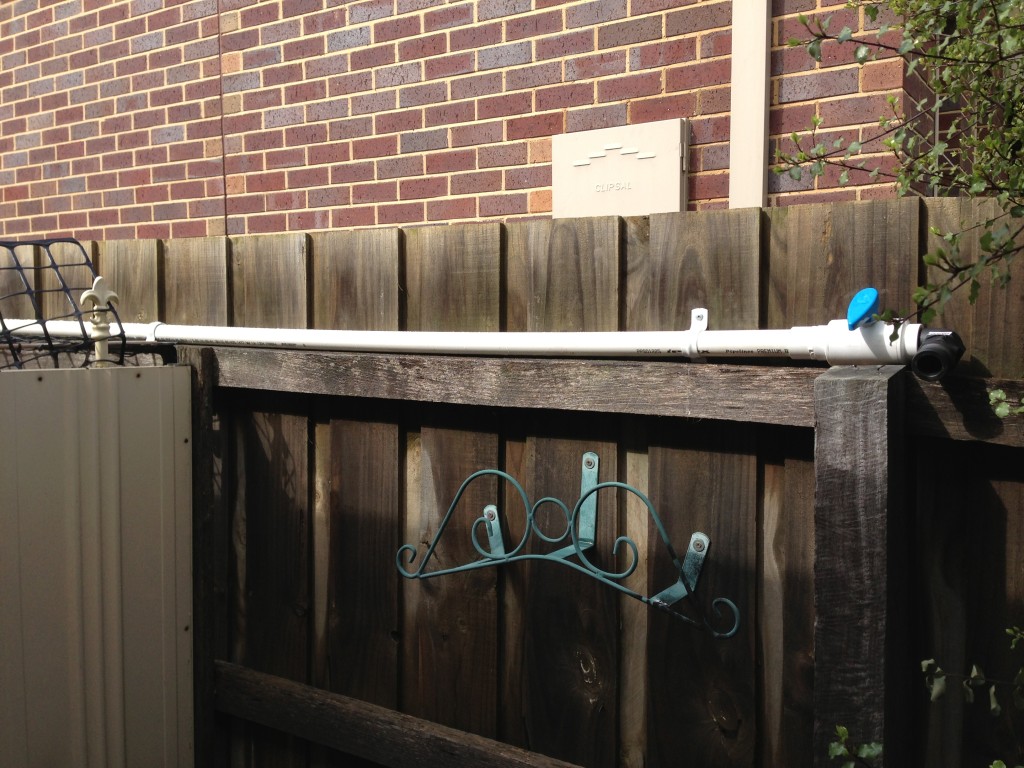
The plumbing for the new tank is basically completely finished. Fresh water for RODI filter built into cabinet is supplied via mini tap on wall and clean NSW is supplied via PVC line at the wall which is operated via remote control. Yep, the remote control is working like a charm, love it!
gnjr.jpg

lu99.jpg


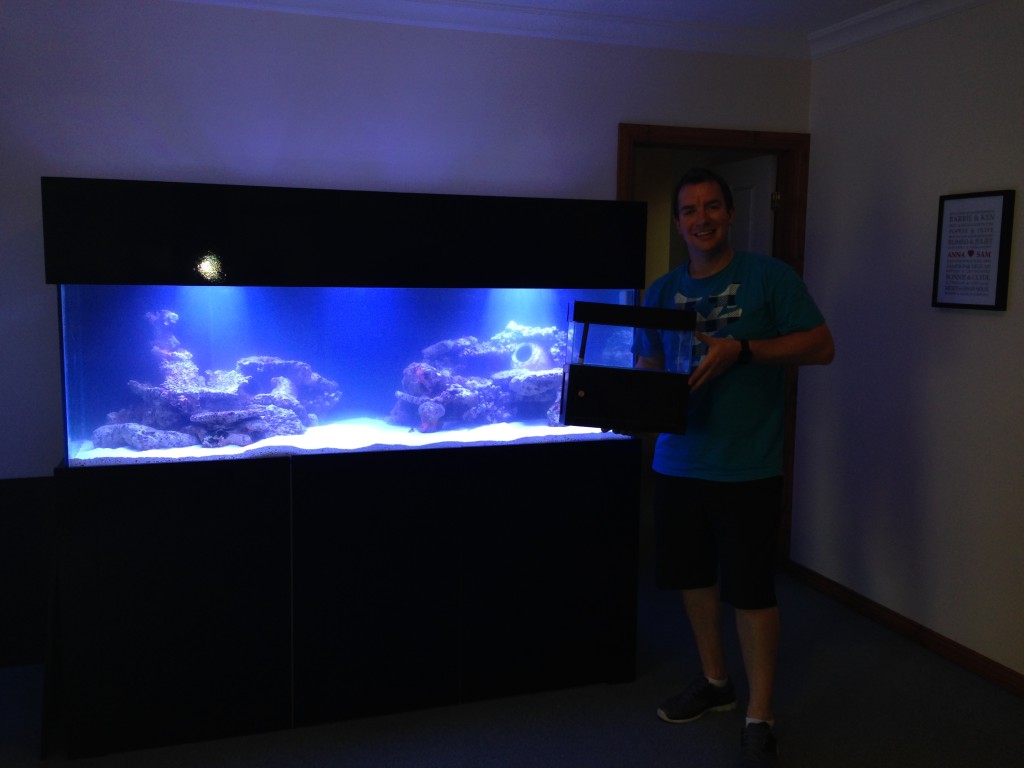
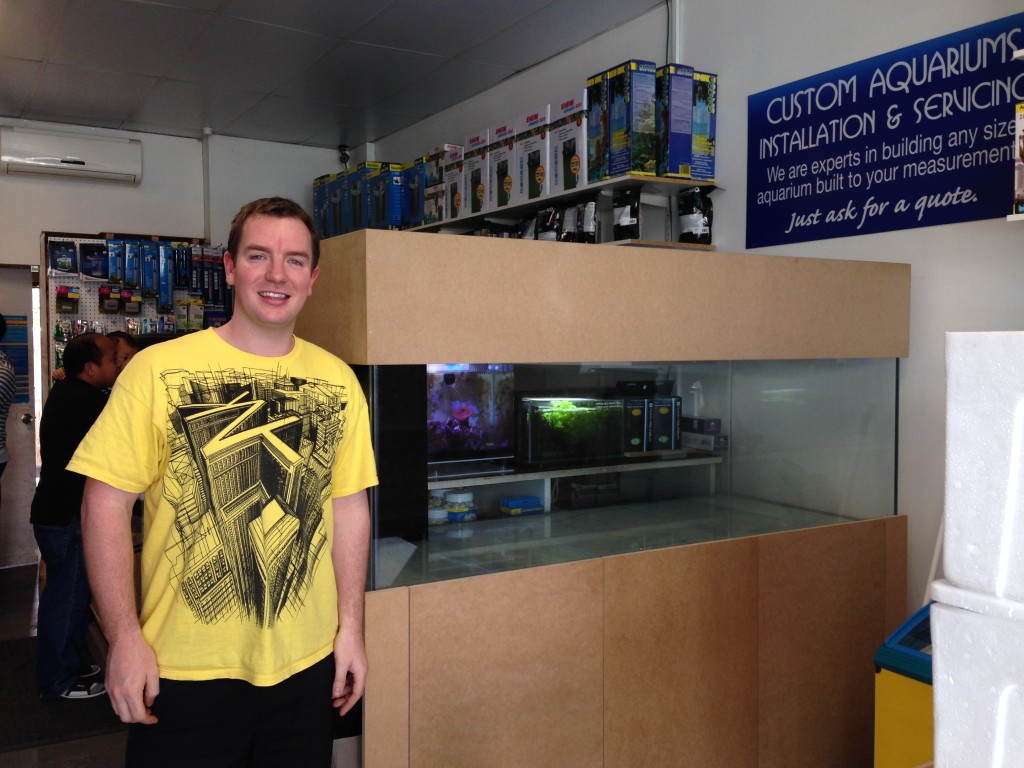
Also - took a very unflattering shot next to the tank at my LFS, which actually makes me look like the hulk (well, a very chubby version anyway)
igq0.jpg


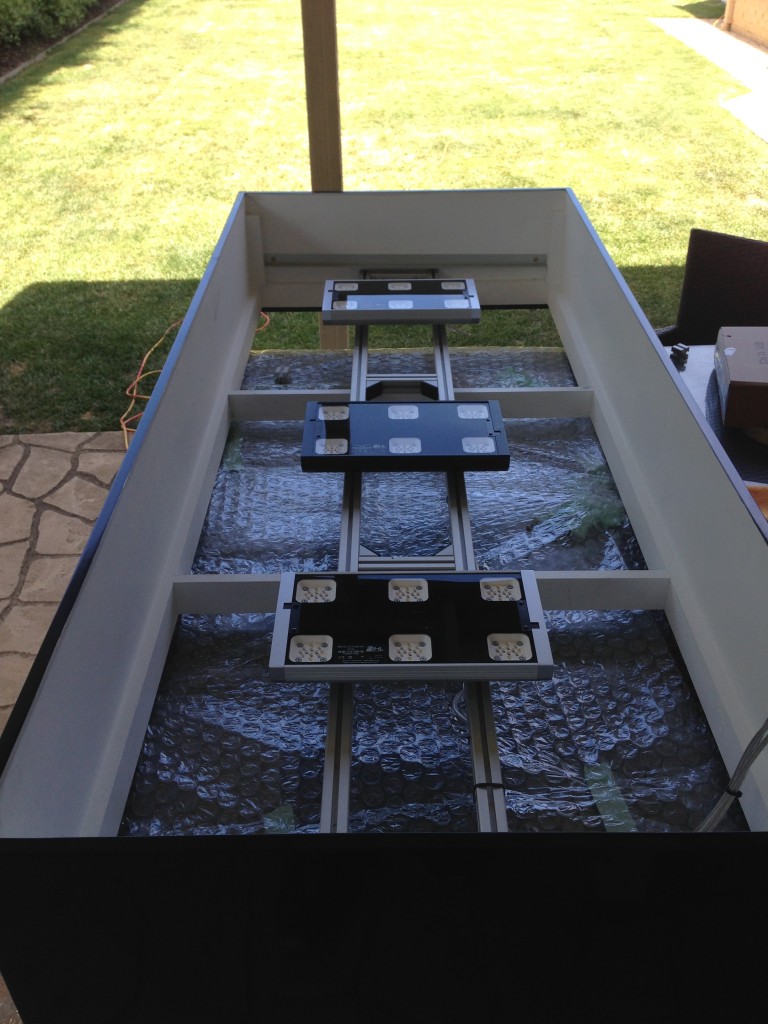
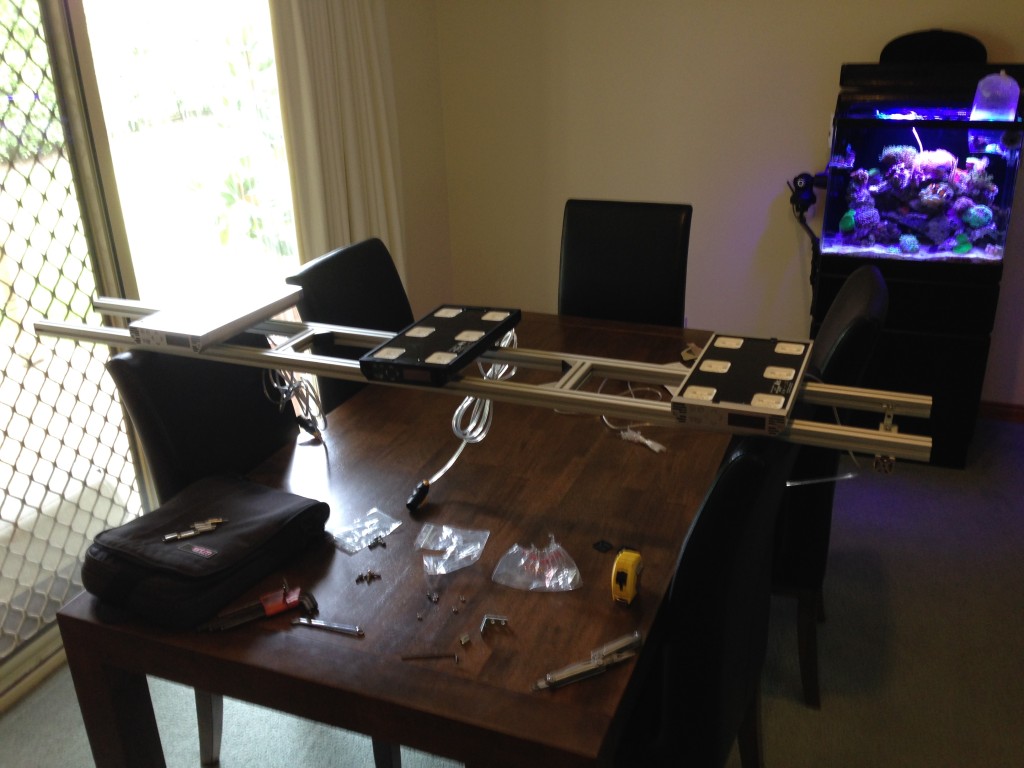
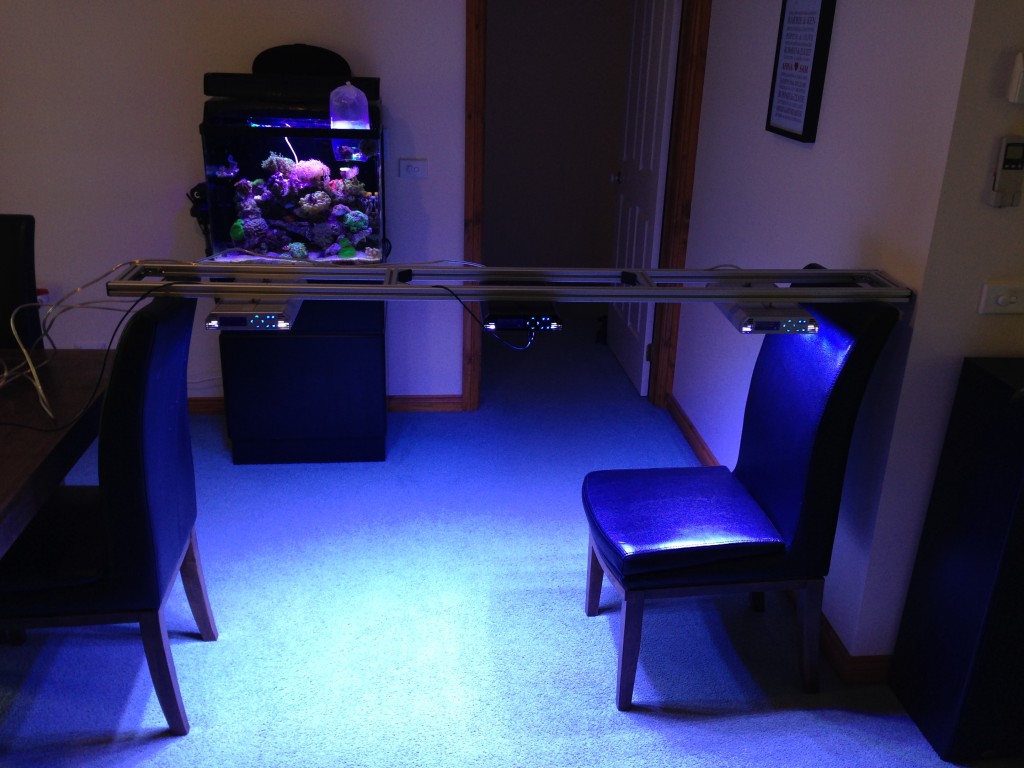
Got my light frame sorted today, used aluminium extrusion which made it neat, strong and really easy to bolt together :)


This frame will allow me to move each individual light left/right and all three backwards/forwards as a group. Should make it easy for access and also ensure that I have nice even coverage over my scape. Check out modular components online if your interested in this top product :)


4t73.jpg


jx17.jpg


Ok, here is a time lapse video taken from the install day. Further pictures to come
 
Last edited:
OP
OP
samparker

samparker

Well-Known Member
View Badges
Joined
Jan 6, 2014
Messages
525
Reaction score
798
Location
Australia
Rating - 0%
0   0   0
Few pics from the install day:


pvrg.jpg

ak20.jpg

1zic.jpg

jqfk.jpg

w27p.jpg

9nbb.jpg

76b5.jpg

vdof.jpg

oyn2.jpg

915n.jpg


With mini tank (6 litre scale replica for my office):
akl4.jpg

9cpy.jpg

g9vh.jpg


latest version of scape:
daph.jpg


So it seems I might have a god complex.... Had some time to play with the tank today whilst it is cycling, so thought it might be fun to add thunder and rain to my lightning effects. I know it's all a novelty, but **** - why not!


Just hid a speaker behind the cabinet that can stream sounds from my iPhone and plumbed in my spare waveline pump to a home made spray bar which I can turn on and off via remote control. The end result, a party trick :)


Sam
 
Last edited:
OP
OP
samparker

samparker

Well-Known Member
View Badges
Joined
Jan 6, 2014
Messages
525
Reaction score
798
Location
Australia
Rating - 0%
0   0   0
Due to a couple of tanks closing down and some nicely priced items coming up for sale, I have started to put a few pieces in the tank. Not sure if all will stay long term, but it is nice to have some life in there. Also moved a couple of basic pieces from my poor overstocked RSM130, have added a clean up crew and a lonely Banggai cardinal. Starting to look nice, Banggai doesn't look the best, but hoping to bring him back to full health asap.


Also started to dose Mag and Alk on very small amounts as it was testing up a bit low. Please ignore my messy cabinet, there is a large update to come in that area soon :)
8oli.jpg

h3fh.jpg

e9cg.jpg

toxa.jpg

xfmq.jpg

3jdy.jpg

pd5m.jpg

jylk.jpg

2soh.jpg

e6ni.jpg

vtrf.jpg

tmhw.jpg


Cheers!
Sam
 
OP
OP
samparker

samparker

Well-Known Member
View Badges
Joined
Jan 6, 2014
Messages
525
Reaction score
798
Location
Australia
Rating - 0%
0   0   0
Even though my sump and cabinet are far from finished, I have made some progress around some parts. Finished of RODI reservoir that is fully automated. When bottom float switch his triggered, solenoid opens to RODI filter which fills till the high float (or higher emergency float) switch is triggered. This allows the unit to run for a good 90mins or more at a time. Completely set and forget :)
Just used a 31cm cube tank to hold the water, neat and easy.
image.jpg


You can also see the 7ch dosing setup which currently is dosing mag, calc, alk, coral snow, coral colour and microbacter7.
Just installed coral bones, algae and a clip on lamp with warm white CFL globe. Will extend light shade soon to limit the light spread to just that section of the sump.
ATO.jpg


Mixed up Randy's Recipe to start dosing with, note - more beer than shown was consumed:
dosing.jpg

dosing.jpg


Have also added some upgrades to the RLSS R8i skimmer to try and get the most out of it. I recently lashed out and picked up an Avast Swabbie from the good folk at @K&J Aquatics to fit up to my RLSS 8i skimmer. I initially fitted it up with the included universal skimmer lid, but did over-hear Ken saying he had a spare lid as Dave from Deer Park preferred to drill his own skimmer lid and fit it that way. That thought obviously stayed in my head as I was looking at the (now spare) RLSS skimmer lid sitting on my work bench.... Decided to drill it and fit the swabbie to that.
lid.jpg

lid.jpg


Marked centre, drilled the hole for the swabbie shaft, ensured it fit, then marked and drilled the holes to bolt the motor down. Could have bought a tap the correct thread to use the included plastic screws, but thought I'd make it look all pretty and fit up some titanium bolts instead (plus I had some sitting around the right size :) )
lid2.jpg

underlid.jpg

safety.jpg

lid2.jpg


Tested out the swabbie in its new lid, all worked perfectly. So thought I would add a float switch to turn off the skimmer if the cup gets (extremely) full.
installed.jpg


End result? A neater and smaller skimmer lid that fits better (I'm not a massive fan of plastic thumbscrew adjustments to get center), with a flash of colour and another safety device added to hopefully mitigate a future disaster :)
As a side note, ignore how I mounted the swabbie to the motor arm. The first pic is right, and have changed it back to that now ;)


In preparation for automatic water changes and hard plumbing a drain from the skimmer cup, I thought it would be a good idea to ensure the skimmer didn't run when water level was too high (as it would wet skim a lot of water down the drain and then top off with too much RODI).
So I setup a float switch which is attached to a relay that switches 240VAC from a 12vdc input.
Must say that I can't claim this though, got the plans and important parts off a fellow reefer on MASA. I still have the high level float in the skimmer cup in case the drain blokes or it fills really fast.
safety.jpg

underlid.jpg

installed.jpg


Probably not the best pic (really should have taken one with the jiffy box open!) but gives an idea :) Please ignore messy wires everywhere, update to come with power in next few weeks.
box.jpg

box.jpg


I used the bracket to add in a low sump level switch too, that will be used for auto water change system.
float.jpg

float.jpg


Sam
 
Last edited:
OP
OP
samparker

samparker

Well-Known Member
View Badges
Joined
Jan 6, 2014
Messages
525
Reaction score
798
Location
Australia
Rating - 0%
0   0   0
Couple of fish pics, sorry for iphone poor quality...

I've had a cheap auto fish feeder new-in-box in the cupboard for ages now, came free with my first tank but never had a reason to use it. Thought I'd pull it apart and see if I could work out how to make it controllable from my phone. That way, if I go straight to the LFS from work (on coral day for instance) I can drop in some pellets to keep them going till I get home. Plus, it was something to kill an hour :p
IMG_2640.jpg


This is the fish feeder, its not the usual Eheim unit, but a cheap Resun brand. I presume it is just a copy.
IMG_2640.jpg


It has a handy button on it to "manually" active the unit rather than set a programmed time. Time to pull it apart and find the contacts to that button
The unit actually clips together, not a single screw needed undoing!
IMG_2641.jpg

IMG_2641.jpg


Found the contacts to the switch (ignore the image, I used one of the wrong ones...) and soldered on some fly leads to connect up to a RF relay.
IMG_2642.jpg

IMG_2642.jpg


Connected onto a 433Mhz relay that my ninja block can control.
IMG_2643.jpg

IMG_2643.jpg


Unit re-assembled, tried to make it as neat as possible, probably could have lashed out on some heat shrink to keep the fly leads neat... lol
IMG_2646.jpg

IMG_2646.jpg

Log into my ninja block, assign the RF code a name, in this case "Fish Feeder"
IMG_2644.png

IMG_2644.png

Then setup a button to control it on the iPhone app:
IMG_2645.png


Put the unit into place and power the 433mhz relay off the 12v line that runs my evac. fans in the hood.
IMG_2647.jpg

IMG_2647.jpg


Here is a short, blurry, video of it in operation. May change the location of the feeder after I am happy it is fault free (which so far seems to be the case)


Cost: $0, had a spare 433mhz relay, already had ninja block and have had this feeder for over a year. Time taken - about an hour (most of which was writing this post!)
Feel free to ask any questions!


Sam
 
Last edited:
OP
OP
samparker

samparker

Well-Known Member
View Badges
Joined
Jan 6, 2014
Messages
525
Reaction score
798
Location
Australia
Rating - 0%
0   0   0
Video that didn't work in post above:
 
Last edited:
OP
OP
samparker

samparker

Well-Known Member
View Badges
Joined
Jan 6, 2014
Messages
525
Reaction score
798
Location
Australia
Rating - 0%
0   0   0
Added a drain line to the skimmer today. Means I now have three, RODI waste, water change and skimmer drain. Laundry cabinet is getting busy (but I won't be with the skimmer!!!)
IMG_2652.jpg

IMG_2653.jpg

Sam
 
Last edited:
OP
OP
samparker

samparker

Well-Known Member
View Badges
Joined
Jan 6, 2014
Messages
525
Reaction score
798
Location
Australia
Rating - 0%
0   0   0
Here is my new addition to the tank, alongside my other favourite piece :)
SAM_0943.jpg

Finally got a chance to use a PAR meter I borrowed to test out my lights, results are below. Did a test of what I currently run them at (High efficiency mode at 65% power - peak output at 1pm) and another run ohm high output, 100% power with all channels turned up. Ignore the background image, it is just used to locate each measurement.

65% High efficiency:
65eco_small.jpg

100% High output:
100ho_small.jpg

So I guess the next question is, what PAR levels should I be chasing???
Sam
 
Last edited:
OP
OP
samparker

samparker

Well-Known Member
View Badges
Joined
Jan 6, 2014
Messages
525
Reaction score
798
Location
Australia
Rating - 0%
0   0   0
Picked up a cheapy DSLR off ebay for $240 (Canon EOS 350D) primarily to take pictures of my tank and my family. Having never had a proper camera before, the obvious thing to do with it when you first get it is to take a heap of pics on different settings and try and teach yourself what your doing..... lol
Here are some samples that I think look pretty cool, have had a chance to follow a few youtube tutorials now and think I can get these a fair bit better still. All a bit of fun none the less!
IMG_0608.jpg

IMG_0620.jpg

IMG_0626.jpg

IMG_0653.jpg

IMG_0678.jpg

IMG_0709.jpg

IMG_0738.jpg

IMG_0742.jpg


Borrowed an awesome Avast Marine port hole for the camera this weekend, having a ball! These are a mix of my RSM130 tank and a couple from the big 6 footer:
IMG_0928.jpg

IMG_0920.jpg

IMG_0922.jpg

IMG_0925.jpg


Sam
 
Last edited:
OP
OP
samparker

samparker

Well-Known Member
View Badges
Joined
Jan 6, 2014
Messages
525
Reaction score
798
Location
Australia
Rating - 0%
0   0   0
Got a new fish this weekend and am in love!


"Davo" as he was bought from Dave at my LFS and generously bought for me by my father in law, David. Red striped pacific hog fish, amazing colour adder to the tank.
davo.jpg
 
Last edited:
OP
OP
samparker

samparker

Well-Known Member
View Badges
Joined
Jan 6, 2014
Messages
525
Reaction score
798
Location
Australia
Rating - 0%
0   0   0
OK - over the weekend I have taken thousands of shots.... But these are some of my favourite (of those that I have actually looked at anyway!)

Tried really hard to get a good pic of the clowns in the RBTA, they just didn't want to play the game and the camera was wanting to focus on the nem more than the clowns - but this looks cool:
clowns-jpg.41330

This is just a basic pink morph, wow - looks amazing!
coral1-jpg.41323

Solid toxic hammer, nothing surprising found in this pic - but still like it:
coral2-jpg.41324

This would have to be probably the best picture I think I have ever taken. Seriously looks like an alien planet we are yet to discover.....
coral3-jpg.41325

Duncan heads look pretty neat up close:
coral4-jpg.41326


This is unfortunately just out of focus (in my opinion) but otherwise is a pretty cool pic:
cynaria-jpg.41331


Reverse stem hammer has nice contrast up close:
reverse-jpg.41332

The humble old xenia is pretty incredibly up close:
xenia-jpg.41333


Hope the pics still look pretty good, had to shrink them to next to nothing to display properly on here. I have 35mb RAW versions at home that I am contemplating having printed onto metal "canvas" for display in the house.


Regards,
Sam
 
Last edited:
OP
OP
samparker

samparker

Well-Known Member
View Badges
Joined
Jan 6, 2014
Messages
525
Reaction score
798
Location
Australia
Rating - 0%
0   0   0
Put the tank on its own circuit today (well my sparky mate did). This way if a hair straightener is left on and shorts, my fish and coral don't die
smile.png

Also popped an outlet for the avast swabbie closer to the skimmer so I don't have to dig it out of the power centre. That outlet is connected to a timer so it only runs a few minutes each day.

Starting to come together
smile.png


image-jpg.38895


image-jpg.38897


image-jpg.38899


Sam
 
OP
OP
samparker

samparker

Well-Known Member
View Badges
Joined
Jan 6, 2014
Messages
525
Reaction score
798
Location
Australia
Rating - 0%
0   0   0
Got sick of my dodgy attempts at acclimating new fish into my system. Was always stuffing about with hoses, air lines, stressing about buckets overflowing or just being lazy and scooping a few hundred millilitres of tank water into the fish bag and then scooping out the poor guy.

With some more expensive fish in the pipeline, this wasn't really acceptable, so popped together a basic acclimation system!

Bought two basic containers, one about 6l and the other about 15 for (larger fish). Adapted a spare line from my return pump (via a valve) to a john guest line which runs into the lid of these containers. I popped an overflow line from each container that drains back to the sump (note, this only used for fish that came in water that is reef friendly, i.e. - other peoples tanks). I put a tap on this as well so that I can disable it if acclimating a store bought fish.

Anyway, here is a pic (this is the smaller container):
img_2669-jpg.38033


[video=youtube;QU5pjSRpqpo]https://www.youtube.com/watch?v=QU5pjSRpqpo[/video]

Sam
 

tyler1503

2500 Club Member
View Badges
Joined
Apr 1, 2013
Messages
2,579
Reaction score
544
Location
Bega, NSW, Australia
Rating - 0%
0   0   0
Wow, incredible build. It's hard to believe with a system that complex that you'd only been in the hobby for 5 moths.
Do you buy any livestock online? Or are they all LFS pieces? I love the euphyllia garden.
 
OP
OP
samparker

samparker

Well-Known Member
View Badges
Joined
Jan 6, 2014
Messages
525
Reaction score
798
Location
Australia
Rating - 0%
0   0   0
Cheers mate! 5 months when I started the build of this tank, coming up to around 12-13months all up now though.

I buy 90% of my stock from my LFS or from other hobbyists. Have bought a few pieces online with mixed results...
Sam
 

tyler1503

2500 Club Member
View Badges
Joined
Apr 1, 2013
Messages
2,579
Reaction score
544
Location
Bega, NSW, Australia
Rating - 0%
0   0   0
Cheers mate! 5 months when I started the build of this tank, coming up to around 12-13months all up now though.

I buy 90% of my stock from my LFS or from other hobbyists. Have bought a few pieces online with mixed results...
Sam

Nice! What's your stock list?
Fair enough, if you don't mind me asking what online places have you had a good experience with? I'm wanting to try online purchasing, but can't find any aussie companies I feel comfortable dealing with.
 

Being sticky and staying connected: Have you used any reef-safe glue?

  • I have used reef safe glue.

    Votes: 89 87.3%
  • I haven’t used reef safe glue, but plan to in the future.

    Votes: 6 5.9%
  • I have no interest in using reef safe glue.

    Votes: 4 3.9%
  • Other.

    Votes: 3 2.9%
Back
Top