Murdered my tank :(

afk-47

Community Member
View Badges
Joined
Apr 11, 2021
Messages
73
Reaction score
51
Location
Chiraq, IL
Rating - 0%
0   0   0
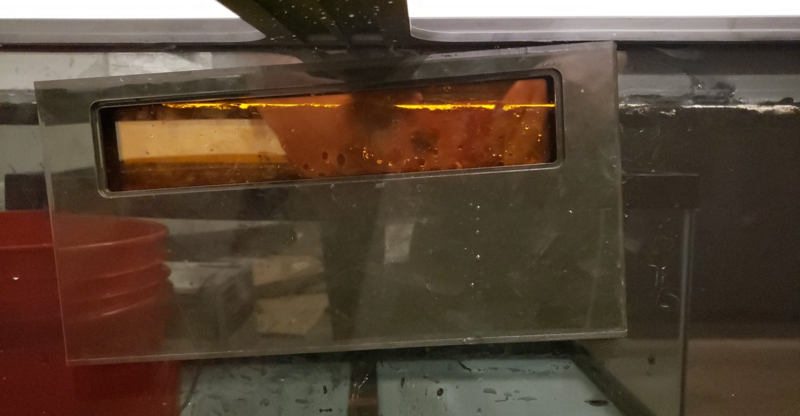
Well as the title, I roasted my new tank. I got the Eshopps Prodigy L overflow and went to go install it. The template SUCKS for rimmed tanks and needed some work to get it to work well. Well, the first hole (right side) went pretty well. The second walked off on me low and a bit to the right :( I should have hit it with more speed and way more aggressive angle to start it off. Live and learn sometimes. I could live with it but I know ill never like the tank so on FB market and craigslist to try and soften the blow on another.


OP
OP
A

afk-47

Community Member
View Badges
Joined
Apr 11, 2021
Messages
73
Reaction score
51
Location
Chiraq, IL
Rating - 0%
0   0   0
Im keeping the overflow for sure. Ill try and sell the tank to help pay for the new one
 
OP
OP
A

afk-47

Community Member
View Badges
Joined
Apr 11, 2021
Messages
73
Reaction score
51
Location
Chiraq, IL
Rating - 0%
0   0   0
Some advice for the next time you drill it is make a template out of at least 1/4” plywood it can be thicker as well and that will stop your bit from walking. And use some c clamps to hold the template on tank.
That was the issue I really had. The template holes were too small (not the end of the world), but was it hanging off the trim. I will make plywood templates next time. The template they provide is odd. Suppose to use the 1.5" mark to match the trim height but that puts the inside of the overflow not fitting under the inside trim. Great product, useless template.
 

Aggro

Active Member
View Badges
Joined
May 6, 2020
Messages
378
Reaction score
471
Location
Somewhere over the rainbow
Rating - 0%
0   0   0
That was the issue I really had. The template holes were too small (not the end of the world), but was it hanging off the trim. I will make plywood templates next time. The template they provide is odd. Suppose to use the 1.5" mark to match the trim height but that puts the inside of the overflow not fitting under the inside trim. Great product, useless template.
Ya when I drilled my old acrylic tank I used a piece of 1/2” and I actually put it an inch lower then the recommended height it makes life so much easier lol.
 
OP
OP
A

afk-47

Community Member
View Badges
Joined
Apr 11, 2021
Messages
73
Reaction score
51
Location
Chiraq, IL
Rating - 0%
0   0   0
Seems like an over reaction to trash the tank, but it ain't mine.
Yes and no. It will still function but will always bug me that is off. If I can get back half of what I got into it, ill sell it and pay the difference on a new tank. If not, ill live with it until it's time to upgrade to a bigger tank. Thankfully, it's not a big crazy expensive tank. Sometimes, lessons just need to learn I guess.
 

Red_Beard

Valuable Member
View Badges
Joined
Feb 17, 2019
Messages
1,220
Reaction score
1,490
Location
Utah
Rating - 0%
0   0   0
What if you got a burr and hogged out the bottom of the high hole and the top of the low hole. That would give you enough material for the gaskets on the bulkheads to seal and give enough slop to square it up. Youll never see the holes with the fittings in.
 

Doctorgori

2500 Club Member
View Badges
Joined
Mar 18, 2019
Messages
4,270
Reaction score
5,688
Location
Myrtle Beach
Rating - 0%
0   0   0
That was the issue I really had. The template holes were too small (not the end of the world), but was it hanging off the trim. I will make plywood templates next time. The template they provide is odd. Suppose to use the 1.5" mark to match the trim height but that puts the inside of the overflow not fitting under the inside trim. Great product, useless template.

What if you got a burr and hogged out the bottom of the high hole and the top of the low hole. That would give you enough material for the gaskets on the bulkheads to seal and give enough slop to square it up. Youll never see the holes with the fittings in.
I got that medium overflow by them. If you use thier template on a rimmed tank you end up with like 1/2-3/4” gap: top->waterline ...too low
...I also think its fixable per 2nd quote above...
 
OP
OP
A

afk-47

Community Member
View Badges
Joined
Apr 11, 2021
Messages
73
Reaction score
51
Location
Chiraq, IL
Rating - 0%
0   0   0
What if you got a burr and hogged out the bottom of the high hole and the top of the low hole. That would give you enough material for the gaskets on the bulkheads to seal and give enough slop to square it up. Youll never see the holes with the fittings in.
I like this idea. I need to move the holes 5/8" which should be doable. I guess worst comes to worst, silicone the bulkheads.
 
OP
OP
A

afk-47

Community Member
View Badges
Joined
Apr 11, 2021
Messages
73
Reaction score
51
Location
Chiraq, IL
Rating - 0%
0   0   0
What if you got a burr and hogged out the bottom of the high hole and the top of the low hole. That would give you enough material for the gaskets on the bulkheads to seal and give enough slop to square it up. Youll never see the holes with the fittings in.
1618203177433.png


think a few of these would do it? grind, test, repeat until it fits? then lay the tank on its side with just a layer of water to see if it leaks. If so, glue that bugger in?
 
Last edited:

unchaotic

Well-Known Member
View Badges
Joined
Feb 28, 2021
Messages
908
Reaction score
1,232
Location
Minot
Rating - 0%
0   0   0
Not ideal, and not what you want but could you just put return lines in those holes to make it look somewhat on purpose and put the overflow somewhere else?
 
OP
OP
A

afk-47

Community Member
View Badges
Joined
Apr 11, 2021
Messages
73
Reaction score
51
Location
Chiraq, IL
Rating - 0%
0   0   0
Not ideal, and not what you want but could you just put return lines in those holes to make it look somewhat on purpose and put the overflow somewhere else?
I thought about this too. I could be done for sure. 1.5" Bulkheads with some threaded reducers.
 

Red_Beard

Valuable Member
View Badges
Joined
Feb 17, 2019
Messages
1,220
Reaction score
1,490
Location
Utah
Rating - 0%
0   0   0
think a few of these would do it? grind, test, repeat until it fits? then lay the tank on its side with just a layer of water to see if it leaks. If so, glue that bugger in?

I would get a diamond coated steel bit, those bits wear out way faster than you'd think.
I would lay your overflow on it and measure how far out of level it is, split that measurement in half and mark up how far you'll need to go with a marker and set a bulkhead in and make sure the seals will indeed fit before any actual cutting. But, once youve done that you'll have a guide line of exactly how much material needs to go. If you have flat faced ie. no notches, drill bits you could make a plywood template as suggested above, and clamp it good so it wont move on you. Go REALLY gently spinning fast with no pressure and it would cut out exactly what you need. That would probably be easier than a burr, having thought about this more. And you already have the tools to do that. Just make sure there is no chatter in your template. No movement at the template and that the hole isnt too big for the bit so it doesnt wobble or skip.
 
OP
OP
A

afk-47

Community Member
View Badges
Joined
Apr 11, 2021
Messages
73
Reaction score
51
Location
Chiraq, IL
Rating - 0%
0   0   0
If there is room in both inner and outer boxes, you might be able to go up one size with your bulkhead fittings. This would help in correcting the tilt.
the bulkheads are installed before the inner box is created. There's no way to remove them, unfortunately.
 

Ratherbeflyen

Well-Known Member
View Badges
Joined
Mar 9, 2018
Messages
571
Reaction score
935
Location
Houston
Rating - 0%
0   0   0
Instead of trying to hog out or grind the holes, I would get a scrap piece of plywood or glass and make a template as if you were drilling a new tank. Then clamp it in place and drill the tank again. A diamond hole saw doesn't have to touch the glass evenly to cut, especially with a template to hold it in place.
 

Being sticky and staying connected: Have you used any reef-safe glue?

  • I have used reef safe glue.

    Votes: 108 87.1%
  • I haven’t used reef safe glue, but plan to in the future.

    Votes: 8 6.5%
  • I have no interest in using reef safe glue.

    Votes: 5 4.0%
  • Other.

    Votes: 3 2.4%
Back
Top